客服系统
Amazon S3 to Redshift: 3 Easy Methods
You have your complete E-Commerce store set up on Shopify. You Collect data on the orders placed, Carts abandoned, Products viewed, and so on. You now want to move all of this data on Shopify to a robust Data Warehouse such as Google BigQuery so that you can combine this information with data from many other sources and gain deep insights. Well, you have landed on the right blog. This blog will discuss 2 step-by-step methods for moving data from Shopify to BigQuery for analytics. First, it will provide a brief introduction to Shopify and

The Best Data Pipeline Tools List for 2024
Businesses today generate massive amounts of data. This data is scattered across different systems used by the business: Cloud Applications, databases, SDKs, etc. To gain valuable insight from this data, deep analysis is required. As a first step, companies would want to move this data to a single location for easy access and seamless analysis. This article introduces you to Data Pipeline Tools and the factors that drive a Data Pipeline Tools Decision. It also provides the difference between Batch vs. Real-Time Data Pipeline, Open Source vs. Proprietary Data Pipeline, and On-premise vs. Cloud-native Data Pipeline Tools.
Before we dive into the details, here is a snapshot of what this post covers:
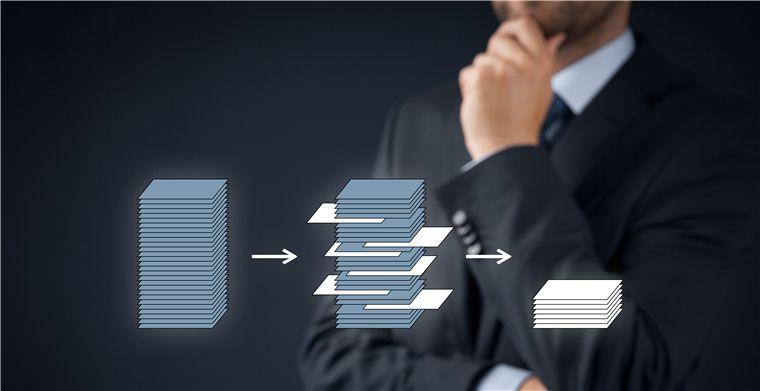
What is a Data Pipeline Tool?
Dealing with data can be tricky. To be able to get real insights from data, you would need to perform ETL:
Extract data from multiple data sources that matter to you.
Transform and enrich this data to make it analysis-ready.
Load this data to a single source of truth more often a Data Lake or Data Warehouse.
Each of these steps can be done manually. Alternatively, each of these steps can be automated using separate software tools too.
However, during the process, many things can break. The code can throw errors, data can go missing, incorrect/inconsistent data can be loaded, and so on. The bottlenecks and blockers are limitless.
Often, a Data Pipeline tool is used to automate this process end-to-end efficiently, reliably, and securely. Data Pipeline software has many advantages, including the guarantee of a consistent and effortless migration from various data sources to a destination, often a Data Lake or Data Warehouse.
1000+ data teams trust LIKE.TG ’s robust and reliable platform to replicate data from 150+ plug-and-play connectors.START A 14-DAY FREE TRIAL!
Types of Data Pipeline Tools
Depending on the purpose, different types of Data Pipeline tools are available. The popular types are as follows:
Batch vs Real-time Data Pipeline Tools
Open source vs Proprietary Data Pipeline Tools
On-premise vs Cloud-native Data Pipeline Tools
1) Batch vs. Real-time Data Pipeline Tools
Batch Data Pipeline tools allow you to move data, usually a very large volume, at a regular interval or batches. This comes at the expense of real-time operation. More often than not, these type of tools is used for on-premise data sources or in cases where real-time processing can constrain regular business operation due to limited resources. Some of the famous Batch Data Pipeline tools are as follows:
Informatica PowerCenter
IBM InfoSphere DataStage
Talend
Pentaho
The real-time ETL tools are optimized to process data in real-time. Hence, these are perfect if you are looking to have analysis ready at your fingertips day in-day out. These tools also work well if you are looking to extract data from a streaming source, e.g. the data from user interactions that happen on your website/mobile application. Some of the famous real-time data pipeline tools are as follows:
LIKE.TG Data
Confluent
Estuary Flow
StreamSets
2) Open Source vs. Proprietary Data Pipeline Tools
Open Source means the underlying technology of the tool is publicly available and therefore needs customization for every use case. This type of Data Pipeline tool is free or charges a very nominal price. This also means you would need the required expertise to develop and extend its functionality as needed. Some of the known Open Source Data Pipeline tools are:
Talend
Apache Kafka
Apache Airflow
The Proprietary Data Pipeline tools are tailored as per specific business use, therefore require no customization and expertise for maintenance on the user’s part. They mostly work out of the box. Here are some of the best Proprietary Data Pipeline tools that you should explore:
LIKE.TG Data
Blendo
Fly Data
3) On-premises vs. Cloud-native Data Pipeline Tools
Previously, businesses had all their data stored in On-premise systems. Hence, a Data Lake or Data Warehouse also had to be set up On-premise. These Data Pipeline tools clearly offer better security as they are deployed on the customer’s local infrastructure. Some of the platforms that support On-premise Data Pipelines are:
Informatica Powercenter
Talend
Oracle Data Integrator
Cloud-native Data Pipeline tools allow the transfer and processing of Cloud-based data to Data Warehouses hosted in the cloud. Here the vendor hosts the Data Pipeline allowing the customer to save resources on infrastructure. Cloud-based service providers put a heavy focus on security as well. The platforms that support Cloud Data Pipelines are as follows:
LIKE.TG Data
Blendo
Confluent
The choice of a Data Pipeline that would suit you is based on many factors unique to your business. Let us look at some criteria that might help you further narrow down your choice of Data Pipeline Tool.
Factors that Drive Data Pipeline Tool Decision
With so many Data Pipeline tools available in the market, one should consider a couple of factors while selecting the best-suited one as per the need.
Easy Data Replication: The tool you choose should allow you to intuitively build a pipeline and set up your infrastructure in minimal time.
Maintenance Overhead: The tool should have minimal overhead and work out of the box.
Data Sources Supported: It should allow you to connect to numerous and various data sources. You should also consider support for those sources you may need in the future.
Data Reliability: It should transfer and load data without error or dropped packet.
Realtime Data Availability: Depending on your use case, decide if you need data in real-time or in batches will be just fine.
Customer Support: Any issue while using the tool should be solved quickly and for that choose the one offering the most responsive and knowledgeable customer sources
Scalability: Check whether the data pipeline tool can handle your current and future data volume needs.
Security: Access if the tool you are choosing can provide encryption and other necessary regulations for data protection.
Documentation: Look out if the tool has proper documentation or community to help when any need for troubleshooting arises.
Cost: Check the costs of license and maintenance of the data pipeline tool that you are choosing, along with its features to ensure that it is cost-effective for you.
Here is a list of use cases for the different Data Pipeline Tools mentioned in this article:
LIKE.TG , No-code Data Pipeline Solution
LIKE.TG is the only real-time ELT No-code Data Pipeline platform that cost-effectively automates data pipelines from 150+ sources that are flexible to your needs.
For the rare times things do go wrong, LIKE.TG ensures zero data loss. To find the root cause of an issue, LIKE.TG also lets you monitor your workflow so that you can address the issue before it derails the entire workflow. Add 24*7 customer support to the list, and you get a reliable tool that puts you at the wheel with greater visibility. Check LIKE.TG ’s in-depth documentation to learn more.
LIKE.TG offers a simple, and transparent pricing model. LIKE.TG has 3 usage-based pricing plans starting with a free tier, where you can ingest upto 1 million records.
What makes LIKE.TG amazing:
Data Transformation: It provides a simple interface to perfect, modify, and enrich the data you want to transfer.
Schema Management: LIKE.TG can automatically detect the schema of the incoming data and maps it to the destination schema.
Incremental Data Load: LIKE.TG allows the transfer of data that has been modified in real-time. This ensures efficient utilization of bandwidth on both ends.
LIKE.TG was the most mature Extract and Load solution available, along with Fivetran and Stitch but it had better customer service and attractive pricing. Switching to a Modern Data Stack with LIKE.TG as our go-to pipeline solution has allowed us to boost team collaboration and improve data reliability, and with that, the trust of our stakeholders on the data we serve.
– Juan Ramos, Analytics Engineer, Ebury
Check out how LIKE.TG empowered Ebury to build reliable data products here.
Sign up here for a 14-Day Free Trial!
Business Challenges That Data Pipelines Mitigates:
Data Pipelines face the following business challenges and overcome them while serving your organization:
Operational Efficiency
It is difficult to orchestrate and manage complex data workflows. You can improve the operational efficiency of your workflow using data pipelines through automated workflow orchestration tools.
Real-time Decision-Making
Sometimes there is a delay in decision-making because of traditional batch processing. Data pipelines enable real-time data processing and speed up an organization’s decision-making.
Scalability
Traditional systems cannot handle large volumes of data, which can strain their performance. Data pipelines that are cloud-based provide scalable infrastructure and optimized performance.
Data Integration
The organizations usually have data scattered across various sources, which poses challenges. Data pipelines, through the ETL process, can ensure the consolidation of data in a central repository.
Conclusion
The article introduced you to Data Pipeline Tools and the factors that drive Data Pipeline Tools decisions.
It also provided the difference between Batch vs. Real-Time Data Pipeline, Open Source vs. Proprietary Data Pipeline, and On-premise vs. Cloud-native Data Pipeline Tools.
Now you can also read about LIKE.TG ’s Inflight Transformation feature and know how it improves your ELT data pipeline productivity. A Data Pipeline is the mechanism by which ETL processes occur. Now you can learn more about the best ETL tools that simplify the ETL process.
Visit our Website to Explore LIKE.TG
Want to take LIKE.TG for a spin? Sign Up for a 14-day free trial and experience the feature-rich LIKE.TG suite first hand.
Share your experience of finding the Best Data Pipeline Tools in the comments section below!

Shopify to Redshift: 2 Easy Methods
Software As A Service offerings like Shopify has revolutionized the way businesses step up their Sales channels. Shopify provides a complete set of tools to aid in setting up an e-commerce platform in a matter of a few clicks. Shopify comes bundles with all the configurations to support a variety of payment gateways and customizable online shop views. Bundles with this package are also the ability to run analysis and aggregation over the customer data collected through Shopify images. Even with all these built-in Shopify capabilities, organizations sometimes need to import the data from Shopify to their Data Warehouse since that allows them to derive meaningful insights by combining the Shopify data with their organization data. Doing this also means they get to use the full power of a Data Warehouse rather than being limited to the built-in functionalities of Shopify Analytics. This post is about the methods in which data can be loaded from Shopify to Redshift, one of the most popular cloud-based data warehouse.
Solve your data replication problems with LIKE.TG ’s reliable, no-code, automated pipelines with 150+ connectors.Get your free trial right away!
Shopify to Redshift: Approaches to Move Data
This blog covers two methods for migrating data from Shopify to Redshift:
Method 1: Using Shopify APIs to connect Shopify to Redshift
Making use of Shopify APIs to connect with Redshift is one such way. Shopify provides multiple APIs such as Billing, Customer, Inventory, etc., and can be accessed through its RESTful endpoints. This method makes use of custom code to connect with Shopify APIs and uses it to connect Shopify to Redshift.
Method 2: Using LIKE.TG Data, a No-code Data Pipeline to Connect Shopify to Redshift
Get started with LIKE.TG for free
A fully managed,No-code Data Pipeline platformlikeLIKE.TG Data, helps you load data from Shopify (among 40+ Free Sources) to Redshift in real-time, in an effortless manner. LIKE.TG with its minimal learning curve can be set up in a matter of minutes making the users ready to load data without compromising performance. Its strong integration with various sources such as Databases, Files, Analytics Engine, etc gives users the flexibility to bring in data of all different kinds in a way that’s as smooth as possible, without having to write a single line of code. It helps transfer data fromShopifyto a destination of your choice forfree.
Get started with LIKE.TG !
Sign up here for a 14-day free trial!
Methods to connect Shopify to Redshift
There are multiple methods that can be used to connect Shopify to Redshift and load data easily:
Method 1: Using Shopify APIs to connect Shopify to RedshiftMethod 2: Using LIKE.TG Data, a No-code Data Pipeline to Connect Shopify to Redshift
Method 1: Using Shopify APIs to connect Shopify to Redshift
Since Redshift supports loading data to tables using CSV, the most straightforward way to accomplish this move is to use the CSV export feature of Shopify Admin. But this is not always practical since this is a manual process and is not suitable for the kind of frequent sync that typical organizations need. We will focus on the basics of accomplishing this in a programmatic way which is much better suited for typical requirements.
Shopify provides a number of APIs to access the Product, Customer, and Sales data. For this exercise, we will use the Shopify Private App feature. A Private App is an app built to access only the data of a specific Shopify Store. To create a Private App script, we first need to create a username and password in the Shopify Admin. Once you have generated the credentials, you can proceed to access the APIs. We will use the product API for reference in this post.
Use the below snippet of code to retrieve the details of all the products in the specified Shopify store.
curl --user shopify_app_user:shopify_app_password GET /admin/api/2019-10/products.json?limit=100
The important parameter here is the Limit parameter. This field is there because the API is paginated and it defaults to 50 results in case the Limit parameter is not provided. The maximum pagination limit is 250 results per second.
To access the full data, Developers need to buffer the id of the last item in the previous request and use that to form the next curl request. The next curl request would look like as below.
curl --user shopify_app_user:shopify_app_password GET /admin/api/2019-10/products.json? limit=100since_id=632910392 -o products.json
You will need a loop to execute this. From the above steps, you will have a set of JSON files that should be imported to Redshift to complete our objective. Fortunately, Redshift provides a COPY command which works well with JSON data. Let’s create a Redshift table before we export the data.
create table products( product_id varchar(25) NOT NULL, type varchar(25) NOT NULL, vendor varchar(25) NOT NULL, handle varchar(25) NOT NULL, published_scope varchar(25) NOT NULL )
Once the table is created, we can use the COPY command to load the data. Before copying ensure that the JSON files are loaded into an S3 bucket since we will be using S3 as the source for COPY command. Assuming data is already in S3, let’s proceed to the actual COPY command. The challenge here is that the Shopify API result JSON is a very complex nested JSON that has a large number of details. To map the appropriate keys to Redshift values, we will need a json_path file that Redshift uses to map fields in JSON to the Redshift table. The command will look as below.
copy products from ‘s3://products_bucket/products.json’ iam_role ‘arn:aws:iam:0123456789012:role/MyRedshiftRole' json ‘s3://products_bucket/products_json_path.json’ The json_path file for the above command will be as below. { "jsonpaths": [ "$['id']", "$['product_type']", "$[‘vendor’]", "$[‘handle’]", "$[‘published_scope’]" ] }
This is how you can connect Shopify to Redshift. Please note that this was a simple example and oversimplifies many of the actual pitfalls in the COPY process from Shopify to Redshift.
Limitations of migrating data using Shopify APIs
The Developer needs to implement a logic to accommodate the pagination that is part of the API results.Shopify APIs are rate limited. The requests are throttled based on a Leaky Bucket algorithm with a bucket size of 40 and 2 requests per second leak in case of admin APIs. So your custom script will need a logic to handle this limit in case your data volume is high.In case you need to Clean, Transform, Filter data before loading it to the Warehouse, you will need to build additional code to achieve this.The above approach works for a one-off load but if frequent sync which also handles duplicates is needed, additional logic needs to be developed using a Redshift Staging Table.In case you want to copy details that are inside the nested JSON structure or arrays in Shopify format, the json_path file development will take some development time.
Method 2: Using LIKE.TG Data, a No-code Data Pipeline to Connect Shopify to Redshift
LIKE.TG Data,a No-code Data Pipeline can help you move data from 100+ Data Sources including Shopify (among 40+ Free sources) swiftly to Redshift. LIKE.TG is fully managed and completely automates the process of not only loading data from your desired source but also enriching the data and transforming it into an analysis-ready form without having to write a single line of code. Its fault-tolerant architecture ensures that the data is handled in a secure, consistent manner with zero data loss. It helps transfer data fromShopifyto a destination of your choice forfree.
Steps to use LIKE.TG Data:
LIKE.TG Data focuses on two simple steps to get you started:
Configure Source:Connect LIKE.TG Data with Shopify by simply providing the API key and Pipeline name.
IntegrateData:Load data from Shopify to Redshift by simply providing your Redshift database credentials. Enter a name for your database, the host and port number for your Redshift database and connect in a matter of minutes.
Advantages of using LIKE.TG Data Platform:
Real-Time Data Export:LIKE.TG with its strong integration with 100+ sources, allows you to transfer data quickly efficiently. This ensures efficient utilization of bandwidth on both ends.Live Support:The LIKE.TG team is available round the clock to extend exceptional support to its customers through chat, email, and support calls.Schema Management:LIKE.TG takes away the tedious task of schema management automatically detects schema of incoming data and maps it to the destination schema.Minimal Learning:LIKE.TG with its simple and interactive UI, is extremely simple for new customers to work on and perform operations.Secure: LIKE.TG has a fault-tolerant architecture that ensures that the data is handled in a secure, consistent manner with zero data loss.Live Monitoring: LIKE.TG allows you to monitor the data flow so you can check where your data is at a particular point in time.
About Shopify
Shopify is a powerful e-commerce platform designed to allow people or businesses to sell their offerings/products online. Shopify helps you set up an online store and also offers a Point Of Sale (POS) to sell the products in person. Shopify provides you with Payment Gateways, Customer Engagement techniques, Marketing, and even Shipping facilities to help you get started.
Various product or services that you can sell on the Shopify:
Physical Products:Shopify allows you to perform the door-step delivery of the products you’ve manufactured that can be door-shipped to the customer. These include anything like Printed Mugs/T-Shirt, Jewellery, Gifts, etc.Digital Products:Digital Products can include E-Books, Audios, Course Material, etc.Services and Consultation:If you’re providing services like Life Consultation, Home-Cooked delicacies, Event Planning, or anything else, Shopify has got you covered.Memberships:Various memberships such as Gym memberships, Yoga-classes membership, Event Membership, etc. can be sold to the customers.Experiences:Event-based experiences like Adventurous Sports and Travel, Mountain Trekking, Wine Tasting, events, and hands-on workshops. You can use Shopify to sell tickets for these experiences as well.Rentals:If you’re running rental services like Apartment rentals, rental Taxis, or Gadgets, you can use Shopify to create Ads and engage with the customer.Classes:Online studies, Fitness classes can be advertised here.
Shopify allows you to analyze Trends and Customer Interaction on their platform. However, for advanced Analytics, you may need to store the data into some Database or Data Warehouse to perform in-depth Analytics and then move towards a Visualization tool to create appealing reports that can demonstrate these Trends and Market positioning.
For further information on Shopify, you can check theofficial site here.
About Redshift
Redshiftis a columnar Data Warehouse managed by Amazon Web Services (AWS). It is designed to run complex Analytical problems in a cost-efficient manner. It can store petabyte-scale data and enable fast analysis. Redshift’s completely managed warehouse setup, combined with its powerful MPP (Massively Parallel Processing) have made it one of the most famous Cloud Data Warehouse options among modern businesses.You can read more about the features of Redshift here.
Conclusion
In this blog, you were introduced to the key features of Shopify and Amazon Redshift. You learned about two methods to connect Shopify to Redshift. The first method is connecting using Shopify API. However, you explored some of the limitations of this manual method. Hence, an easier alternative, LIKE.TG Data was introduced to you to overcome the challenges faced by previous methods. You can seamlessly connect Shopify to Redshift with LIKE.TG for free.
visit our website to explore LIKE.TG
Want to try LIKE.TG ?
sign up for a 14-day free trialand experience the feature-rich LIKE.TG suite first hand. Have a look at our unbeatablepricing, which will help you choose the right plan for you.
What are your thoughts on moving data from Shopify to Redshift? Let us know in the comments.

Data Automation: Conceptualizing Industry-driven Use Cases
As the data automation industry goes under a series of transformations, thanks to new strategic autonomous tools at our disposal, we now see a shift in how enterprises operate, cultivate, and sell value-driven services. At the same time, product-led growth paves the way for a productivity-driven startup ecosystem for better outcomes for every stakeholder.So, as one would explain, data automation is an autonomous process to collect, transfigure, or store data. Data automation technologies are in the use to execute time-consuming tasks that are recurring and replaceable to increase efficiency and minimize cost.
Innovative use of data automation can enable enterprises to provide a superior user experience, inspired by custom and innovative use to cater to pressure points in the customer lifecycle. To cut a long story short, data automation can brush up user experience and drive better outcomes.
In this article, we will talk about how data automation and its productivity-led use cases are transforming industries worldwide. We will discuss how data automation improves user experience and at the same time drive better business outcomes.
Why Data Automation?
Data automation has been transforming the way work gets done. Automation has helped companies empower teams by increasing productivity and nudging data transfer passivity. By automating bureaucratic activities from enterprises across vertices, we increase productivity, revenue, and customer satisfaction — quicker than before. Today, data automation has gained enough momentum that you just simply can’t execute without it.
As one would expect, data automation has come with its own unique sets of challenges. But it’s the skill lag and race to save cost that contradicts and creates major discussion in the data industry today. Some market insights are as follows:
A 2017 McKinsey report says, “half of today’s work activities could be automated by the end of 2055” — Cost reduction is prioritized.
A 2017 Unit4 study revealed, “office workers spent 69 days in a year on administrative tasks, costing companies $5 trillion a year” — a justification to automate.
And another research done by McKinsey estimated its outcome by surveying 1500 executives across industries and regions, out of which 66% of respondents believed that “addressing potential skills gaps related to automation/digitization was a top-ten priority” — data literacy is crucial in a data-driven environment.
What is Data Warehouse Automation?
A data warehouse is a single source of data truth, it works as a centralized repository for data generated from multiple sources. Each set of data has its unique use cases. The stored data helps companies generate business insights that are data predictive to help mitigate early signs of market nudges.
Using Data Warehouse Automation (DWA) we automate data flow, from third-party sources to the data warehouses such as Redshift, Snowflake, and BigQuery. But shifting trends tell us another story — a shift in reverse. We have seen an increased demand for data-enriching applications like LIKE.TG Activate — to transfer the data from data warehouses to CRMs like Salesforce and HubSpot.
Nevertheless, an agile data warehouse automation solution with a unique design, quick deployment settings, and no-code stock experience will lead its way. Let’s list out some of the benefits:
Data Warehouse Automation solutions provide real-time, source to destination, ingestion, and update services.
Automated and continuous refinements facilitate better business outcomes by simplifying data warehouse projects.
Automated ETL processes eliminate any reoccurring steps through auto-mapping and job scheduling.
Easy-to-use user interfaces and no-code platforms are enhancing user experience.
Empower Success Teams With Customer-data Analytics Using LIKE.TG Activate
LIKE.TG Activate helps you unify directly transfer data from data warehouses and other SaaS Product Analytics platforms like Amplitude, to CRMs such as Salesforce HubSpot, in a hassle-free automated manner.
LIKE.TG Activate manages automates the process of not only loading data from your desired source but also enrich transform data into an analysis-ready format — without having to write a single line of code. LIKE.TG Activate takes care of pre-processing data needs and allows you to focus on key business activities, to draw compelling insights into your product’s performance, customer journey, high-quality leads, and customer retention through a personalized experience.
Check out what makes LIKE.TG Activate amazing.
Real-Time Data Transfer: LIKE.TG Activate, with its strong integration with 100+ sources, allows you to transfer data quickly efficiently. This ensures efficient utilization of bandwidth on both ends.Secure: LIKE.TG Activate has a fault-tolerant architecture that ensures data is handled safely and cautiously with zero data loss.Data Transformation: It provides a simple interface to perfect, modify, and enrich the data you want to transfer.Tremendous Connector Availability: LIKE.TG Activate houses a diverse set of connectors that authorize you to bring data in from multiple data sources such as Google Analytics, Amplitude, Jira, and Oracle. And even data-warehouses such as Redshift and Snowflake are in an integrated and analysis-ready format.
Live Support:The LIKE.TG Activate team is available round the clock to extend exceptional support to its customers through chat, email, and support calls.
Get Customer-Centric with LIKE.TG Activate today!Sign up herefor exclusive early access into Activate!
Customer Centricity Benefiting From Data Automation
Today’s enterprises prefer tools that help customer-facing staff achieve greater success. Assisting customers on every twist and turn with unique use cases and touchpoints is now the name of the game. In return, the user touchpoint data is analyzed, to better engage customer-facing staff.
Data automation makes customer data actionable. As data is available for the teams to explore, now companies can offer users competent customer service, inspired by unique personalized experiences.
A train of thought: Focusing on everyday data requests from sales, customer success, and support teams, we can ensure success and start building a sophisticated CRM-centric data automation technology. Enriching the CRM software with simple data requests from teams mentioned above, can, in fact, make all the difference.
Customer and Data Analytics Enabling Competitive Advantage
Here, data automation has a special role to play. The art and science of data analytics are entangled with high-quality data collection and transformation abilities. Moving lightyears ahead from survey-based predictive analytics procedures, we now have entered a transition period, towards data-driven predictive insights and analytics.
Thanks to better analytics, we can better predict user behavior, build cross-functional teams, minimize user churn rate, and focus first on the use cases that drive quick value.
Four Use Cases Disrupting Legacy Operations Today
1. X-Analytics
We can’t limit today’s autonomous tools to their primitive use cases as modern organizations generate data that is both unstructured and structured. Setting the COVID-19 pandemic an example of X-Analytics’s early use case: X-Analytics helped medical and public health experts by analyzing terabytes of data in the form of videos, research papers, social media posts, and clinical trials data.
2. Decision Intelligence
Decision intelligence helps companies gain quick, actionable insights using customer/product data. Decision intelligence can amplify user experience and improve operations within the companies.
3. Blockchain in Data Analytics
Smart contracts, with the normalization of blockchain technology, have evolved. Smart contracts increase transparency, data quality, and productivity. For instance, a process in a smart contract is initiated only when certain predetermined conditions are met. The process is designed to remove any bottlenecks that might come in between while officializing an agreement.
4. Augmented Data Management:
As the global service industry inclines towards outsourcing the data storage and management needs, getting insights will become more complicated and time-consuming. Using AI and ML to automate lackluster tasks can reduce manual data management tasks by 45%.
Data Automation is Changing the Way Work Gets Done
Changing user behavior and customer buying trends are altering market realities today. At the same time, the democratization of data within organizations has enabled customer-facing staff to generate better results. Now, teams are encouraged, by design, to take advantage of data, to make compelling, data-driven decisions.
Today, high-quality data is an integral part of a robust sales and marketing flywheel. Hence, keeping an eye on the future, treating relationships like partnerships and not just one-time transactional tedium, generates better results.
Conclusion
Alas, the time has come to say goodbye to our indulgence in recurring data transfer customs, as we embrace change happening in front of our eyes. Today, data automation has cocooned out of its early use cases and has aww-wittingly blossomed to benefit roles that are, in practice, the first touchpoint in any customers’ life cycle. And what about a startup’s journey to fully calibrate the product’s offering — how can we forget!?
Today’s data industry has fallen sick of unstructured data silos, and wants an unhindered flow of analytics-ready data to facilitate business decisions– small or big, doesn’t matter. Now, with LIKE.TG Activate, directly transfer data from data warehouses such as Snowflake or any other SaaS application to CRMs like HubSpot, Salesforce, and others, in a fully secure and automated manner.
LIKE.TG Activate has taken advantage of its robust analytics engine that powers a seamless flow of analysis-ready customer and product data. But, integrating this complex data from a diverse set of customers product analytics platforms is challenging; hence LIKE.TG Activate comes into the picture. LIKE.TG Activate has strong integration with other data sources that allows you to extract data make it analysis-ready. Now, become customer-centric and data-driven like never before!
Give LIKE.TG Activate a try bysigning up for a 14-day free trial today.
Connecting DynamoDB to Redshift – 2 Easy Methods
DynamoDB is Amazon’s document-oriented, high-performance, NoSQL Database. Given it is a NoSQL Database, it is hard to run SQL queries to analyze the data. It is essential to move data from DynamoDB to Redshift, convert it into a relational format for seamless analysis.This article will give you a comprehensive guide to set up DynamoDB to Redshift Integration. It will also provide you with a brief introduction to DynamoDB and Redshift. You will also explore 2 methods to Integrate DynamoDB and Redshift in the further sections. Let’s get started.
Prerequisites
You will have a much easier time understanding the ways for setting up DynamoDB to Redshift Integration if you have gone through the following aspects:
An active AWS (Amazon Web Service) account.Working knowledge of Database and Data Warehouse.A clear idea regarding the type of data is to be transferred.Working knowledge of Amazon DynamoDB and Amazon Redshift would be an added advantage.
Solve your data replication problems with LIKE.TG ’s reliable, no-code, automated pipelines with 150+ connectors.Get your free trial right away!
Introduction to Amazon DynamoDB
Fully managed by Amazon, DynamoDB is a NoSQL database service that provides high-speed and highly scalable performance. DynamoDB can handle around 20 million requests per second. Its serverless architecture and on-demand scalability make it a solution that is widely preferred.
To know more about Amazon DynamoDB, visit this link.
Introduction to Amazon Redshift
A widely used Data Warehouse, Amazon Redshift is an enterprise-class RDBMS. Amazon Redshift provides a high-performance MPP, columnar storage set up, highly efficient targeted data compression encoding schemes, making it a natural choice for Data Warehousing and analytical needs.
Amazon Redshift has excellent business intelligence abilities and a robust SQL-based interface. Amazon Redshift allows you to perform complex data analysis queries, complex joins with other tables in your AWS Redshift cluster and queries can be used in any reporting application to create dashboards or reports.
To know more about Amazon Redshift, visit this link.
Methods to Set up DynamoDb to Redshift Integration
This article delves into both the manual and using LIKE.TG methods in depth. You will also see some of the pros and cons of these approaches and would be able to pick the best method based on your use case.Below are the two methods:
Method 1: Using Copy Utility to Manually Set up DynamoDB to Redshift IntegrationMethod 2: Using LIKE.TG Data to Set up DynamoDB to Redshift Integration
Method 1: Using Copy Utility to Manually Set up DynamoDB to Redshift Integration
As a prerequisite, you must have a table created in Amazon Redshift before loading data from the DynamoDB table to Redshift. As we are copying data from NoSQL DB to RDBMS, we need to apply some changes/transformations before loading it to the target database. For example, some of the DynamoDB data types do not correspond directly to those of Amazon Redshift. While loading, one should ensure that each column in the Redshift table is mapped to the correct data type and size. Below is the step-by-step procedure to set up DynamoDB to Redshift Integration.
Step 1: Before you migrate data from DynamoDB to Redshift create a table in Redshift using the following command as shown by the image below.
Step 2: Create a table in DynamoDB by logging into the AWS console as shown below.
Step 3: Add data into DynamoDB Table by clicking on Create Item.
Step 4: Use the COPY command to copy data from DynamoDB to Redshift in the Employee table as shown below.
copy emp.emp from 'dynamodb://Employee' iam_role 'IAM_Role' readratio 10;
Step 5: Verify that data got copied successfully.
Limitations of using Copy Utility to Manually Set up DynamoDB to Redshift Integration
There are a handful of limitations while performing ETL from DynamoDB to Redshift using the Copy utility. Read the following:
DynamoDB table names can contain up to 255 characters, including ‘.’ (dot) and ‘-‘ (dash) characters, and are case-sensitive. However, Amazon Redshift table names are limited to 127 characters, cannot include dots or dashes, and are not case-sensitive. Also, we cannot use Amazon Redshift reserved words. Unlike SQL Databases, DynamoDB does not support NULL. Interpretation of empty or blank attribute values in DynamoDB should be specified to Redshift. In Redshift, these can be treated as either NULLs or empty fields.Following data parameters are not supported alongwith COPY from DynamoDB:FILLRECORDESCAPEIGNOREBLANKLINESIGNOREHEADERNULLREMOVEQUOTESACCEPTINVCHARSMANIFESTENCRYPT
However, apart from the above-mentioned limitations, the COPY command leverages Redshift’s massively parallel processing(MPP) architecture to read and stream data in parallel from an Amazon DynamoDB table. By leveraging Redshiftdistribution keys, you can make the best out of Redshift’s parallel processing architecture.
Method 2: Using LIKE.TG Data to Set up DynamoDB to Redshift Integration
LIKE.TG Data, a No-code Data Pipeline, helps you directly transfer data from Amazon DynamoDB and100+ other data sourcesto Data Warehouses such as Amazon Redshift, Databases, BI tools, or a destination of your choice in a completely hassle-free automated manner. LIKE.TG is fully managed and completely automates the process of not only loading data from your desired source but also enriching the data and transforming it into an analysis-ready form without having to write a single line of code. Its fault-tolerant architecture ensures that the data is handled in a secure, consistent manner with zero data loss.
LIKE.TG Data takes care of all your data preprocessing needs and lets you focus on key business activities and draw a much powerful insight on how to generate more leads, retain customers, and take your business to new heights of profitability. It provides a consistent reliable solution to manage data in real-time and always have analysis-ready data in your desired destination.
Loading data into Amazon Redshift using LIKE.TG is easier, reliable, and fast. LIKE.TG is a no-code automated data pipeline platform that solves all the challenges described above. You move data from DynamoDB to Redshift in the following two steps without writing any piece of code.
Authenticate Data Source: Authenticate and connect your Amazon DynamoDB account as a Data Source.
To get more details about Authenticating Amazon DynamoDB with LIKE.TG Data visit here.
Configure your Destination: Configure your Amazon Redshift account as the destination.
To get more details about Configuring Redshift with LIKE.TG Data visit thislink.
You now have a real-time pipeline for syncing data from DynamoDB to Redshift.
Sign up here for a 14-Day Free Trial!
Here are more reasons to try LIKE.TG :
Secure: LIKE.TG has a fault-tolerant architecture that ensures that the data is handled in a secure, consistent manner with zero data loss.Schema Management: LIKE.TG takes away the tedious task of schema management automatically detects the schema of incoming data and maps it to the destination schema.Minimal Learning: LIKE.TG , with its simple and interactive UI, is extremely simple for new customers to work on and perform operations.LIKE.TG Is Built To Scale: As the number of sources and the volume of your data grows, LIKE.TG scales horizontally, handling millions of records per minute with very little latency.Incremental Data Load: LIKE.TG allows the transfer of data that has been modified in real-time. This ensures efficient utilization of bandwidth on both ends.Live Support: The LIKE.TG team is available round the clock to extend exceptional support to its customers through chat, email, and support calls.Live Monitoring: LIKE.TG allows you to monitor the data flow and check where your data is at a particular point in time.
Methods to Set up DynamoDB to Redshift Integration
Method 1: Using Copy Utility to Manually Set up DynamoDB to Redshift Integration
This method involves the use of COPY utility to set up DynamoDB to Redshift Integration. This process of writing custom code to perform DynamoDB to Redshift replication is tedious and needs a whole bunch of precious engineering resources invested in this. As your data grows, the complexities will grow too, making it necessary to invest resources on an ongoing basis for monitoring and maintenance.
Method 2: Using LIKE.TG Data to Set up DynamoDB to Redshift Integration
LIKE.TG Data is an automated Data Pipeline platform that can move your data from Optimizely to MySQL very quickly without writing a single line of code. It is simple, hassle-free, and reliable.
Moreover, LIKE.TG offers a fully-managed solution to set up data integration from100+ data sources(including 30+ free data sources)and will let you directly load data to a Data Warehouse such as Snowflake, Amazon Redshift, Google BigQuery, etc. or the destination of your choice. It will automate your data flow in minutes without writing any line of code. Its Fault-Tolerant architecture makes sure that your data is secure and consistent. LIKE.TG provides you with a truly efficient and fully automated solution to manage data in real-time and always have analysis-ready data.
Get Started with LIKE.TG for Free
Conclusion
The process of writing custom code to perform DynamoDB to Redshift replication is tedious and needs a whole bunch of precious engineering resources invested in this. As your data grows, the complexities will grow too, making it necessary to invest resources on an ongoing basis for monitoring and maintenance. LIKE.TG handles all the aforementioned limitations automatically, thereby drastically reducing the effort that you and your team will have to put in.
Visit our Website to Explore LIKE.TG
Businesses can use automated platforms like LIKE.TG Data to set this integration and handle the ETL process. It helps you directly transfer data from a source of your choice to a Data Warehouse, Business Intelligence tools, or any other desired destination in a fully automated and secure manner without having to write any code and will provide you a hassle-free experience.
Want to take LIKE.TG for a spin? Sign Up for a 14-day free trial and experience the feature-rich LIKE.TG suite first hand. You can also have a look at the unbeatable pricing that will help you choose the right plan for your business needs.
Share your experience of setting up DynamoDB to Redshift Integration in the comments section below!

Google Ads to Redshift Simplified: 2 Easy Methods
Your business uses Google Ads heavily to acquire more customers and build your brand. Given the importance of this data, moving data from Google Ads to a robust Data Warehouse Redshift for advanced analytics is a step in the right direction. Google Ads is an Advertising Platform from Google that provides you the tools for launching Ad Campaigns, Product Listing, or Videos to your users. On the other hand, Amazon Redshift is a Cloud-based Data Warehousing solution from Amazon Web Services (AWS).This blog will introduce you to Google Ads and Amazon Redshift. It will also discuss 2 approaches so that you can weigh your options and choose wisely while loading data from Google Ads to Redshift. The 1st method is completely manual and demands technical proficiency while the 2nd method uses LIKE.TG Data.
Introduction to Google Ads
Google Ads is an Online Advertising Platform that allows businesses to showcase highly personalized ads in various formats such as Text Ads, Video Ads, Image Ads. Advertising copy is placed on pages where Google Ads things are relevant. Businesses can choose to pay Google basis a flexible model (Pay Per Click or Pay for the advertisement shown).
Given the reach that Google has, this has become one of the most favorite advertising channels for modern Marketers.
For more information on Google Ads, click here.
Introduction to Amazon Redshift
AWS Redshift is a Data Warehouse managed by Amazon Web Services (AWS). It is built using MPP (massively parallel processing) architecture and has the capacity to store large sets of data and perform advanced analytics. Designed to run complex analytical workloads in a cost-efficient fashion, Amazon Redshift has emerged to be a popular Cloud Data Warehouse choice for modern data teams.
For more information on Amazon Redshift, click here.
Methods to Load Data from Google Ads to Redshift
Method 1: Load Data from Google Ads to Redshift by Building ETL ScriptsThis method would need a huge investment on the engineering side. A group of engineers would need to understand both Google Ads and Redshift ecosystems and hand code a custom solution to move data.Method 2: Load Data from Google Ads to Redshift using LIKE.TG DataLIKE.TG comes pre-built with integration for both Google Ads and Redshift. With a few simple clicks, a sturdy Data Replication setup can be created from Google Ads to Redshift for free. Since LIKE.TG is a managed platform, you would not need to invest in engineering resources. LIKE.TG will handle the groundwork while your analysts can work with Redshift to uncover insights.
Get Started with LIKE.TG for free
Methods to Load Data from Google Ads to Redshift
Majorly there are 2 methods through which you can load your data from Google Ads to Redshift:
Method 1: Load Data from Google Ads to Redshift by Building ETL ScriptsMethod 2: Load Data from Google Ads to Redshift using LIKE.TG Data
This section will discuss the above 2 approaches in detail. In the end, you will have a deep understanding of both and you will be able to make the right decision by weighing the pros and cons of each. Now, let’s walk through these methods one by one.
Method 1: Load Data from Google Ads to Redshift by Building ETL Scripts
This method includes Manual Integration between Google Ads and Redshift. It demands technical knowledge and experience in working with Google Ads and Redshift. Following are the steps to integrate and load data from Google Ads to Redshift:
Step 1: Extracting Data from Google AdsStep 2: Loading Google Ads Data to Redshift
Step 1: Extracting Data from Google Ads
Applications interact with the Google Ads platform using Google Ads API. The Google Ads API is implemented using SOAP (Simple Object Access Protocol) and doesn’t support RESTful implementation.
A number of different libraries are offered that could be used with many programming languages. The following languages and frameworks are officially supported.
PythonPHPJAVA.NETRubyPERL
Google Ads API is quite complex and exposes many functionalities to the user. One can pull out a number of reports using Google Ads API. The granularity of the results you would need can also be specified by passing specific parameters. You can decide the data you want to get in 2 ways.
By using an AWQL-based report definitionBy using XML-based report definition
Most Google Ads APIs are queried using AWQL which is similar to SQL. The following output formats are supported.
CSV – Comma separated values formatCSV FOR EXCEL – MS excel compatible formatTSV – Tab separated valueXML – Extensible markup language formatGZIPPED-CSV – Compressed csvGZIPPED-XML – Compressed xml
You can read more about Data Extraction from Google Ads here.
Once you have the necessary data extracted from Google Ads, the next step would be to load it into Redshift.
Step 2: Loading Google Ads Data to Redshift
As a prerequisite, you will need to create a Redshift table and map the schema from the extracted Google Ads data. When mapping the schema, you should be careful to map each attribute to the right data types supported by Redshift. Redshift supports the following data types:
INTSMALLINTBIGINTDECIMALVARCHARCHARDATETIMESTAMPREALDOUBLE PRECISIONBOOLEAN
Design a schema and map the data from the source. Follow the best practicespublished by Amazon when designing the Redshift database.
While Redshift allows us to directly insert data into its tables, this is not the most recommended approach. Avoid using the INSERT command as it loads the data row by row. This slows the process because Redshift is not optimized to load data in this way. Instead, load the data to Amazon S3 and use the copy command to load it to Redshift. This is very useful, especially when handling large volumes of data.
Limitations of Loading Data from Google Ads to Redshift Using Custom Code
Accessing Google Ads Data in Real-time: After successfully creating a program that loads data from Google ads to the Redshift warehouse, you will be required to deal with the challenge of loading new and updated data. You may decide to replicate the data in real-time each time a new row or updated data is created. This process is slower and resource-intensive. Therefore, you will be required to write additional code and build cron jobs to run this in a continuous loop.Infrastructure Maintenance: Google ads may update their APIs or something may break at Redshift’s end unexpectedly. In order to save your business from irretrievable data loss, you will be required to constantly maintain the code and monitor the health of the infrastructure. Ability to Transform: The above approach only allows you to move data from Google Ads to Redshift as is. In case you are looking to clean/transform the data before loading to the warehouse – say you want to convert currencies or standardize time zones in which ads were run, this would not be possible using the previous approach.
Method 2: Load Data from Google Ads to Redshift using LIKE.TG Data
LIKE.TG Data, a No-code Data Pipeline helps to Load Data from any data source such as Databases, SaaS applications, Cloud Storage, SDKs, and Streaming Services and simplifies the ETL process. It supports 100+ data sources(including 40+ free sources) including Google Ads, etc., for free and is a 3-step process by just selecting the data source, providing valid credentials, and choosing the destination. LIKE.TG loads the data onto the desired Data Warehouse, enriches the data, and transforms it into an analysis-ready form without writing a single line of code.
Its completely automated pipeline offers data to be delivered in real-time without any loss from source to destination. Its fault-tolerant and scalable architecture ensure that the data is handled in a secure, consistent manner with zero data loss and supports different forms of data. The solutions provided are consistent and work with different Business Intelligence (BI) tools as well.
LIKE.TG can move data from Google Ads to Redshift seamlessly in 2 simple steps:
Step 1: Configuring the Source
Navigate to the Asset Palette and click on Pipelines.Now, click on the +CREATE button and select Google Ads as the source for data migration.In theConfigure your Google Adspage, click+ ADD GOOGLE ADS ACCOUNT which will redirect you to the Google Ads login page.Login to your Google Ads account and click on Allow to authorize LIKE.TG to access your Google Ads data.
In theConfigure your Google Ads Sourcepage, fill all the required fields
Step 2: Configuring the Destination
Once you have configured the source, it’s time to manage the destination. navigate to the Asset Palette and click on Destination.Click on the +CREATE button and select Amazon Redshift as the destination.In theConfigure your Amazon Redshift Destinationpage, specify all the necessary details.
LIKE.TG will now take care of all the heavy-weight lifting to move data from Google Ads to Redshift.
Get Started with LIKE.TG for free
Advantages of Using LIKE.TG
Listed below are the advantages of using LIKE.TG Data over any other Data Pipeline platform:
Secure: LIKE.TG has a fault-tolerant architecture that ensures that the data is handled in a secure, consistent manner with zero data loss.Schema Management: LIKE.TG takes away the tedious task of schema management automatically detects the schema of incoming data and maps it to the destination schema.Minimal Learning: LIKE.TG , with its simple and interactive UI, is extremely simple for new customers to work on and perform operations.LIKE.TG Is Built To Scale: As the number of sources and the volume of your data grows, LIKE.TG scales horizontally, handling millions of records per minute with very little latency.Incremental Data Load: LIKE.TG allows the transfer of data that has been modified in real-time. This ensures efficient utilization of bandwidth on both ends.Live Support: The LIKE.TG team is available round the clock to extend exceptional support to its customers through chat, email, and support calls.Live Monitoring: LIKE.TG allows you to monitor the data flow and check where your data is at a particular point in time.
Conclusion
The article introduced you to Google Ads and Amazon Redshift. It provided 2 methods that you can use for loading data from Google Ads to Redshift. The 1st method includes Manual Integration while the 2nd method uses LIKE.TG Data.
With the complexity involves in Manual Integration, businesses are leaning more towards Automated and Continous Integration. This is not only hassle-free but also easy to operate and does not require any technical proficiency. In such a case, LIKE.TG Data is the right choice for you! It will help simplify the Marketing Analysis. LIKE.TG Data supports platforms like Google Ads, etc., for free.
Visit our Website to Explore LIKE.TG
In order to do Advanced Data Analytics effectively, you will require to have reliable and updated Google Ads data.
Want to take LIKE.TG for a spin? Sign Up for a 14-day free trial and experience the feature-rich LIKE.TG suite first hand
What are your thoughts on moving data from Google Ads to Redshift? Let us know in the comments.
MongoDB to Redshift Data Transfer: 2 Easy Methods
If you are looking to move data from MongoDB to Redshift, I reckon that you are trying to upgrade your analytics set up to a modern data stack. Great move!Kudos to you for taking up this mammoth of a task! In this blog, I have tried to share my two cents on how to make the data migration from MongoDB to Redshift easier for you.
Before we jump to the details, I feel it is important to understand a little bit on the nuances of how MongoDB and Redshift operate. This will ensure you understand the technical nuances that might be involved in MongoDB to Redshift ETL. In case you are already an expert at this, feel free to skim through these sections or skip them entirely.
What is MongoDB?
MongoDB distinguishes itself as a NoSQL database program. It uses JSON-like documents along with optional schemas. MongoDB is written in C++. MongoDB allows you to address a diverse set of data sets, accelerate development, and adapt quickly to change with key functionalities like horizontal scaling and automatic failover.
MondoDB is a best RDBMS when you have a huge data volume of structured and unstructured data. It’s features make scaling and flexibility smooth. These are available for data integration, load balancing, ad-hoc queries, sharding, indexing, etc.
Another advantage is that MongoDB also supports all common operating systems (Linux, macOS, and Windows). It also supports C, C++, Go, Node.js, Python, and PHP.
What is Amazon Redshift?
Amazon Redshift is essentially a storage system that allows companies to store petabytes of data across easily accessible “Clusters” that you can query in parallel. Every Amazon Redshift Data Warehouse is fully managed which means that the administrative tasks like maintenance backups, configuration, and security are completely automated.
Suppose, you are a data practitioner who wants to use Amazon Redshift to work with Big Data. It will make your work easily scalable due to its modular node design. It also us you to gain more granular insight into datasets, owing to the ability of Amazon Redshift Clusters to be further divided into slices. Amazon Redshift’s multi-layered architecture allows multiple queries to be processed simultaneously thus cutting down on waiting times. Apart from these, there are a few more benefits of Amazon Redshift you can unlock with the best practices in place.
Main Features of Amazon Redshift
When you submit a query, Redshift cross checks the result cache for a valid and cached copy of the query result. When it finds a match in the result cache, the query is not executed. On the other hand, it uses a cached result to reduce runtime of the query.
You can use the Massive Parallel Processing (MPP) feature for writing the most complicated queries when dealing with large volume of data.
Your data is stored in columnar format in Redshift tables. Therefore, the number of disk I/O requests to optimize analytical query performance is reduced.
Why perform MongoDB to Redshift ETL?
It is necessary to bring MongoDB’s data to a relational format data warehouse like AWS Redshift to perform analytical queries. It is simple and cost-effective to efficiently analyze all your data by using a real-time data pipeline. MongoDB is document-oriented and uses JSON-like documents to store data.
MongoDB doesn’t enforce schema restrictions while storing data, the application developers can quickly change the schema, add new fields and forget about older ones that are not used anymore without worrying about tedious schema migrations. Owing to the schema-less nature of a MongoDB collection, converting data into a relational format is a non-trivial problem for you.
In my experience in helping customers set up their modern data stack, I have seen MongoDB be a particularly tricky database to run analytics on. Hence, I have also suggested an easier / alternative approach that can help make your journey simpler.
In this blog, I will talk about the two different methods you can use to set up a connection from MongoDB to Redshift in a seamless fashion: Using Custom ETL Scripts and with the help of a third-party tool, LIKE.TG .
What Are the Methods to Move Data from MongoDB to Redshift?
These are the methods we can use to move data from MongoDB to Redshift in a seamless fashion:
Method 1: Using Custom Scripts to Move Data from MongoDB to Redshift
Method 2: Using an Automated Data Pipeline Platform to Move Data from MongoDB to Redshift
Integrate MongoDB to RedshiftGet a DemoTry it
Method 1: Using Custom Scripts to Move Data from MongoDB to Redshift
Following are the steps we can use to move data from MongoDB to Redshift using Custom Script:
Step 1: Use mongoexport to export data.
mongoexport --collection=collection_name --db=db_name --out=outputfile.csv
Step 2: Upload the .json file to the S3 bucket.2.1: Since MongoDB allows for varied schema, it might be challenging to comprehend a collection and produce an Amazon Redshift table that works with it. For this reason, before uploading the file to the S3 bucket, you need to create a table structure.2.2: Installing the AWS CLI will also allow you to upload files from your local computer to S3. File uploading to the S3 bucket is simple with the help of the AWS CLI. To upload.csv files to the S3 bucket, use the command below if you have previously installed the AWS CLI. You may use the command prompt to generate a table schema after transferring.csv files into the S3 bucket.
AWS S3 CP D:\outputfile.csv S3://S3bucket01/outputfile.csv
Step 3: Create a Table schema before loading the data into Redshift.
Step 4: Using the COPY command load the data from S3 to Redshift.Use the following COPY command to transfer files from the S3 bucket to Redshift if you’re following Step 2 (2.1).
COPY table_name
from 's3://S3bucket_name/table_name-csv.tbl'
'aws_iam_role=arn:aws:iam::<aws-account-id>:role/<role-name>'
csv;
Use the COPY command to transfer files from the S3 bucket to Redshift if you’re following Step 2 (2.2). Add csv to the end of your COPY command in order to load files in CSV format.
COPY db_name.table_name
FROM ‘S3://S3bucket_name/outputfile.csv’
'aws_iam_role=arn:aws:iam::<aws-account-id>:role/<role-name>'
csv;
We have successfully completed MongoDB Redshift integration.
For the scope of this article, we have highlighted the challenges faced while migrating data from MongoDB to Amazon Redshift. Towards the end of the article, a detailed list of advantages of using approach 2 is also given. You can check out Method 1 on our other blog and know the detailed steps to migrate MongoDB to Amazon Redshift.
Limitations of using Custom Scripts to Move Data from MongoDB to Redshift
Here is a list of limitations of using the manual method of moving data from MongoDB to Redshift:
Schema Detection Cannot be Done Upfront: Unlike a relational database, a MongoDB collection doesn’t have a predefined schema. Hence, it is impossible to look at a collection and create a compatible table in Redshift upfront.
Different Documents in a Single Collection: Different documents in single collection can have a different set of fields. A document in a collection in MongoDB can have a different set of fields.
{
"name": "John Doe",
"age": 32,
"gender": "Male"
}
{
"first_name": "John",
"last_name": "Doe",
"age": 32,
"gender": "Male"
}
Different documents in a single collection can have incompatible field data types. Hence, the schema of the collection cannot be determined by reading one or a few documents.
2 documents in a single MongoDB collection can have fields with values of different types.
{
"name": "John Doe",
"age": 32,
"gender": "Male"
"mobile": "(424) 226-6998"
}
{
"name": "John Doe",
"age": 32,
"gender": "Male",
"mobile": 4242266998
}
The fieldmobile is a string and a number in the above documents respectively. It is a completely valid state in MongoDB. In Redshift, however, both these values either will have to be converted to a string or a number before being persisted.
New Fields can be added to a Document at Any Point in Time: It is possible to add columns to a document in MongoDB by running a simple update to the document. In Redshift, however, the process is harder as you have to construct and run ALTER statements each time a new field is detected.
Character Lengths of String Columns: MongoDB doesn’t put a limit on the length of the string columns. It has a 16MB limit on the size of the entire document. However, in Redshift, it is a common practice to restrict string columns to a certain maximum length for better space utilization. Hence, each time you encounter a longer value than expected, you will have to resize the column.
Nested Objects and Arrays in a Document: A document can have nested objects and arrays with a dynamic structure. The most complex of MongoDB ETL problems is handling nested objects and arrays.
{
"name": "John Doe",
"age": 32,
"gender": "Male",
"address": {
"street": "1390 Market St",
"city": "San Francisco",
"state": "CA"
},
"groups": ["Sports", "Technology"]
}
MongoDB allows nesting objects and arrays to several levels. In a complex real-life scenario is may become a nightmare trying to flatten such documents into rows for a Redshift table.
Data Type Incompatibility between MongoDB and Redshift: Not all data types of MongoDB are compatible with Redshift. ObjectId, Regular Expression, Javascript are not supported by Redshift. While building an ETL solution to migrate data from MongoDB to Redshift from scratch, you will have to write custom code to handle these data types.
Method 2: Using Third Pary ETL Tools to Move Data from MongoDB to Redshift
White using the manual approach works well, but using an automated data pipeline tool like LIKE.TG can save you time, resources and costs. LIKE.TG Data is a No-code Data Pipeline platform that can help load data from any data source, such as databases, SaaS applications, cloud storage, SDKs, and streaming services to a destination of your choice. Here’s how LIKE.TG overcomes the challenges faced in the manual approach for MongoDB to Redshift ETL:
Dynamic expansion for Varchar Columns: LIKE.TG expands the existing varchar columns in Redshift dynamically as and when it encounters longer string values. This ensures that your Redshift space is used wisely without you breaking a sweat.
Splitting Nested Documents with Transformations: LIKE.TG lets you split the nested MongoDB documents into multiple rows in Redshift by writing simple Python transformations. This makes MongoDB file flattening a cakewalk for users.
Automatic Conversion to Redshift Data Types: LIKE.TG converts all MongoDB data types to the closest compatible data type in Redshift. This eliminates the need to write custom scripts to maintain each data type, in turn, making the migration of data from MongoDB to Redshift seamless.
Here are the steps involved in the process for you:
Step 1: Configure Your Source
Load Data from LIKE.TG to MongoDB by entering details like Database Port, Database Host, Database User, Database Password, Pipeline Name, Connection URI, and the connection settings.
Step 2: Intgerate Data
Load data from MongoDB to Redshift by providing your Redshift databases credentials like Database Port, Username, Password, Name, Schema, and Cluster Identifier along with the Destination Name.
LIKE.TG supports 150+ data sources including MongoDB and destinations like Redshift, Snowflake, BigQuery and much more. LIKE.TG ’s fault-tolerant and scalable architecture ensures that the data is handled in a secure, consistent manner with zero data loss.
Give LIKE.TG a try and you can seamlessly export MongoDB to Redshift in minutes.
GET STARTED WITH LIKE.TG FOR FREE
For detailed information on how you can use the LIKE.TG connectors for MongoDB to Redshift ETL, check out:
MongoDB Source Connector
Redshift Destination Connector
Additional Resources for MongoDB Integrations and Migrations
Stream data from mongoDB Atlas to BigQuery
Move Data from MongoDB to MySQL
Connect MongoDB to Snowflake
Connect MongoDB to Tableau
Conclusion
In this blog, I have talked about the 2 different methods you can use to set up a connection from MongoDB to Redshift in a seamless fashion: Using Custom ETL Scripts and with the help of a third-party tool, LIKE.TG .
Outside of the benefits offered by LIKE.TG , you can use LIKE.TG to migrate data from an array of different sources – databases, cloud applications, SDKs, and more. This will provide the flexibility to instantly replicate data from any source like MongoDB to Redshift.
More related reads:
Creating a table in Redshift
Redshift functions
You can additionally model your data, build complex aggregates and joins to create materialized views for faster query executions on Redshift. You can define the interdependencies between various models through a drag and drop interface with LIKE.TG ’s Workflows to convert MongoDB data to Redshift.

Aurora to Redshift Replication: 4 Easy Steps
AWS Data Pipeline is a data movement and data processing service provided by Amazon. Using Data Pipeline you can perform data movement and processing as per your requirement. Data pipeline also supports scheduling of Pipeline processing. You can also perform data movement residing on on-prem.Data Pipeline provides you various options to customize your resources, activities, scripts, failure handling, etc. In the Pipeline you just need to define the sequence of data sources, destinations along data processing activities depending on your business logic and the data pipeline will take care of data processing activities.
Similarly, you can perform Aurora to Redshift Replication using AWS Data Pipeline. This article introduces you to Aurora and Amazon Redshift. It also provides you the steps to perform Aurora to Redshift Replication using AWS Data Pipeline.
Method 1: Using an Automated Data Pipeline Platform
You can easily move your data from Aurora to Redshift using LIKE.TG ’s automated data pipeline platform.
Step 1: Configure Aurora as a Source
Step 2: Configure Redshift as a destination
LIKE.TG is the only real-time ELT No-code Data Pipeline platform that cost-effectively automates data pipelines that are flexible to your needs. With integration with 150+ Data Sources such as PostgreSQL, MySQL, and MS SQL Server, we help you not only export data from sources load data to the destinations but also transform enrich your data, make it analysis-ready.The unique combination of features differentiates LIKE.TG from its competitors, including Fivetran.
Method 2: Steps to Perform Aurora to Redshift Replication Using AWS Data Pipeline
This is a method that demands technical proficiency and experience in working with Aurora and Redshift. This is a Manual Integration using AWS Data Pipeline.
Follow the steps below to perform Aurora to Redshift Replication using AWS Data Pipeline:
Step 1: Select the Data from Aurora
Step 2: Create an AWS Data Pipeline to Perform Aurora to Redshift Replication
Step 3: Activate the Data Pipeline to Perform Aurora to Redshift Replication
Step 4: Check the Data in Redshift
Step 1: Select the Data from Aurora
Select the data that you want for Aurora to Redshift Replication as shown in the image below.
Step 2: Create an AWS Data Pipeline to Perform Aurora to Redshift Replication
For MySQL/Aurora MySQL to Redshift, AWS Data Pipeline provides an inbuilt template to build the Data Pipeline. You will reuse the template and provide the details as shown in the image below.
Note: Check all the pre and post conditions in the Data Pipeline before activating the Pipeline for performing Aurora to Redshift Replication.
Step 3: Activate the Data Pipeline to Perform Aurora to Redshift Replication
Data Pipeline internally generates the following activities automatically:
RDS to S3 Copy Activity (to stage data from Amazon Aurora)
Redshift Table Create Activity (create Redshift Table if not present)
Move data from S3 to Redshift
Perform the cleanup from S3 (Staging)
Step 4: Check the Data in Redshift
Pros of Performing Aurora to Redshift Replication Using AWS Data Pipeline
AWS Data Pipeline is quite flexible as it provides a lot of built-in options for data handling.
You can control the instance and cluster types while managing the Data Pipeline hence you have complete control.
Data pipeline has already provided inbuilt templates in AWS Console which can be reused for similar pipeline operations.
Depending upon your business logic, condition check and job logic are user-friendly.
While triggering the EMR cluster you can leverage other engines other than Apache Spark i.e. Pig, Hive, etc.
Cons of Performing Aurora to Redshift Replication Using AWS Data Pipeline
The biggest disadvantage with the approach is that it is not serverless and the pipeline internally triggers other instance/clusters which runs behind the scene. In case, they are not handled properly, it may not be cost-effective.
Another disadvantage with this approach is similar to the case of copying Aurora to Redshift usingGlue, data pipeline is available in limited regions. For the list of supported regions, refer AWS website.
Job handling for complex pipelines sometimes may become very tricky in handling unless. This still requires proper development/pipeline preparation skills.
AWS Data Pipeline sometimes gives non-meaningful exception errors, which makes it difficult for a developer to troubleshoot. Requires a lot of improvement on this front.
Simplify Data Analysis using LIKE.TG ’s No-code Data Pipeline
LIKE.TG Data, a No-code Data Pipeline helps to Load Data from any data source such as Databases, SaaS applications, Cloud Storage, SDKs, and Streaming Services and simplifies the ETL process. It supports 150+ data sources, including Aurora, etc., and is a 3-step process by just selecting the data source, providing valid credentials, and choosing the destination. LIKE.TG loads the data onto the desired Data Warehouse, enriches the data, and transforms it into an analysis-ready form without writing a single line of code.
Get Started with LIKE.TG for free
Check out why LIKE.TG is the Best:
Secure: LIKE.TG has a fault-tolerant architecture that ensures that the data is handled in a secure, consistent manner with zero data loss.
Schema Management: LIKE.TG takes away the tedious task of schema management automatically detects the schema of incoming data and maps it to the destination schema.
Minimal Learning: LIKE.TG , with its simple and interactive UI, is extremely simple for new customers to work on and perform operations.
LIKE.TG Is Built To Scale: As the number of sources and the volume of your data grows, LIKE.TG scales horizontally, handling millions of records per minute with very little latency.
Incremental Data Load: LIKE.TG allows the transfer of data that has been modified in real-time. This ensures efficient utilization of bandwidth on both ends.
Live Support: The LIKE.TG team is available round the clock to extend exceptional support to its customers through chat, email, and support calls.
Live Monitoring: LIKE.TG allows you to monitor the data flow and check where your data is at a particular point in time.
Sign up here for a 14-day Free Trial!
Conclusion
The article introduced you to Amazon Aurora and Amazon Redshift. It provided you a step-by-step guide to replicate data from Aurora to Redshift using AWS Data Pipeline. Furthermore, it also provided you the pros and cons to go with AWS Data Pipeline.
Amazon Aurora to Redshift Replication using AWS Data Pipeline is convenient during the cases where you want to have full control over your resources and environment. It is a good service for the people who are competent at implementing ETL solution logic. However, in our opinion, this service has not been effective and not that much success as compared to other data movement services.
This service has been launched quite a long back and is still available in a few regions. However, having said that since AWS data pipeline support multi-region data movement, you can Select Pipeline in the nearest region and perform the data movement operation using resources of the region for you movement (be careful about security and compliance).
With the complexity involves in Manual Integration, businesses are leaning more towards Automated and Continous Integration. This is not only hassle-free but also easy to operate and does not require any technical proficiency. In such a case, LIKE.TG Data is the right choice for you! It will help simplify the Marketing Analysis. LIKE.TG Data supports platforms like Aurora, etc.
While you rest, LIKE.TG will take responsibility for fetching the data and moving it to your destination warehouse. Unlike AWS Data pipeline, LIKE.TG provides you with an error-free, completely controlled setup to transfer data in minutes.
Visit our Website to Explore LIKE.TG
Want to take LIKE.TG for a spin? Sign Up for a 14-day free trial and experience the feature-rich LIKE.TG suite first hand.
Share your experience of setting up Aurora to Redshift Integration in the comments section below!
Loading Data from Oracle to Redshift: 2 Easy Methods
Is your Oracle server getting too slow for analytical queries now? Or do you think you are paying too much money to increase the storage capacity or compute power of your Oracle instance? Or are you looking to join and combine data from multiple databases seamlessly? Whatever the case may be, Amazon Redshift offers amazing solutions to the above problems. Hence there is little to think about before moving your data from an Oracle to Amazon Redshift cluster.This article covers the basic idea behind the two architectures and the detailed steps you need to follow to migrate data from Oracle to Redshift. Additionally, it also covers why you should consider implementing an ETL solution such as LIKE.TG Data to make the migration smooth and efficient.
Overview on Oracle and Amazon Redshift
Oracle is fundamentally a Proprietary, Multi-Model, Relational Database System used for Data Warehousing and Online Transaction Processing (OLTP). However, the most recent versions include features similar to cloud-based solutions (such as Amazon Redshift) like columnar storage, on-cloud deployment, etc.
Amazon Redshift is a PostgreSQL standard-based, efficiently scalable, entirely managed, on-cloud database optimized for Online Analytical Processing (OLAP) and data warehousing. One can get things started very quickly in just two steps –
Launch a Redshift cluster via simple API calls or through the AWS Management Console.Connect the local SQL client to this Redshift instance.
There are many advantages of Redshift’s Unique Architecture.Deciding to move data from Oracle to Redshift is the right step in stepping up your data analytics infrastructure.
Methods to Load Data from Oracle to Redshift
Method 1: Custom ETL Scripts to Load Data from Oracle to Redshift
Hand code ETL scripts and configure jobs to move Oracle data to Redshift
Method 2: Setting Up Oracle to Redshift Integration using LIKE.TG Data
LIKE.TG Data, a No-code Data Pipeline, provides you a fully automated platform to set up Oracle to Redshift Integrationforfree. It is a hassle-free solution to directly connect Oracle to Redshift when you don’t have technical expertise in this field.
Sign up here for a 14-day Free Trial!
Methods to Load Data from Oracle to Redshift
There are majorly 2 methods of loading data from Oracle to Redshift:
Method 1: Custome ETL Scripts to Load Data from Oracle to RedshiftMethod 2: Setting Up Oracle to Redshift Integration using LIKE.TG Data
Let’s walk through these methods one by one.
Method 1: Custome ETL Scripts to Load Data from Oracle to Redshift
It is a really easy and straightforward way to move data from Oracle to Amazon Redshift. This method involves 4 major steps:
Step 1: Exporting Data from an Oracle Table via SpoolStep 2: Copying a Flat File onto an AWS S3 BucketStep 3: Creating an Empty Table and Loading Data from the AWS S3 Bucket
These steps are illustrated in technical detail via an example in the following section.
Step 1: Exporting Data from an Oracle Table via Spool
One of the most common ways to export Oracle data onto a flat-file is using the Spool command. Here’s an example of how to do it –
SPOOL c:oracleorgemp.csv
SELECT employeeno || ',' ||
employeename || ',' ||
job || ',' ||
manager || ',' ||
TO_CHAR(hiredate,'YYYY-MM-DD') AS hiredate || ',' ||
salary || ',' ||
FROM employee
ORDER BY employeeno;
SPOOL OFF
The above code exports all records available in employees into the emp.csv file under the org folder as mentioned. The CSV file could then be zipped (using “$ gzip emp.csv”) for compression before moving to the AWS S3 Bucket.
Step 2: Copying a Flat File onto an AWS S3 Bucket
AWS provides S3 Buckets to store files that could be loaded into an Amazon Redshift instance using the COPY command. To drop a local file into an AWS S3 Bucket, you could run a ‘COPY command’ on the AWS Command Line Interface. Here’s how you would do it –
aws s3 cp //oracle/org/emp.csv s3://org/empl/emp.csv.gz
However, if you’d prefer the Graphical User Interface (GUI) way, you could go over to your AWS S3 console https://console.aws.amazon.com/s3/home, and copy-paste your “emp.csv” file into the desired Amazon S3 Bucket.
Step 3: Creating an Empty Table and Loading Data from the AWS S3 Bucket
Before running the COPY command, an empty table must be created in the database to absorb the “emp.csv” file now available on the Amazon S3 Bucket.
The employee table on Redshift can be created using the following code:
SET SEARCH_PATH TO PUBLIC; // selecting the schema
CREATE TABLE EMPLOYEE (
cmployeeno INTEGER NOT NULL,
employeename VARCHAR,
job VARCHAR,
manager VARCHAR,
hiredate DATE,
salary INTEGER
DISTKEY(hiredate)
SORTKEY(employeeno)
)
The flat file copied over to S3 can be loaded into the above table using the following :
SET SEARCH_PATH TO PUBLIC;
COPY EMPLOYEE
FROM 's3://org/empl/emp.csv.gz'
'AWS_ACCESS_KEY_ID=MY_ACCESS_KEY AWS_SECRET_ACCESS_KEY=MY_SECRET_KEY'
GZIP;
Once you are done with the above steps, you need to increment the load from Oracle to Redshift. So, keep reading!
Incremental Load from Oracle to Redshift
The above is an example to demonstrate the process of moving data from Oracle to Redshift. In reality, this would be performed, typically every day, on an entire database consisting of 10s or 100s of tables in a scheduled and automated fashion. Here is how this is done.
Step 1: Iterative Exporting of TablesStep 2: Copying CSV Files to AWS S3Step 3: Importing AWS S3 Data into Redshift
Step 1: Iterative Exporting of Tables
The following script will go through each table one by one. Next, it will export the data in each of them into a separate CSV file with the filename as the *name of the table*_s3.
begin
for item in (select table_name from user_tables)
loop
dbms_output.put_line('spool '||item.table_name||'_s3.csv');
dbms_output.put_line('select * from'||item.table_name||’;’);
dbms_output.put_line('spool off');
end loop;
end;
Step 2: Copying CSV Files to AWS S3
The exported .csv files can be uploaded to an S3 bucket using the following command:
aws s3 cp <your directory path> s3://<your bucket name> --grants read=uri=http://acs.amazonaws.com/groups/global/AllUsers --recursive
Step 3: Importing AWS S3 Data into Redshift
As mentioned before, this process is typically done every 24 hours on a whole lot of data. Hence, you must ensure that there is no data loss as well as no duplicate data. The 2nd part (duplicate data) is particularly relevant when copying data over to Redshift because Redshift doesn’t enforce Primary Key constraints.
Now, you can drop all the data in your Redshift instance and load the entire Oracle Database every time you are performing the data load. However, this is quite risky in regards to data loss and also very inefficient and computationally intensive. Hence, a good way to efficiently perform the data loads while ensuring data consistency would be to:
Copy the AWS S3 flat file data into a temp table: This is achieved by running the ‘COPY’ command the same way as explained in “Step 3” before.Compare the temp table data with the incoming data (the .csv files): See the section Data Loads: SCD Type 1 and Type Resolve any data inconsistency issues: See the section Data Loads: SCD Type 1 and Type 2Remove data from the Parent Table and copy the new and clean up data from the Temp Table. Run the following commands:
begin;
delete from employee where *condition* (depends on what data is available in the temp table)
insert into employee select * from emp_temp_table;
end;
Data Loads – SCD Type 1 and Type 2
Generally, while comparing the existing table data with the new stream of data (S3 bucket data, in this case) one or both of the following methods is used to complete the data load:
Type 1 or Upsert: A new record is either inserted or updated. The update happens only when the primary key of the incoming record matches with the primary key of an existing record. Here is an example:
Existing Record:
Incoming Record:
Final Table (After Upsert):
Type 2 or Maintain History: In this scenario, if the primary key of the incoming record matches with the primary key of an existing record, the existing record is end dated or flagged to reflect that it is a past record. Here is the Type 2 for the above example –
Existing Record:
Incoming Record:
Final Table (After Type 2):
Limitations of Using Custom ETL Scripts to Load Data from Oracle to Redshift
Although a Custom Script (or more likely a combination of Custom Scripts) written to execute the above steps will work, it will be tedious to ensure the smooth functioning of such a system due to the following reasons:
There are many different kinds of steps that are needed to be executed in a dependent fashion without failure.The incremental load is especially difficult to code and execute in such a way as to ensure there is no data loss and/or data inconsistencies. Doing a full load every time puts a lot of load on the Oracle database.As mentioned, this is typically done once every day. Lately, however, people want to look at more real-time data. Hence, this will have to be executed a lot more frequently than once in 24 hours. That is going to test the robustness and thoroughness of your solution a lot more.
Method 2: Setting Up Oracle to Redshift Integration using LIKE.TG Data
LIKE.TG Data, a No-code Data Pipeline helps to Load Data from any data source such as Databases, SaaS applications, Cloud Storage, SDKs, and Streaming Services and simplifies the ETL process. It supports 100+ data sources including Oracle, etc., and is a 3-step process by just selecting the data source, providing valid credentials, and choosing the destination. LIKE.TG loads the data onto the desired Data Warehouse, enriches the data, and transforms it into an analysis-ready form without writing a single line of code.
Its completely automated pipeline offers data to be delivered in real-time without any loss from source to destination. Its fault-tolerant and scalable architecture ensure that the data is handled in a secure, consistent manner with zero data loss and supports different forms of data. The solutions provided are consistent and work with different Business Intelligence (BI) tools as well.
Get Started with LIKE.TG for free
Check out why LIKE.TG is the Best:
Secure: LIKE.TG has a fault-tolerant architecture that ensures that the data is handled in a secure, consistent manner with zero data loss.Schema Management: LIKE.TG takes away the tedious task of schema management automatically detects the schema of incoming data and maps it to the destination schema.Minimal Learning: LIKE.TG , with its simple and interactive UI, is extremely simple for new customers to work on and perform operations.LIKE.TG Is Built To Scale: As the number of sources and the volume of your data grows, LIKE.TG scales horizontally, handling millions of records per minute with very little latency.Incremental Data Load: LIKE.TG allows the transfer of data that has been modified in real-time. This ensures efficient utilization of bandwidth on both ends.Live Support: The LIKE.TG team is available round the clock to extend exceptional support to its customers through chat, email, and support calls.Live Monitoring: LIKE.TG allows you to monitor the data flow and check where your data is at a particular point in time.
Sign up here for a 14-day Free Trial!
Conclusion
Furthermore, LIKE.TG has an intuitive user interface that lets, even the not-so-technical people, easily tweak the parameters of your data load settings. This would come in super handy once you have everything up and running.
With LIKE.TG , you can achieve seamless and accurate data replication from Oracle to Redshift. With its fault-tolerant architecture, LIKE.TG ensures that no data is lost while loading. This empowers you to focus on the right projects instead of worrying about data availability.
Visit our Website to Explore LIKE.TG
Want to take LIKE.TG for a spin? Sign Up for a 14-day free trial and experience the feature-rich LIKE.TG suite first hand.
Share your experience of loading data from Oracle to Redshift in the comments section below!

Asana to Redshift: 2 Easy Methods
Asana is a Work Management Platform available as a Cloud Service that helps users to organize, track and manage their tasks. Asana helps to plan and structure work in a way that suits organizations. All activities involved in a typical organization, right from Project Planning to Task Assignment, Risk Forecasting, Assessing Roadblocks, and changing plans can be handled on the same platform. All this comes at a very flexible pricing plan based on the number of users per month.There is also a free version available for teams up to a size of 15. Almost 70000 organizations worldwide use asana for managing their work. Since the platform is closely coupled with the day-to-day activities of the organizations, it is only natural that the organizations will want to have the data imported into their Data Warehouse for analysis and building insights. This is where Amazon Redshift comes into play.
In this blog post, you will learn to load data from Asana to Redshift Data Warehouse which is one of the most widely used completely managed Data Warehouse services.
Introduction to Asana
Asana is a Project Management Software that provides a comprehensive set of APIs to build applications using their platform. Not only does it allow to access data, but it also has APIs to insert, update and delete data related to any item in the platform. It is important to understand the object hierarchy followed by Asana before going into detail on how to access the APIs.
Solve your data replication problems with LIKE.TG ’s reliable, no-code, automated pipelines with 150+ connectors.Get your free trial right away!
Asana Object Hierarchy
Objects in Asana are organized as the below basic units.
Tasks: Tasks represent the most basic unit of action in Asana.Projects: Tasks are organized into projects. A project represents a collection of tasks that can be viewed as a Board, List, or Timeline.Portfolio: A portfolio is a collection of projects.Sections: Tasks can also be grouped as sections. Sections usually represent something lower in the hierarchy than projects.Subtasks: Tasks can be represented as a collection of subtasks. Subtasks are similar to the task, except that they have a parent task.
Users in Asana are organized as workspaces, organizations, and teams. Workspaces are the highest-level units. Organizations are special workspaces that represent an actual company. Teams are a group of users who collaborate on projects.
Asana API Access
Asana allows API access through two mechanisms
OAuth: This method requires an application to be registered in the Asana admin panel and user approval to allow data access through his account. This is meant to be used while implementing applications using the Asana platform.Personal Access Token: A personal access token can be created from the control panel and used to successfully execute API calls using an authorization header key. This is meant to be used while implementing simple scripts. We will be using this method to access Asana data.
Asana API Rate Limits
Asana API enforces rate limits to maintain the stability of its systems. Free users can make up to 150 requests per minute and premium users can make up to 1500 requests per minute. There is also a limit to the concurrent number of requests. Users can make up to 50 read requests and 15 write requests concurrently.
There is also a limit based on the cost of a request. Some of the API requests may be costly at the back end since Asana will have to traverse a large nested graph to provide the output. Asana does not explicitly mention the exact cost quota but emphasizes that if you make too many costly requests, you could get an error as a response.
For more information on Asana, click here.
Introduction to Amazon Redshift
Amazon Redshift is a completely managed database offered as a cloud service by Amazon Web Services (AWS). It offers a flexible pricing plan with the users only having to pay for the resources they use. A detailed article on Amazon Redshift’s pricing plan can be found here. AWS takes care of all the activities related to maintaining a highly reliable and stable Data Warehouse. The customers can thus focus on their business logic without worrying about the complexities of managing a large infrastructure.
Amazon Redshift is designed to run complex queries over large amounts of data and provide quick results. It accomplishes this through the use of Massively Parallel Processing (MPP) architecture. Amazon Redshift works based on a cluster of nodes. One of the nodes is designated as a Leader Node and others are known as Compute Nodes. Leader Node handles client communication, query optimization, and task assignment.
Redshift can be scaled seamlessly by adding more nodes or upgrading existing nodes. Redshift can handle up to a PB of data. Redshift’s concurrency scaling feature can automatically scale the cluster up and down during high load times while staying within the customer’s budget constraints. Users can enjoy a free hour of concurrency scaling for every 24 hours of a Redshift cluster staying operational.
For more information on Amazon Redshift, click here.
Methods to Replicate Data from Asana to Redshift
Method 1: Build a Custom Code to Replicate Data from Asana to Redshift
You will invest engineering bandwidth to hand-code scripts to get data from Asana’s API to S3 and then to Redshift. Additionally, you will also need to monitor and maintain this setup on an ongoing basis so that there is a consistent flow of data.
Method 2: Replicate Data from Asana to Redshift using LIKE.TG Data
Bringing data from Asana works pretty much out of the box while using a solution likethe LIKE.TG Data Integration Platform.With minimal tech involvement, the data can be reliably streamed from Asana to Redshift in real-time.
Sign up here for a 14-day Free Trial!
Methods to Replicate Data from Asana to Redshift
Broadly, there are 2 methods to replicate your data from Asana to Redshift. Those methods are listed here:
Method 1: Build a Custom Code to Replicate Data from Asana to RedshiftMethod 2: Replicate Data from Asana to Redshift using LIKE.TG Data
Now, let’s go through these methods one by one.
Method 1: Build a Custom Code to Replicate Data from Asana to Redshift
The objective here is to import a list of projects from Asana to Redshift. You will be using the project API in Asana to accomplish this. To access the API, you will first need a personal access token. Let us start by learning how to generate the personal access token. Follow the steps below to build a custom code to replicate data from Asana to Redshift:
Step 1: Access the Personal Access TokenStep 2: Access the API using Personal Access TokenStep 3: Convert JSON to CSVStep 4: Copy the CSV File to AWS S3 BucketStep 5: Copy Data to Amazon Redshift
Step 1: Access the Personal Access Token
Follow the steps below to access the Personal Access Token:
Go to the “Developer App Management” page in Asana and click on the “My Profile” settings.Go to “Apps” and then to “Manage Developer Apps” and then click on “Create New Personal Access Token”.Add a description and click on “Create”.Copy the token that is displayed.Note: This token will only be shown once and if you do not copy it, you will need to create another one.
Step 2: Access the API using Personal Access Token
With the Personal Access Token that you copied in your last step, access the API as follows.
curl -X GET https://app.asana.com/api/1.0/projects -H 'Accept: application/json' -H 'Authorization: Bearer {access-token}'
The response will be a JSON in the following format.
{ "data": [ { "gid": "12345", "resource_type": "project", "name": "Stuff to buy", "created_at": "2012-02-22T02:06:58.147Z", "archived": false, "color": "light-green", … }, {....}
The response will contain a key named data. The value for the “data”. Key will be a list of project details formatted as a nested JSON. Save the file as “projects.json”.
Step 3: Convert JSON to CSV
Use the command-line JSON processor utility jq to convert the JSON to CSV for loading to MySQL. For simplicity, you will only convert the name, created_at, and due_date attributes of project details.
jq -r '.data[] | [.name, .start_on, .due_on] | @csv' projects.json > projects.csv
Note: name, start_on, and due_on are fields contained in the response JSON. If you need different fields, you will have to modify the above code as per your requirement.
Step 4: Copy the CSV File to AWS S3 Bucket
Copy the CSV file to an AWS S3 Bucket location using the following code.
aws s3 cp projects.csv s3://my_bucket/projects/
Step 5: Copy Data to Amazon Redshift
Login to “AWS Management Console” and type the following command in the Query Editor in the Redshift console and execute.
copy target_table_name from ‘s3://my_bucket/projects/ credentials access_key_id <access_key_id> secret_access_key <secret_access_key>
Note: access_key_id and secret_access_key represent the IAM credentials.
That concludes the effort. You have successfully copied data from Asana to Redshift. However, you still have only imported 1 table into your Amazon Redshift. For that table, you have only ingested 3 columns. Asana has a large number of objects in its database with each object having numerous columns. To accommodate all these in our current approach, you will need to implement a complex script using a programming language.
Drawbacks of Building a Custom Code to Replicate Data from Asana to Redshift
Listed below are the drawbacks of building a custom code to replicate data from Asana to Redshift:
Asana provides some of the critical information related to objects like authors, workspaces, etc are available inside nested JSON structures in the original JSON. These can only be extracted by implementing a lot of custom logic.In most cases, the import function will need to be executed periodically to maintain a recent copy. Such jobs will need mechanisms to handle duplicates and scheduled operations.The above method uses a complete overwrite of the Redshift table. This may not be always practical. In case incremental load is required, the Redshift INSERT INTO command will be required. But this command does not manage duplicates on its own. So a temporary table and related logic to handle duplicates will be required.The current approach does not have any mechanism to handle the rate limits by Asana.Any further improvement to the current approach will need the developers to have a lot of domain knowledge in Asana and their object hierarchy structure.
A wise choice would be using a simple ETL tool like LIKE.TG and do not worry about all these complexities in implementing a custom ETL from Asana to Redshift
Towards the end, the blog discusses the drawbacks of this approach and highlights simpler alternatives to achieve the same objective.
Method 2: Replicate Data from Asana to Redshift using LIKE.TG Data
LIKE.TG Data, a No-code Data Pipeline helps to Load Data from any data source such as Databases, SaaS applications, Cloud Storage, SDKs, and Streaming Services and simplifies the ETL process. It supports 100+ data sources including Asana, etc., and is a 3-step process by just selecting the data source, providing valid credentials, and choosing the destination. LIKE.TG loads the data onto the desired Data Warehouse, enriches the data, and transforms it into an analysis-ready form without writing a single line of code.
Its completely automated pipeline offers data to be delivered in real-time without any loss from source to destination. Its fault-tolerant and scalable architecture ensure that the data is handled in a secure, consistent manner with zero data loss and supports different forms of data. The solutions provided are consistent and work with different Business Intelligence (BI) tools as well.
Get Started with LIKE.TG for free
Check out why LIKE.TG is the Best:
Secure: LIKE.TG has a fault-tolerant architecture that ensures that the data is handled in a secure, consistent manner with zero data loss.Schema Management: LIKE.TG takes away the tedious task of schema management automatically detects the schema of incoming data and maps it to the destination schema.Minimal Learning: LIKE.TG , with its simple and interactive UI, is extremely simple for new customers to work on and perform operations.LIKE.TG Is Built To Scale: As the number of sources and the volume of your data grows, LIKE.TG scales horizontally, handling millions of records per minute with very little latency.Incremental Data Load: LIKE.TG allows the transfer of data that has been modified in real-time. This ensures efficient utilization of bandwidth on both ends.Live Support: The LIKE.TG team is available round the clock to extend exceptional support to its customers through chat, email, and support calls.Live Monitoring: LIKE.TG allows you to monitor the data flow and check where your data is at a particular point in time.
Sign up here for a 14-day Free Trial!
Conclusion
The article introduced you to Asana and Amazon Redshift. It also provided 2 methods that you can use to replicate data from Asana to Redshift. The 1st method involves Manual Integration while the 2nd method involves Automated Continous Integration.
With the complexity involves in Manual Integration, businesses are leaning more towards Automated Integration. This is not only hassle-free but also easy to operate and does not require any technical proficiency. In such a case, LIKE.TG Data is the right choice for you! It will help simplify the Web Analysis process by setting up Asana to Redshift Integration.
Visit our Website to Explore LIKE.TG
Want to take LIKE.TG for a spin? Sign Up for a 14-day free trial and experience the feature-rich LIKE.TG suite first hand.
Share your experience of Setting Up Asana to Redshift Integration in the comments section below!

AWS Aurora to Redshift: 9 Easy Steps
AWS Data Migration Service (DMS) is a Database Migration service provided by Amazon. Using DMS, you can migrate your data from one Database to another Database. It supports both, Homogeneous and Heterogeneous Database Migration. DMS also supports migrating data from the on-prem Database to AWS Database services. As a fully managed service, Amazon Aurora saves you time by automating time-consuming operations like provisioning, patching, backup, recovery, and failure detection and repair.
Amazon Redshift is a cloud-based, fully managed petabyte-scale data warehousing service. Starting with a few hundred gigabytes of data, you may scale up to a petabyte or more. This allows you to gain fresh insights for your company and customers by analyzing your data.
In this article, you will be introduced to AWS DMS. You will understand the steps to load data from Amazon Aurora to Redshift using AWS DMS. You also explore the pros and cons associated with this method. So, read along to gain insights and understand the loading of data from Aurora to Redshift using AWS DMS.
What is Amazon Aurora?
Amazon Aurora is a popular database engine with a rich feature set that can import MySQL and PostgreSQL databases with ease. It delivers enterprise-class performance while automating all common database activities. As a result, you won’t have to worry about managing operations like data backups, hardware provisioning, and software updates manually.
Amazon Aurora offers great scalability and data replication across various zones thanks to its multi-deployment tool. As a result, consumers can select from a variety of hardware specifications to meet their needs. The server-less functionality of Amazon Aurora also controls database scalability and automatically upscales or downscales storage as needed. You will only be charged for the time the database is active in this mode.
Solve your data replication problems with LIKE.TG ’s reliable, no-code, automated pipelines with 150+ connectors.Get your free trial right away!
Key Features of Amazon Aurora
Amazon Aurora’s success is aided by the following features:
Exceptional Performance: The Aurora database engine takes advantage of Amazon’s CPU, memory, and network capabilities thanks to software and hardware improvements. As a result, Aurora considerably exceeds its competition.
Scalability: Based on your database usage, Amazon Aurora will automatically scale from a minimum of 10 GB storage to 64 TB storage in increments of 10 GB at a time. This will have no effect on the database’s performance, and you won’t have to worry about allocating storage space as your business expands.
Backups: Amazon Aurora offers automated, incremental, and continuous backups that don’t slow down your database. This eliminates the need to take data snapshots on a regular basis in order to keep your data safe.
High Availability and Durability: Amazon RDS continuously monitors the health of your Amazon Aurora database and underlying Amazon Elastic Compute Cloud (Amazon EC2) instance. In the event of a database failure, Amazon RDS will automatically resume the database and associated activities. With Amazon Aurora, you don’t need to replay database redo logs for crash recovery, which cuts restart times in half. Amazon Aurora also isolates the database buffer cache from the database process, allowing it to survive a database restart.
High Security: Aurora is integrated with AWS Identity and Access Management (IAM), allowing you to govern what your AWS IAM users and groups may do with specific Aurora resources (e.g., DB Instances, DB Snapshots, DB Parameter Groups, DB Event Subscriptions, DB Options Groups). You can also use tags to restrict what activities your IAM users and groups can take on groups of Aurora resources with the same tag (and tag value).
Fully Managed: Amazon Aurora will keep your database up to date with the latest fixes. You can choose whether and when your instance is patched with DB Engine Version Management. You can manually stop and start an Amazon Aurora database with a few clicks. This makes it simple and cost-effective to use Aurora for development and testing where the database does not need to be up all of the time. When you suspend your database, your data is not lost.
Developer Productivity: Aurora provides machine learning capabilities directly from the database, allowing you to add ML-based predictions to your applications using the regular SQL programming language. Thanks to a simple, efficient, and secure connectivity between Aurora and AWS machine learning services, you can access a wide range of machine learning algorithms without having to build new integrations or move data around.
What is Amazon Redshift?
Amazon Redshift is a petabyte-scale data warehousing service that is cloud-based and completely managed. It allows you to start with a few gigabytes of data and work your way up to a petabyte or more. Data is organised into clusters that can be examined at the same time via Redshift. As a result, Redshift data may be rapidly and readily retrieved. Each node can be accessed individually by users and apps.
Many existing SQL-based clients, as well as a wide range of data sources and data analytics tools, can be used with Redshift. It features a stable architecture that makes it simple to interface with a wide range of business intelligence tools.
Each Redshift data warehouse is fully managed, which means administrative tasks like backup creation, security, and configuration are all automated.
Because Redshift was designed to handle large amounts of data, its modular design allows it to scale easily. Its multi-layered structure enables handling several inquiries at once simple.
Slices can be created from Redshift clusters, allowing for more granular examination of data sets.
Key Features of Amazon Redshift
Here are some of Amazon Redshift’s important features:
Column-oriented Databases: In a database, data can be organised into rows or columns. Row-orientation databases make up a large percentage of OLTP databases. In other words, these systems are built to perform a huge number of minor tasks such as DELETE, UPDATE, and so on. When it comes to accessing large amounts of data quickly, a column-oriented database like Redshift is the way to go. Redshift focuses on OLAP operations. The SELECT operations have been improved.
Secure End-to-end Data Encryption: All businesses and organisations must comply with data privacy and security regulations, and encryption is one of the most important aspects of data protection. Amazon Redshift uses SSL encryption for data in transit and hardware-accelerated AES-256 encryption for data at rest. All data saved to disc is encrypted, as are any backup files. You won’t need to worry about key management because Amazon will take care of it for you.
Massively MPP (Multiple Processor Parallelization): Redshift, like Netezza, is an MPP appliance. MPP is a distributed design approach for processing large data sets that employs a “divide and conquer” strategy among multiple processors. A large processing work is broken down into smaller tasks and distributed among multiple compute nodes. To complete their calculations, the compute node processors work in parallel rather than sequentially.
Cost-effective: Amazon Redshift is the most cost-effective cloud data warehousing alternative. The cost is projected to be a tenth of the cost of traditional on-premise warehousing. Consumers simply pay for the services they use; there are no hidden costs. You may discover more about pricing on the Redshift official website.
Scalable: Amazon Redshift, a petabyte-scale data warehousing technology from Amazon, is scalable. Redshift from Amazon is simple to use and scales to match your needs. With a few clicks or a simple API call, you can instantly change the number or kind of nodes in your data warehouse, and scale up or down as needed.
What is AWS Data Migration Service (DMS)?
Using AWS Data Migration Service (DMS) you can migrate your tables from Aurora to Redshift. You need to provide the source and target Database endpoint details along with Schema Names. DMS uses a Replication Instance to process the Migration task. In DMS, you need to set up a Replication Instance and provide the source and target endpoint details. Replication Instance reads the data from the source and loads the data into the target. This entire processing happens in the memory of the Replication Instance. For migrating a high volume of data, it is recommended to use Replication Instances of higher instance classes.
To explore more about AWS DMS, visit here.
Seamlessly Move Data from Aurora to Redshift Using LIKE.TG ’s No Code Data Pipeline
Method 1: Move Data from Aurora to Redshift Using AWS DMS
This method requires you to manually write a custom script that makes use of AWS DMS to transfer data from Aurora to Redshift.
Method 2: Move Data from Aurora to Redshift Using LIKE.TG Data
LIKE.TG Data, an Automated No Code Data Pipelineprovides you a hassle-free solution for connectingAurora PostgreSQL to Amazon Redshiftwithin minutes with an easy-to-use no-code interface. LIKE.TG is fully managed and completely automates the process of not only loading data from Aurora PostgreSQL but also enriching the data and transforming it into an analysis-ready form without having to write a single line of code.
LIKE.TG ’s fault-tolerant Data Pipeline offers a faster way to move data from databases or SaaS applications into your Redshift account. LIKE.TG ’s pre-built integration with Aurora PostgreSQL along with100+ other data sources(and 40+ free data sources)will take full charge of the data transfer process, allowing you to focus on key business activities
GET STARTED WITH LIKE.TG FOR FREE
Why Move Data from Amazon Aurora to Redshift?
Aurora is a row-based database, therefore it’s ideal for transactional queries and web apps. Do you need to check for a user’s name using their id? Aurora makes it simple. Do you want to count or average all of a user’s widgets? Redshift excels in this area. As a result, if you want to utilize any of the major Business Intelligence tools on the market today to analyze your data, you’ll need to employ a data warehouse like Redshift. You can use LIKE.TG for this to make the process easier.
Methods to Move Data from Aurora to Redshift
You can easily move your data from Aurora to Redshift using the following 2 methods:
Method 1: Move Data from Aurora to Redshift Using LIKE.TG Data
Method 2: Move Data from Aurora to Redshift Using AWS DMS
Method 1: Move Data from Aurora to Redshift Using LIKE.TG Data
LIKE.TG Data, an Automated Data Pipeline helps you directly transfer data fromAurora to Redshiftin a completely hassle-free automated manner.LIKE.TG is fully managed and completely automates the process of not only loading data from your desired source but also enriching the data and transforming it into an analysis-ready form without having to write a single line of code. You can seamlessly ingest data from your Amazon Aurora PostgreSQL database using LIKE.TG Pipelines and replicate it to a Destination of your choice.
While you unwind, LIKE.TG will take care of retrieving the data and transferring it to your destination Warehouse. Unlike AWS DMS, LIKE.TG provides you with an error-free, fully managed setup to move data in minutes. You can check a detailed article to compare LIKE.TG vs AWS DMS.
Refer to these documentations for detailed steps for integration of Amazon Aurora to Redshift.
The following steps can be implemented to connect Aurora PostgreSQL to Redshift using LIKE.TG :
Step 1) Authenticate Source: Connect Aurora PostgreSQL as the source to LIKE.TG ’s Pipeline.
Step 2) Configure Destination: Configure your Redshift account as the destination for LIKE.TG ’s Pipeline.
Check out what makes LIKE.TG amazing:
Secure: LIKE.TG has a fault-tolerant architecture that ensures that the data is handled in a secure, consistent manner with zero data loss.
Auto Schema Mapping: LIKE.TG takes away the tedious task of schema management automatically detects the schema of incoming data fromAurora PostgreSQLfilesand maps it to the destination schema.
Quick Setup: LIKE.TG with its automated features, can be set up in minimal time. Moreover, with its simple and interactive UI, it is extremely easy for new customers to work on and perform operations.
Transformations: LIKE.TG provides preload transformations through Python code. It also allows you to run transformation code for each event in the Data Pipelines you set up. You need to edit the event object’s properties received in the transform method as a parameter to carry out the transformation. LIKE.TG also offers drag and drop transformations like Date and Control Functions, JSON, and Event Manipulation to name a few. These can be configured and tested before putting them to use for aggregation.
LIKE.TG Is Built To Scale: As the number of sources and the volume of your data grows, LIKE.TG scales horizontally, handling millions of records per minute with very little latency.
Incremental Data Load: LIKE.TG allows the transfer of data that has been modified in real-time. This ensures efficient utilization of bandwidth on both ends.
Live Support: The LIKE.TG team is available round the clock to extend exceptional support to its customers through chat, email, and support calls.
With continuous Real-Time data movement, LIKE.TG allows you to combine Aurora PostgreSQL data along with your other data sources and seamlessly load it to Redshift with a no-code, easy-to-setup interface. Try our 14-day full-feature access free trial!
Get Started with LIKE.TG for Free
Method 2: Move Data from Aurora to Redshift Using AWS DMS
Using AWS DMS, perform the following steps to transfer your data from Aurora to Redshift:
Step 1: Let us create a table in Aurora (Table name redshift.employee). We will move the data from this table to Redshift using DMS.
Step 2: We will insert some rows in the Aurora table before we move the data from this table to Redshift.
Step 3: Go to the DMS service and create a Replication Instance.
Step 4: Create source and target endpoint and test the connection from the Replication Instance.
Once both the endpoints are created, it will look as shown below:
Step 5: Once Replication Instance and endpoints are created, create a Replication task. The Replication task will take care of your migration of data.
Step 6: Select the table name and schema, which you want to migrate. You can use % as wildcards for multiple tables/schema.
Step 7: Once setup is done, start the Replication task.
Step 8: Once the Replication task is completed, you can see the entire details along with the assessment report.
Step 9: Now, since the Replication task has completed its activity, let us check the data in Redshift to know whether the data has been migrated.
As shown in the steps above, DMS is pretty handy when it comes to Replicating data from Aurora to Redshift but it requires performing a few manual activities.
Pros of Moving Data from Aurora to Redshift using AWS DMS
Data movement is secure as Data Security is fully managed internally by AWS.
No Database downtime is needed during the Migration.
Replication task setup requires just a few seconds.
Depending upon the volume of Data Migration, users can select the Replication Instance type and the Replication task will take care of migrating the data.
You can migrate your data either in Full mode or in CDC mode. In case your Replication task is running, a change in the data in the source Database will automatically reflect in the target database.
DMS migration steps can be easily monitored and troubleshot using Cloudwatch Logs and Metrics. You can even generate notification emails depending on your rules.
Migrating data to Redshift using DMS is free for 6 months.
Cons of Moving Data from Aurora to Redshift using AWS DMS
While copying data from Aurora to Redshift using AWS DMS, it does not support SCT (Schema Conversion Tool) for your Automatic Schema conversion which is one of the biggest demerits of this setup.
Due to differences in features of the Aurora Database and Redshift Database, you need to perform a lot of manual activities for the setup i.e. DMS does not support moving Stored Procedures since in Redshift there is no concept of Stored Procedures, etc.
Replication Instance has a limitation on storage limit. It supports up to 6 TB of data.
You cannot migrate data from Aurora from one region to another region meaning both the Aurora Database and Redshift Database should be in the same region.
Conclusion
Overall the DMS approach of replicating data from Aurora to Redshift is satisfactory, however, you need to perform a lot of manual activities before the data movement. Few features that are not supported in Redshift have to be handled manually as SCT does not support Aurora to Redshift data movement.
In a nutshell, if your manual setup is ready and taken care of you can leverage DMS to move data from Aurora to Redshift. You can also refer to our other blogs where we have discussed Aurora to Redshift replication using AWS Glue and AWS Data Pipeline.
LIKE.TG Data provides an Automated No-code Data Pipeline that empowers you to overcome the above-mentioned limitations. LIKE.TG caters to 100+ data sources (including 40+ free sources) and can seamlessly transfer your data from Aurora PostgreSQL to Redshift within minutes. LIKE.TG ’s Data Pipeline enriches your data and manages the transfer process in a fully automated and secure manner without having to write any code. It will make your life easier and make data migration hassle-free.
Learn more about LIKE.TG
Want to take LIKE.TG for a spin? Sign Up for a 14-day free trial and experience the feature-rich LIKE.TG suite first hand.
You can also have a look at our unbeatable pricing that will help you choose the right plan for your business needs!
TokuDB to Snowflake: 2 Easy Methods
The need to store, transform, analyze and share data is growing exponentially, with demand for cloud-based data analytics and data warehouse solutions also on the rise. Using the cloud for data processing, analytics, and reporting has now become quite popular mainly due to its convenience and superior performance.In this blog post, we will go over a migration scenario where a fictional business is attempting to migrate their data from an on-prem TokuDB to Snowflake, a cloud-based data warehouse. To this aim, let’s first compare both solutions.Introduction to TokuDB
TokuDB is a highly scalable MySQL and MariaDB storage engine. It offers high data compression, fast insertions, and deletions, among many other features. This makes it a great solution for use in high-performance and write-intensive environments. It uses a fractal tree data structure and huge data pages to efficiently manage and read the data. However, concurrency, scale, resiliency, and security are some of the bottlenecks that limit TokuDB’s performance. It is available in an open-source version and an enterprise edition.
Solve your data replication problems with LIKE.TG ’s reliable, no-code, automated pipelines with 150+ connectors.Get your free trial right away!
Introduction to Snowflake
Snowflake is a cloud data warehouse that came out in 2015. It is primarily available on AWS and Azure. Snowflake is similar to BigQuery in that it stores data separately from where it does its compute. It stores the actual data of your tables in S3 and then it can provision any number of compute nodes to process that data.
In contrast, Snowflake offers instant access to unlimited resources (compute and storage) on-demand.
Snowflake Benefits:
Snowflake is specifically optimized for analytics workloads. It’s therefore ideal for businesses dealing with very complex data sets.Snowflake offers better performance both in terms of storage capacity and query performance.Snowflake also offers better security compared to an on-prem data warehouse. This is because cloud data warehouses are required to meet stringent security requirements.Migrating your data to the cloud is also cost-effective since there is no huge initial outlay and you don’t have to maintain physical infrastructure.
Moving Data from TokuDB to Snowflake
Method 1: Using Custom ETL Scripts to Connect TokuDB to Snowflake
This approach would need you to invest in heavy engineering resources. The broad steps in this approach would need you to understand the S3 data source, write code to extract data from S3, prepare the data, and finally copy it into Snowflake. The details and challenges of each step are described in the next sections.
Method 2: Using LIKE.TG to Connect TokuDB to Snowflake
LIKE.TG is a cloud data pipeline platform that seamlessly moves data from TokuDB to Snowflake in real-time without having to write any code. By deploying LIKE.TG , the data transfer can be completely automated and would not need any human intervention. This will allow you to direct your team’s bandwidth in extracting meaningful insights instead of wrangling with code.
Get Started with LIKE.TG for Free
LIKE.TG ’s pre-built integration with TokuDB (among 100+ Sources) will take full charge of the data transfer process, allowing you to focus on key business activities.
Methods to Connect TokuDB to Snowflake
Here are the methods you can use to establish a connection from TokuDB to Snowflake:
Method 1: Using Custom ETL Scripts to Connect TokuDB to SnowflakeMethod 2: Using LIKE.TG to Connect TokuDB to Snowflake
Method 1: Using Custom ETL Scripts to Connect TokuDB to Snowflake
Here are the steps involved in using Custom ETL Scripts to connect TokuDB and Snowflake:
Step 1: Export TokuDB Tables to CSV FormatStep 2: Upload Source Data Files to Amazon S3Step 3: Create an Amazon S3 StageStep 4: Create a Table in SnowflakeStep 5: Loading Data to SnowflakeStep 6: Validating the Connection from TokuDB to Snowflake
Step 1: Export TokuDB Tables to CSV Format
There are multiple ways to backup a TokuDB database and we will be using a simple SQL command to perform a logical backup.
SELECT * FROM `database_name`.`table_name` INTO OUTFILE 'path_to_folder/filename.csv'
FIELDS ENCLOSED BY '"' TERMINATED BY ';' ESCAPED BY '"' LINES TERMINATED BY 'rn';"
This command dumps the data into CSV format which can then easily be imported into Snowflake.
Repeat this command for all tables and ensure that your TokuDB server has enough storage space to hold the CSV files.
Step 2: Upload Source Data Files to Amazon S3
After generating the CSV/TXT file, we need to upload this data to a place where Snowflake can access it. Install the AWS CLI on your system
How to install the AWS CLI
After that execute the following command.
aws s3 cp filename.csv s3://{YOUR_BUCKET_NAME}
Step 3: Create an Amazon S3 Stage
Using the SnowSQL CLI client, run this command:
create or replace stage my_csv_stage
file_format = mycsvformat
url = 's3://{YOUR_BUCKET_NAME}';
The example above creates an external stage named my_csv_stage.
Step 4: Create a Table in Snowflake
Create a table with your schema. You will load data into this table in the next step.
create or replace table {YOUR_TABLE_NAME}
('$TABLE_SCHEMA')
Step 5: Loading Data to Snowflake
Loading data requires a Snowflake compute cluster.Run the following command in the SnowSQL CLI client:
copy into {YOUR_TABLE_NAME}
from s3://{YOUR_BUCKET_NAME} credentials=(aws_key_id='$AWS_ACCESS_KEY_ID' aws_secret_key='$AWS_SECRET_ACCESS_KEY')
file_format = (type = csv field_delimiter = '|' skip_header = 1);
This command will load data from all CSV files in the S3 bucket.
Step 6: Validating the Connection from TokuDB to Snowflake
select * from {YOUR_TABLE_NAME} limit 10;
The above approach is effort-intensive. You would need to hand-code many steps that run coherently to achieve the objective.
Limitations of Using Custom ETL Scripts to Connect TokuDB to Snowflake
This method is ideal for a one-time bulk load. In case you are looking to stream data in real-time, you might have to configure cron jobs and write additional code to achieve this.More often than not, the use case to move data from TokuDB to Snowflake is not this straightforward. You might need to clean, transform and enrich the data to make it analysis-ready. This would not be easy to achieve.Since the data moved from TokuDB is critical to your business, you will need to constantly monitor the infrastructure to ensure that nothing breaks. Failure at any step would lead you to irretrievable data loss.
Method 2: Using LIKE.TG to Connect TokuDB to Snowflake
UsingLIKE.TG (Official Snowflake ETL partner)— a managed system that simplifies data migration. LIKE.TG is fully managed and completely automates the process of not only loading data from your desired source but also enriching the data and transforming it into an analysis-ready form without having to write a single line of code. Its fault-tolerant architecture ensures that the data is handled in a secure, consistent manner with zero data loss.
Sign up here for a 14-Day Free Trial!
LIKE.TG takes care of all your data preprocessing to set up TokuDB Snowflake Integration and lets you focus on key business activities and draw a much powerful insight on how to generate more leads, retain customers, and take your business to new heights of profitability. It provides a consistent reliable solution to manage data in real-time and always have analysis-ready data in your desired destination.
Moving data from TokuDB to Snowflake requires just 2 steps:
Step 1: Connect to your TokuDB database by providing connection settings.
Step 2: Select the mode of replication you want: (a) Load the result set of a Custom Query (b) Full dump of tables (c) Load data via log
Step 3: Configure the Snowflake destination by providing the details like Destination Name, Account Name, Account Region, Database User, Database Password, Database Schema, and Database Name.
Check out what makes LIKE.TG amazing:
Real-Time Data Transfer: LIKE.TG with its strong Integration with 100+ sources, allows you to transfer data quickly efficiently. This ensures efficient utilization of bandwidth on both ends.Data Transformation: It provides a simple interface to perfect, modify, and enrich the data you want to transfer.Secure: LIKE.TG has a fault-tolerant architecture that ensures that the data is handled in a secure, consistent manner with zero data loss.Tremendous Connector Availability: LIKE.TG houses a large variety of connectors and lets you bring in data from numerous Marketing SaaS applications, databases, etc. such as Google Analytics 4, Google Firebase, Airflow, HubSpot, Marketo, MongoDB, Oracle, Salesforce, Redshift, etc. in an integrated and analysis-ready form.Simplicity: Using LIKE.TG is easy and intuitive, ensuring that your data is exported in just a few clicks.Completely Managed Platform: LIKE.TG is fully managed. You need not invest time and effort to maintain or monitor the infrastructure involved in executing codes.Live Support: The LIKE.TG team is available round the clock to extend exceptional support to its customers through chat, email, and support calls.
That is it, LIKE.TG will now take care of reliably loading data from TokuDB to Snowflake in real-time.
Conclusion
This blog talks about the two methods you can use to set up TokuDB Snowflake Integration in a seamless fashion: using custom ETL code and a third-party tool, LIKE.TG .
Extracting complex data from a diverse set of data sources can be a challenging task and this is where LIKE.TG saves the day!
Visit our Website to Explore LIKE.TG
In addition to TokuDB, LIKE.TG can also bring data from a wide array of data sources into Snowflake. Database (MySQL, PostgreSQL, MongoDB and more), Cloud Applications (Google Analytics, Google Ads, Facebook Ads, Salesforce, and more). This allows LIKE.TG to scale on-demand as your data needs grow.
Sign Up for a full-feature free trial (14 days) to see the simplicity of LIKE.TG first-hand. You can also have a look at the unbeatable pricing that will help you choose the right plan for your business needs.
Google Analytics to Snowflake: 2 Easy Methods
Google Analytics is the most popular web analytics service on the market, used to gather crucial information on website events: web traffic, purchases, signups, and other aspects of browser/customer behavior. However, the vast amount of data that Analytics provides makes it necessary for many users to search for ways to more deeply analyze the information found within the platform. Enter Snowflake, a platform designed from the ground up to be a cloud-based data warehouse. You can read more about Snowflake here. For many users of Analytics, Snowflake is the ideal solution for their data analysis needs, and in this article, we will walk you through the process of moving your data from Google Analytics to Snowflake.Introduction to Google Analytics
Google Analytics (GA) is a Web Analytics service that offers Statistics and basic Analytical tools for your Search Engine Optimization (SEO) and Marketing needs. It’s free and part of Google’s Marketing Platform, so anyone with a Google account may take advantage of it.
Google Analytics is used to monitor website performance and gather visitor data. It can help organizations identify the most popular sources of user traffic, measure the success of their Marketing Campaigns and initiatives, track objective completion, discover patterns and trends in user engagement, and obtain other visitor information, such as demographics. To optimize Marketing Campaigns, increase website traffic, and better retain visitors, small and medium-sized retail websites commonly leverage Google Analytics.
Here are the key features of Google Analytics:
Conversion Tracking: Conversion points (such as a contact form submission, e-commerce sale, or phone call) can be tracked in Google Analytics once they have been recognized on your website. You’ll be able to observe when someone converted, the traffic source that referred them, and much more.Third-Party Referrals: A list of third-party websites that sent you traffic will be available. That way you’ll know which sites are worth spending more time on, as well as if any new sites have started linking to yours.Custom Dashboards: You can create semi-custom Dashboards for your analytics with Google Analytics. You can add Web Traffic, Conversions, and Keyword Referrals to your dashboard if they’re essential to you. To share your reports, you can export your dashboard into PDF or CSV format.Traffic Reporting: Google Analytics is essentially a traffic reporter. How many people visit your site each day will be revealed by the service’s statistics. You may also keep track of patterns over time, which can help you make better decisions about online Marketing.
Solve your data replication problems with LIKE.TG ’s reliable, no-code, automated pipelines with 150+ connectors.Get your free trial right away!
Introduction to Snowflake
Snowflake is a cloud data warehouse that came out in 2015. It is primarily available on AWS and Azure.Snowflakeis similar to BigQuery in that it stores data separately from where it does its compute. It stores the actual data of your tables in S3 and then it can provision any number of compute nodes to process that data.
In contrast, Snowflake offers instant access to unlimited resources (compute and storage) on-demand.
Snowflake Benefits:
Snowflake is specifically optimized for analytics workloads. It’s therefore ideal for businesses dealing with very complex data sets.Snowflake offers better performance both in terms of storage capacity and query performance.Snowflake also offers better security compared to an on-prem data warehouse. This is because cloud data warehouses are required to meet stringent security requirements.Migrating your data to the cloud is also cost-effective since there is no huge initial outlay and you don’t have to maintain physical infrastructure.
Methods to Move data from Google Analytics to Snowflake
Before we get started, there are essentially two ways to move your data from Google Analytics to Snowflake:
Method 1: Using Custom ETL Scripts to Move Data from Google Analytics to Snowflake
This would need you to understand the Google Analytics API, build a code to bring data from it, clean and prepare the data and finally, load it to Snowflake. This can be a time-intensive task and (let’s face it) not the best use of your time as a developer.
Method 2: Using LIKE.TG Data to Move Data from Google Analytics to Snowflake
LIKE.TG , a Data Integration Platform gets the same results in a fraction of time with none of the hassles. LIKE.TG can help you bring Google Analytics data to Snowflake in real-time for free without having to write a single line of code.
Get Started with LIKE.TG for Free
LIKE.TG ’s pre-built integration with Google Analytics (among 100+ Sources) will take full charge of the data transfer process, allowing you to focus on key business activities.
This article provides an overview of both the above approaches. This will allow you to assess the pros and cons of both and choose the route that suits your use case best
Understanding the Methods to Connect Google Analytics to Snowflake
Here are the methods you can use to establish a connection from Google Analytics to Snowflake:
Method 1: Using Custom ETL Scripts to Move Data from Google Analytics to SnowflakeMethod 2: Using LIKE.TG Data to Move Data from Google Analytics to Snowflake
Method 1: Using Custom ETL Scripts to Move Data from Google Analytics to Snowflake
Here are the steps you can use to set up a connection from Google Analytics to Snowflake using Custom ETL Scripts:
Step 1: Accessing Data on Google AnalyticsStep 2: Transforming Google Analytics DataStep 3: Transferring Data from Google Analytics to SnowflakeStep 4: Maintaining Data on Snowflake
Step 1: Accessing Data on Google Analytics
The first step in moving your data is to access it, which can be done using the Google Analytics Reporting API. Using this API, you can create reports and dashboards, both for use in your Analytics account as well as in other applications, such as Snowflake. However, when using the Reporting API, it is important to remember that only those with a paid Analytics 360 subscription will be able to utilize all the features of the API, such as viewing event-level data, while users of the free version of Analytics can only create reports using less targeted aggregate data.
Step 2: Transforming Google Analytics Data
Before transferring data to Snowflake, the user must define a complete and well-ordered schema for all included data. In some cases, such as with JSON or XML data types, data does not need a schema in order to be transferred directly to Snowflake. However, many data types cannot be moved quite so readily, and if you are dealing with (for example) Microsoft SQL server data, more work is required on the part of the user to ensure that the data is compatible with Snowflake.
Google Analytics reports are conveniently expressed in the manner of a spreadsheet, which maps well to the similarly tabular data structures of Snowflake. On the other hand, it is important to remember that these reports are samples of primary data, and as such, may contain different values during separate report instances, even over the same time period sampled.
Because Analytics reports and Snowflake data profiles are so similarly structured, a common technique is to map each key embedded in a Report API endpoint response to a mirrored column on the Snowflake data table, thereby ensuring a proper conversion of necessary data types. Because data conversion is not automatic, it is incumbent on the user to revise data tables to keep up with any changes in primary data types.
Step 3: Transferring Data from Google Analytics to Snowflake
There are three primary ways of transferring your data to Snowflake:
COPY INTO – The COPY INTO command is perhaps the most common technique for data transferral, whereby data files (stored either locally or in a storage solution like Amazon S3 buckets) are copied into a data warehouse.PUT – The PUT command may also be used, which allows the user to stage files prior to the execution of the COPY INTO command.Upload – Data files can be uploaded into a service such as the previously mentioned Amazon S3, allowing for direct access of these files by Snowflake.
Step 4: Maintaining Data on Snowflake
Maintaining an accurate database on Snowflake is a never-ending battle; with every update to Google Analytics, older data on Snowflake must be analyzed and updated to ensure the integrity of the overarching data tables. This task is made somewhat easier by creating UPDATE statements in Snowflake, but you must also take care to identify and delete any duplicate records that appear in the database.
Overall, maintenance of your newly-created Snowflake database can be a time-consuming project, which is all the more reason to look for time-saving solutions such as LIKE.TG .
Limitations of Using Custom ETL Scripts to Connect Google Analytics to Snowflake
Although there are other methods of integrating data from Google Analytics to Snowflake, those not using LIKE.TG must be prepared to deal with a number of limitations:
Heavy Engineering Bandwidth: Building, testing, deploying, and maintaining the infrastructure necessary for proper data transfer requires a great deal of effort on the end user’s part.Not Automatic: Each time a change is made in Google Analytics, time must be taken to manually alter the code to ensure data integrity.Not Real-time: The steps as set out in this article must be performed every single time data is moved from Analytics to Snowflake. For most users, who will be moving data on a regular basis, following these steps every time will be a cumbersome, time-consuming ordeal.Possibility of Irretrievable Data Loss: If at any point during this process an error occurs say, something changes in Google Analytics API or on Snowflake, serious data corruption and loss can result.
Method 2: Using LIKE.TG Data to Move Data from Google Analytics to Snowflake
LIKE.TG is fully managed and completely automates the process of not only loading data from your desired source but also enriching the data and transforming it into an analysis-ready form without having to write a single line of code. Its fault-tolerant architecture ensures that the data is handled in a secure, consistent manner with zero data loss.
Sign up here for a 14-Day Free Trial!
LIKE.TG takes care of all your data preprocessing to set up a connection from Google Analytics to Snowflake and lets you focus on key business activities and draw a much powerful insight on how to generate more leads, retain customers, and take your business to new heights of profitability. It provides a consistent reliable solution to manage data in real-time and always have analysis-ready data in your desired destination.
LIKE.TG being an official Snowflake partner, can connect Google Analytics to Snowflake in 2 simple steps:
Step 1: Connect LIKE.TG with Google Analytics 4 and all your data sources by simply logging in with your credentials.
Step 2: Configure the Snowflake destination by providing the details like Destination Name, Account Name, Account Region, Database User, Database Password, Database Schema, and Database Name.
LIKE.TG will now take care of all the heavy-weight lifting to move data from Google Analytics to Snowflake. Here are some of the benefits of LIKE.TG :
Reduced Time to Implementation: With a few clicks of a mouse, users can swiftly move their data from source to destination. This will drastically reduce time to insight and help your business make key decisions faster.End to End Management: The burden of overseeing the inessential minutiae of data migration is removed from the user, freeing them to make more efficient use of their time.A Robust System for Alerts and Notifications: LIKE.TG offers users a wide array of tools to ensure that changes and errors are detected and that the user is notified as to their presence.Complete, Consistent Data Transfer: Whereas some data migration solutions can lead to the loss of data as errors appear, LIKE.TG uses a proprietary staging mechanism to quarantine problematic data fields so that the user can fix errors on a case-to-case basis and move this data.Comprehensive Scalability: With LIKE.TG , it is no problem to incorporate new data sets, regardless of file size. In addition to Google Analytics, LIKE.TG is also able to interface with a number of other analytics, marketing, and cloud applications; LIKE.TG aims to be the one-source solution for all your data transfer needs.24/7 Support: LIKE.TG provides a team of product experts, ready to assist 24 hours a day, 7 days a week.
Simplify your Data Analysis with LIKE.TG today!
Conclusion
For users who seek a more in-depth understanding of their web traffic, moving data from Google Analytics to their Snowflake data warehouse becomes an important feat.
However, sifting through this can be an arduous and time-intensive process, a process that a tool like LIKE.TG can streamline immensely, with no effort needed from the user’s end. Furthermore, LIKE.TG is compatible with a 100+ data sources, including 40+ Free Sources like Google Analytics allowing the user to interface with databases, cloud storage solutions, and more.
Visit Our Website To Explore LIKE.TG
Still not sure that LIKE.TG is right for you?
Sign Up to try our risk-free, expense-free 14-day trial, and experience for yourself the ease and efficiency provided by the LIKE.TG Data Integration Platform. You can also have a look at the unbeatable pricing that will help you choose the right plan for your business needs.
Salesforce to BigQuery: 2 Easy Methods
Bringing your key sales, marketing and customer data from Salesforce to BigQuery is the right step towards building a robust analytics infrastructure. By merging this information with more data points available from various other data sources used by your business, you will be able to extract deep actionable insights that grow your business. Before we jump into the details, let us briefly understand each of these systems.Introduction to Salesforce
Salesforceis one of the world’s most renowned customer relationship management platforms. Salesforce comes with a wide range of features that allow you to manage your key accounts and sales pipelines.While Salesforce does provide analytics within the software, many businesses would want to extract this data, combine it with data from other sources such as marketing, product, and more to get deeper insights on the customer. By bringing the CRM data into a modern data warehouse like BigQuery, this can be achieved.
Key Features of Salesforce
Salesforce is one of the most popular CRM in the current business scenario and it is due to its various features. Some of these key features are:
Easy Setup:Unlike most CRMs, which usually take up to a year to completely get installed and deployed, Salesforce can be easily set up from scratch within few weeks only.
Ease of Use:Businesses usually have to spend more time putting it to use and comparatively much lesser time in understanding how Salesforce works.
Effective:Salesforce is convenient to use and can also be customized by businesses to meet their requirements. Due to this feature, users find the tool very beneficial.
Account Planning: Salesforce provides you with enough data about each Lead that your Sales Team can customize their approach for every potential Lead. This will increase their chance of success and the customer will also get a personalized experience.
Accessibility: Salesforce is a Cloud-based software, hence it is accessible from any remote location if you have an internet connection. Moreover, Salesforce has an application for mobile phones which makes it super convenient to use.
Reliably integrate data with LIKE.TG ’s Fully Automated No Code Data Pipeline
LIKE.TG ’s no-code data pipeline platform lets you connect over 150+ sources in a matter of minutes to deliver data in near real-time to your warehouse. LIKE.TG is the only real-time ELT No-code Data Pipeline platform that cost-effectively automates data pipelines that are flexible to your needs.
All of this combined with transparent pricing and 24×7 support makes us the most loved data pipeline software in terms of user reviews.
Take our 14-day free trial to experience a better way to manage data pipelines.
Get started for Free with LIKE.TG !
Introduction to Google BigQuery
Google BigQuery is a completely managed cloud data warehouse platform offered by Google. It is based on Google’s famous Dremel Engine. Since BigQuery is based on a serverless model, it provides you high level of abstraction. Since it is a completely managed warehouse, companies do not need to maintain any form of physical infrastructure and database administrators. BigQuery comes with a pay-as-you-go pricing model and allows to pay only for the queries run. is also very cost-effective as you only pay for the queries you run. These features together make BigQuery a very sought after data warehouse platform. You can read more about the key features of BigQuery here.
This blog covers two methods of loading data from Salesforce to Google BigQuery. The article also sheds light on the advantages/disadvantages of both approaches. This would give you enough pointers to evaluate them based on your use case and choose the right direction.
Methods to Connect Salesforce to BigQuery
There are several approaches to migrate Salesforce data to BigQuery. Salesforce bigquery connector is commonly integrated for the purpose of analyzing and visualizing Salesforce data in a BigQuery environment. Let us look at both the approaches to connect Salesforce to BigQuery in a little more detail:
Method 1: Move data from Salesforce to Google BigQuery using LIKE.TG
LIKE.TG , a No-code Data Pipeline, helps you directly transfer data from Salesforce and150+ other data sourcesto Data Warehouses such as BigQuery, Databases, BI tools, or a destination of your choice in a completely hassle-free automated manner.
Get Started with LIKE.TG for free
LIKE.TG Data takes care of all your data preprocessing needs and lets you focus on key business activities and draw a much powerful insight on how to generate more leads, retain customers, and take your business to new heights of profitability. It provides a consistent reliable solution to manage data in real-time and always have analysis-ready data in your desired destination.
LIKE.TG can integrate data from Salesforce to BigQuery in just 2 simple steps:
Step 1: Authenticate and configure your Salesforce data sourceas shown in the below image. To learn more about this step, visithere.
Learn more about configuring Salesforce from our documentation page.
To configure Salesforce as a source, perform the following steps;
Go to the Navigation Bar and click on the Pipelines.
In the Pipelines List View, click the + CREATE button.
Select Salesforce on the Select Source Type page.
Specify the necessary information in the Configure your Salesforce account page
Click on the Continue button to complete the source setup and proceed to configuring data ingestion and setting up the destination.
Step 2: CompleteSalesforce to BigQueryMigration by providing information about your Google BigQuery destination such as the authorized Email Address, Project ID, etc.
To configure Google BigQuery as your Destination, follow the steps;
Go to the Navigation Bar, and click the Destinations button.
In the Destinations List View, click the + CREATE button.
On the Add Destination page, select Google BigQuery as the Destination type
Specify the necessary information in the Configure your Google BigQuery warehouse page
Click on the Save Continue buttons to complete the destination setup.
Learn more about configuring BigQuery as destination here.
LIKE.TG ’s visual interface gives you a hassle-free means to quickly and easily migrate from Salesforce to BigQuery and also for free. Without any coding, all your Salesforce data will be ready for analysis within minutes.
Get started for Free with LIKE.TG !
Method 2: Move Data from Salesforce to BigQuery using Custom Scripts
The first step would be to decide what data you need to extract from the API and Salesforce has an abundance of APIs.
Salesforce REST APIs
Salesforce Bulk APIs
Salesforce SOAP APIs
Salesforce Streaming APIsYou may want to use Salesforce’s streaming API, so your data is always current.
Transform your data:Once you have extracted the data using one of the above approaches, you would need to do the following:
BigQuery supports loading data in CSV and JSON formats. If the API you use returns data in formats other than these (eg: XML), you would need to transform them before loading.
You also need to make sure your data types are supported by BIgQuery. Use this link BigQuery data types to learn more about BigQuery data types.
Upload the prepared data to Google Cloud Storage
Load to BigQuery from your GCS bucket using BigQuery’s command-line tool or any cloud SDK.
Salesforce to BigQuery:Limitations in writing Custom Code
When writing and managing API scripts you need to have the resources for coding, code reviews, test deployments, and documentation.
Depending on the use cases developed by your organization, you may need to amend API scripts; change the schema in your data warehouse; and make sure data types in source and destination match.
You will also need to have a system for data validation. This would help you be at peace that data is being moved reliably.
Each of these steps can make a substantial investment of time and resources. In today’s work setting, there are very few places with ‘standby’ resources that can take up the slack when major projects need more attention.
In addition to the above, you would also need to:
Watch out for Salesforce API for changes
Monitor GCS/BigQuery for changes and outages
Retain skilled people to rewrite or update the code as needed
If all of this seems like a crushing workload you could look at alternatives like LIKE.TG . LIKE.TG frees you from inspecting data flows, examining data quality, and rewriting data-streaming APIs. LIKE.TG gives you analysis-ready data so you can spend your time getting real-time business insights.
Method 3: Using CSV/Avro
This method involves using CSV/Avro files to export data from Salesforce into BigQuery. The steps are:
Inside your Salesforce data explorer panel, select the table that you want to export your data.
Click on ‘Export to Cloud Storage’ and select CSV as the file type. Then, select the compression type as GZIP (GNU Zip) or go ahead with the default value.
Download that file to the system.
Login to your BigQuery account. In the Data Explorer section, select “import” and choose “Batch Ingestion”.
Choose the file type as CSV/Avro. You can enable schema auto-detection or specify it specifically.
Add dataset and table name, and select “Import”.
The limitation of the method is that it becomes complex if you have multiple tables/files to import. Same goes for more than one data sources with constantly varying data.
Use cases for Migrating Salesforce to BigQuery
Organizations use Salesforce’s Data Cloud along with Google’s BigQuery and Vertex AI to enhance their customer experiences and tailor interactions with them. Salesforce BigQuery Integration enables organizations to combine and analyze data from their Salesforce CRM system with the powerful data processing capabilities of BigQuery. Let’s understand some real-time use cases for migrating salesforce to bigquery.
Retail: Retail businesses can integrate CRM data with non-CRM data such as real-time online activity and social media sentiment in BigQuery to help you understand the complete customer journey and subsequently when you implement customized AI models to forecast customer tendency. The outcome involves delivering highly personalized recommendations to customers through optimal channels like email, mobile apps, or social media.
Healthcare Organizations: CRM data, including appointment history and patient feedback, can be integrated with non-CRM data, such as patient demographics and medical history in BigQuery. The outcome is the prediction of patients who are susceptible to readmission, allowing for the creation of personalized care plans. This proactive approach enhances medical outcomes through preemptive medical care.
Financial institutions: Financial institutions have the capability to integrate CRM data encompassing a customer’s transaction history, credit score, and financial goals with non-CRM data such as market analysis and economic trends. By utilizing BigQuery, these institutions can forecast customers’ spending patterns, investment preferences, and financial goals. This valuable insight informs the provision of personalized banking services and offers tailored to individual customer needs.
Use cases for migrating Salesforce to BigQuery
Organizations use Salesforce’s Data Cloud along with Google’s BigQuery and Vertex AI to enhance their customer experiences and tailor interactions with them. Salesforce BigQuery Integration enables organizations to combine and analyze data from their Salesforce CRM system with the powerful data processing capabilities of BigQuery. Let’s understand some real-time use cases for migrating salesforce to bigquery.
Retail: Retail businesses can integrate CRM data with non-CRM data such as real-time online activity and social media sentiment in BigQuery to help you understand the complete customer journey and subsequently when you implement customized AI models to forecast customer tendency. The outcome involves delivering highly personalized recommendations to customers through optimal channels like email, mobile apps, or social media.
Healthcare Organizations: CRM data, including appointment history and patient feedback, can be integrated with non-CRM data, such as patient demographics and medical history in BigQuery. The outcome is the prediction of patients who are susceptible to readmission, allowing for the creation of personalized care plans. This proactive approach enhances medical outcomes through preemptive medical care.
Financial institutions: Financial institutions have the capability to integrate CRM data encompassing a customer’s transaction history, credit score, and financial goals with non-CRM data such as market analysis and economic trends. By utilizing BigQuery, these institutions can forecast customers’ spending patterns, investment preferences, and financial goals. This valuable insight informs the provision of personalized banking services and offers tailored to individual customer needs.
Conclusion
The blog talks about the two methods you can use to move data from Salesforce to BigQuery in a seamless fashion. The idea of custom coding with its implicit control over the entire data-transfer process is always attractive. However, it is also a huge resource load for any organization.
A practical alternative is LIKE.TG – a fault-tolerant, reliable Data Integration Platform. LIKE.TG gives you an environment free from any hassles, where you can securely move data from any source to any destination.
See how easy it is to migrate data from Salesforce to BigQuery and that too for free.
Visit our Website to Explore LIKE.TG
Want to take LIKE.TG for a spin? Sign Up for a 14-day free trial and experience the feature-rich LIKE.TG suite first hand. You can also have a look at the unbeatable pricing that will help you choose the right plan for your business needs.
MariaDB to Snowflake: 2 Easy Methods to Move Data in Minutes
Are you looking to move data from MariaDB to Snowflake for Analytics or Archival purposes? You have landed on the right post. This post covers two main approaches to move data from MariaDB to Snowflake. It also discusses some limitations of the manual approach. So, to overcome these limitations, you will be introduced to an easier alternative to migrate your data from MariaDB to Snowflake. How to Move Data from MariaDB to Snowflake?
Method 1: Implement an Official Snowflake ETL Partner such asLIKE.TG Data.
LIKE.TG is the only real-time ELT No-code Data Pipeline platform that cost-effectively automates data pipelines that are flexible to your needs. With integration with 150+ Data Sources (40+ free sources), we help you not only export data from sources load data to the destinations but also transform enrich your data, make it analysis-ready.
GET STARTED WITH LIKE.TG FOR FREE
Method 2: Build Custom ETL Scripts to move data from MariaDB to Snowflake
Organizations can enable scalable analytics, reporting, and machine learning on their valuable MariaDB data by customizing ETL scripts to integrate MariaDB transactional data seamlessly into Snowflake’s cloud data warehouse. However, the custom method can be challenging, which we will discuss later in the blog.
Method 1: MariaDB to Snowflake using LIKE.TG
Using a no-code data integration solution likeLIKE.TG (Official Snowflake ETL Partner), you can move data from MariaDB to Snowflake in real time. Since LIKE.TG is fully managed, the setup and implementation time is next to nothing. You can replicate MariaDB to Snowflake using LIKE.TG ’s visual interface in 2 simple steps:
Step 1: Connect to your MariaDB Database
ClickPIPELINESin theAsset Palette.
Click+ CREATEin thePipelines List View.
In theSelect Source Typepage, select MariaDB as your source.
In theConfigure yourMariaDBSourcepage, specify the following:
Step 2: Configure Snowflake as your Destination
ClickDESTINATIONSin theNavigation Bar.
Click+ CREATEin theDestinations List View.
In theAdd Destinationpage, selectSnowflakeas the Destination type.
In theConfigure yourSnowflake Warehousepage, specify the following:
To know more about MariabDB to Snowflake Integration, refer to LIKE.TG documentation:
MariaDB Source Connector
Snowflake as a Destination
SIGN UP HERE FOR A 14-DAY FREE TRIAL!
Method 2: Build Custom ETL Scripts to move data from MariaDB to Snowflake
Implementing MariaDB to Snowflake integration streamlines data flow and analysis, enhancing overall data management and reporting capabilities. At a high level, the data replication process can generally be thought of in the following steps:
Step 1: Extracting Data from MariaDB
Step 2: Data Type Mapping and Preparation
Step 3: Data Staging
Step 4: Loading Data into Snowflake
Step 1: Extracting Data from MariaDB
Data should be extracted based on the use case and the size of the data being exported.
If the data is relatively small, then it can be extracted using SQL SELECT statements into MariaDB’s MySQL command-line client.
Example:
mysql -u <name> -p <db> SELECT <columns> INTO OUTFILE 'path' FIELDS TERMINATED BY ',' OPTIONALLY ENCLOSED BY '"' LINES TERMINATED BY 'n' FROM <table>;
With the FIELDS TERMINATED BY, OPTIONALLY ENCLOSED BY and LINES TERMINATED BY clauses being optional
If a user is looking to export large amounts of data, then MariaDB provides another command-line tool mysqldump which is better suited to export tables, a database or databases into other database servers. mysqldump creates a backup by dumping database or table information into a text file, which is typically in SQL. However, it can also generate files in other formats like CSV or XML.A use case extracting a full backup of a database is shown below:
mysqldump -h [database host's name or IP address] -u [the database user's name] -p [the database name] > db_backup.sql
The resulting file will consist of SQL statements that will create the database specified above.
Example (snippet):
CREATE TABLE table1 ( ‘Column1’ bigint(10)....... )
Step 2: Data Type Mapping and Preparation
Once the data is exported, one has to ensure that the data types in the MariaDB export properly correlate with their corresponding data types in Snowflake.
Snowflake presents documentation on data preparation before the Staging process here.
In general, it should be noted that the BIT data type in MariaDB corresponds to the BOOLEAN in Snowflake. Also, Large Object types (both BLOB and CLOB) and ENUM are not supported in Snowflake. The complete documentation on the data types that are not supported by Snowflake can be found here.
Step 3: Data Staging
The data is ready to be imported into the Staging area after we have ensured that the data types are accurately mapped.
There are two types of stages that a user can create in Snowflake. These are:
Internal Stages
External Stages
Each of these stages can be created using the Snowflake GUI or with SQL code. For the scope of this blog, we have included the steps to do this using SQL code.
Loading Data to Internal Stage:
CREATE [ OR REPLACE ] [ TEMPORARY ] STAGE [ IF NOT EXISTS ] <internal_stage_name> [ FILE_FORMAT = ( { FORMAT_NAME = '<file_format_name>' | TYPE = { CSV | JSON | AVRO | ORC | PARQUET | XML } [ formatTypeOptions ] ) } ] [ COPY_OPTIONS = ( copyOptions ) ] [ COMMENT = '<string_literal>' ]
Loading Data to External Stage:
Here is the code to load data to Amazon S3:
CREATE STAGE “[Database Name]”, “[Schema]”,”[Stage Name]” URL=’S3://<URL> CREDENTIALS= (AWS_KEY_ID=<your AWS key ID>, AWS_SECRET_KEY= <your AWS secret key>) ENCRYPTION= (MASTER_KEY=<Master key if required>) COMMENT= ‘[insert comment]’
In case you are using Microsoft Azure as your external stage, here is how you can load data:
CREATE STAGE “[Database Name]”, “[Schema]”,”[Stage Name]” URL=’azure://<URL> CREDENTIALS= (AZURE_SAS_TOKEN=’< your token>‘) ENCRYPTION= (TYPE = “AZURE_CSE, MASTER_KEY=<Master key if required>) COMMENT= ‘[insert comment]’
There are other internal stage types namely the table stage and the user stage. However, these stages are automatically generated by Snowflake. The table stage is held within a table object and is best used for use cases that require the staged data to be only used exclusively for a specific table. The user table is assigned to each user by the system and cannot be altered or dropped. They are used as personal storage locations for users.
Step 4: Loading Data to Snowflake
In order to load the staged data to Snowflake, we use the COPY INTO DML statement through Snowflake’s SQL command-line interface – SnowSQL. Note that using the FROM clause in the COPY INTO statement is optional, as Snowflake will automatically check for files in the stage. You can connect MariaDB to Snowflake to provide smooth data integration, enabling effective data analysis and transfer between the two databases.
Loading Data from Internal Stages:
User Stage Type:
COPY INTO TABLE1 FROM @~/staged file_format=(format_name=’csv_format’)
Table Stage Type:
COPY INTO TABLE1 FILE_FORMAT=(TYPE CSV FIELD DELIMITER=’|’ SKIP_HEADER=1)
Internal Stage Created as per the previous step:
COPY INTO TABLE1 FROM @Stage_name
Amazon S3:
While you can load data directly from an Amazon S3 bucket, the recommended method is to first create an Amazon S3 external stage as described under the Data Stage section of this guide. The same applies to Microsoft Azure and GCP buckets too.
COPY INTO TABLE1 FROM s3://bucket CREDENTIALS= (AWS_KEY_ID='YOUR AWS ACCESS KEY' AWS_SECRET_KEY='YOUR AWS SECRET ACCESS KEY') ENCRYPTION= (MASTER_KEY = 'YOUR MASTER KEY') FILE_FORMAT = (FORMAT_NAME = CSV_FORMAT)
Microsoft Azure:
COPY INTO TABLE1 FROM azure://your account.blob.core.windows.net/container STORAGE_INTEGRATION=(Integration_name) ENCRYPTION= (MASTER_KEY = 'YOUR MASTER KEY') FILE_FORMAT = (FORMAT_NAME = CSV_FORMAT)
GCS:
COPY INTO TABLE1 FROM 'gcs://bucket’ STORAGE_INTEGRATION=(Integration_name) ENCRYPTION= (MASTER_KEY = 'YOUR MASTER KEY') FILE_FORMAT = (FORMAT_NAME = CSV_FORMAT)
Loading Data from External Stages:
Snowflake offers and supports many format options for data types like Parquet, XML, JSON, and CSV. Additional information can be found here.
This completes the steps to load data from MariaDB to Snowflake. The MariaDB Snowflake integration facilitates a smooth and efficient data exchange between the two databases, optimizing data processing and analysis.
While the method may look fairly straightforward, it is not without its limitations.
Limitations of Moving Data from MariaDB to Snowflake Using Custom Code
Significant Manual Overhead: Using custom code to move data from MariaDB to Snowflake necessitates a high level of technical proficiency and physical labor. The process becomes more labor- and time-intensive as a result.
Limited Real-Time Capabilities: Real-time data loading capabilities are absent from the custom code technique when transferring data from MariaDB to Snowflake. It is, therefore, inappropriate for companies that need the most recent data updates.
Limited Scalability: The custom code solution may not be scalable for future expansion as data quantities rise, and it may not be able to meet the increasing needs in an effective manner.
So, you can use an easier alternative: LIKE.TG Data – Simple to use Data Integration Platform that can mask the above limitations and move data from MariaDB to Snowflake instantly.
There are a number of interesting use cases for moving data from MariaDB to Snowflake that might yield big advantages for your company. Here are a few important situations in which this integration excels:
Improved Reporting and Analytics:
Quicker and more effective data analysis: Large datasets can be queried incredibly quickly using Snowflake’s columnar storage and cloud-native architecture—even with datasets that MariaDB had previously been thought to be too sluggish for.
Combine data from various sources with MariaDB: For thorough analysis, you may quickly and easily link your MariaDB data with information from other sources in Snowflake, such as cloud storage, SaaS apps, and data warehouses.
Enhanced Elasticity and Scalability:
Scaling at a low cost: You can easily scale computing resources up or down according on your data volume and query demands using Snowflake’s pay-per-use approach, which eliminates the need to overprovision MariaDB infrastructure.
Manage huge and expanding datasets: Unlike MariaDB, which may have scaling issues, Snowflake easily manages big and expanding datasets without causing performance reduction.
Streamlined Data Management and Governance:
Centralized data platform: For better data management and governance, combine your data from several sources—including MariaDB—into a single, cohesive platform with Snowflake.
Enhanced compliance and data security: Take advantage of Snowflake’s strong security features and compliance certifications to guarantee your sensitive data is private and protected.
Simplified data access and sharing: Facilitate safe data exchange and granular access control inside your company to promote teamwork and data-driven decision making.
Conclusion
In this post, you were introduced to MariaDB and Snowflake. Moreover, you learned the steps to migrate your data from MariaDB to Snowflake using custom code. You observed certain limitations associated with this method. Hence, you were introduced to an easier alternative – LIKE.TG to load your data from MariaDB to Snowflake.
VISIT OUR WEBSITE TO EXPLORE LIKE.TG
LIKE.TG moves your MariaDB data to Snowflake in a consistent, secure and reliable fashion. In addition to MariaDB, LIKE.TG can load data from a multitude of other data sources including Databases, Cloud Applications, SDKs, and more. This allows you to scale up on demand and start moving data from all the applications important for your business.
Want to take LIKE.TG for a spin?
SIGN UP to experience LIKE.TG ’s simplicity and robustness first-hand.
Share your experience of loading data from MariaDB to Snowflake in the comments section below!
MongoDB to Redshift ETL: 2 Easy Methods
If you are looking to move data from MongoDB to Redshift, I reckon that you are trying to upgrade your analytics set up to a modern data stack. Great move!Kudos to you for taking up this mammoth of a task! In this blog, I have tried to share my two cents on how to make the data migration from MongoDB to Redshift easier for you.
Before we jump to the details, I feel it is important to understand a little bit on the nuances of how MongoDB and Redshift operate. This will ensure you understand the technical nuances that might be involved in MongoDB to Redshift ETL. In case you are already an expert at this, feel free to skim through these sections or skip them entirely.
What is MongoDB?
MongoDB distinguishes itself as a NoSQL database program. It uses JSON-like documents along with optional schemas. MongoDB is written in C++. MongoDB allows you to address a diverse set of data sets, accelerate development, and adapt quickly to change with key functionalities like horizontal scaling and automatic failover.
MondoDB is a best RDBMS when you have a huge data volume of structured and unstructured data. It’s features make scaling and flexibility smooth. These are available for data integration, load balancing, ad-hoc queries, sharding, indexing, etc.
Another advantage is that MongoDB also supports all common operating systems (Linux, macOS, and Windows). It also supports C, C++, Go, Node.js, Python, and PHP.
What is Amazon Redshift?
Amazon Redshift is essentially a storage system that allows companies to store petabytes of data across easily accessible “Clusters” that you can query in parallel. Every Amazon Redshift Data Warehouse is fully managed which means that the administrative tasks like maintenance backups, configuration, and security are completely automated.
Suppose, you are a data practitioner who wants to use Amazon Redshift to work with Big Data. It will make your work easily scalable due to its modular node design. It also us you to gain more granular insight into datasets, owing to the ability of Amazon Redshift Clusters to be further divided into slices. Amazon Redshift’s multi-layered architecture allows multiple queries to be processed simultaneously thus cutting down on waiting times. Apart from these, there are a few more benefits of Amazon Redshift you can unlock with the best practices in place.
Main Features of Amazon Redshift
When you submit a query, Redshift cross checks the result cache for a valid and cached copy of the query result. When it finds a match in the result cache, the query is not executed. On the other hand, it uses a cached result to reduce runtime of the query.
You can use the Massive Parallel Processing (MPP) feature for writing the most complicated queries when dealing with large volume of data.
Your data is stored in columnar format in Redshift tables. Therefore, the number of disk I/O requests to optimize analytical query performance is reduced.
Why perform MongoDB to Redshift ETL?
It is necessary to bring MongoDB’s data to a relational format data warehouse like AWS Redshift to perform analytical queries. It is simple and cost-effective to efficiently analyze all your data by using a real-time data pipeline. MongoDB is document-oriented and uses JSON-like documents to store data.
MongoDB doesn’t enforce schema restrictions while storing data, the application developers can quickly change the schema, add new fields and forget about older ones that are not used anymore without worrying about tedious schema migrations. Owing to the schema-less nature of a MongoDB collection, converting data into a relational format is a non-trivial problem for you.
In my experience in helping customers set up their modern data stack, I have seen MongoDB be a particularly tricky database to run analytics on. Hence, I have also suggested an easier / alternative approach that can help make your journey simpler.
In this blog, I will talk about the two different methods you can use to set up a connection from MongoDB to Redshift in a seamless fashion: Using Custom ETL Scripts and with the help of a third-party tool, LIKE.TG .
What Are the Methods to Move Data from MongoDB to Redshift?
These are the methods we can use to move data from MongoDB to Redshift in a seamless fashion:
Method 1: Using Custom Scripts to Move Data from MongoDB to Redshift
Method 2: Using an Automated Data Pipeline Platform to Move Data from MongoDB to Redshift
Integrate MongoDB to RedshiftGet a DemoTry it
Method 1: Using Custom Scripts to Move Data from MongoDB to Redshift
Following are the steps we can use to move data from MongoDB to Redshift using Custom Script:
Step 1: Use mongoexport to export data.
mongoexport --collection=collection_name --db=db_name --out=outputfile.csv
Step 2: Upload the .json file to the S3 bucket.2.1: Since MongoDB allows for varied schema, it might be challenging to comprehend a collection and produce an Amazon Redshift table that works with it. For this reason, before uploading the file to the S3 bucket, you need to create a table structure.2.2: Installing the AWS CLI will also allow you to upload files from your local computer to S3. File uploading to the S3 bucket is simple with the help of the AWS CLI. To upload.csv files to the S3 bucket, use the command below if you have previously installed the AWS CLI. You may use the command prompt to generate a table schema after transferring.csv files into the S3 bucket.
AWS S3 CP D:\outputfile.csv S3://S3bucket01/outputfile.csv
Step 3: Create a Table schema before loading the data into Redshift.
Step 4: Using the COPY command load the data from S3 to Redshift.Use the following COPY command to transfer files from the S3 bucket to Redshift if you’re following Step 2 (2.1).
COPY table_name
from 's3://S3bucket_name/table_name-csv.tbl'
'aws_iam_role=arn:aws:iam::<aws-account-id>:role/<role-name>'
csv;
Use the COPY command to transfer files from the S3 bucket to Redshift if you’re following Step 2 (2.2). Add csv to the end of your COPY command in order to load files in CSV format.
COPY db_name.table_name
FROM ‘S3://S3bucket_name/outputfile.csv’
'aws_iam_role=arn:aws:iam::<aws-account-id>:role/<role-name>'
csv;
We have successfully completed MongoDB Redshift integration.
For the scope of this article, we have highlighted the challenges faced while migrating data from MongoDB to Amazon Redshift. Towards the end of the article, a detailed list of advantages of using approach 2 is also given. You can check out Method 1 on our other blog and know the detailed steps to migrate MongoDB to Amazon Redshift.
Limitations of using Custom Scripts to Move Data from MongoDB to Redshift
Here is a list of limitations of using the manual method of moving data from MongoDB to Redshift:
Schema Detection Cannot be Done Upfront: Unlike a relational database, a MongoDB collection doesn’t have a predefined schema. Hence, it is impossible to look at a collection and create a compatible table in Redshift upfront.
Different Documents in a Single Collection: Different documents in single collection can have a different set of fields. A document in a collection in MongoDB can have a different set of fields.
{
"name": "John Doe",
"age": 32,
"gender": "Male"
}
{
"first_name": "John",
"last_name": "Doe",
"age": 32,
"gender": "Male"
}
Different documents in a single collection can have incompatible field data types. Hence, the schema of the collection cannot be determined by reading one or a few documents.
2 documents in a single MongoDB collection can have fields with values of different types.
{
"name": "John Doe",
"age": 32,
"gender": "Male"
"mobile": "(424) 226-6998"
}
{
"name": "John Doe",
"age": 32,
"gender": "Male",
"mobile": 4242266998
}
The fieldmobile is a string and a number in the above documents respectively. It is a completely valid state in MongoDB. In Redshift, however, both these values either will have to be converted to a string or a number before being persisted.
New Fields can be added to a Document at Any Point in Time: It is possible to add columns to a document in MongoDB by running a simple update to the document. In Redshift, however, the process is harder as you have to construct and run ALTER statements each time a new field is detected.
Character Lengths of String Columns: MongoDB doesn’t put a limit on the length of the string columns. It has a 16MB limit on the size of the entire document. However, in Redshift, it is a common practice to restrict string columns to a certain maximum length for better space utilization. Hence, each time you encounter a longer value than expected, you will have to resize the column.
Nested Objects and Arrays in a Document: A document can have nested objects and arrays with a dynamic structure. The most complex of MongoDB ETL problems is handling nested objects and arrays.
{
"name": "John Doe",
"age": 32,
"gender": "Male",
"address": {
"street": "1390 Market St",
"city": "San Francisco",
"state": "CA"
},
"groups": ["Sports", "Technology"]
}
MongoDB allows nesting objects and arrays to several levels. In a complex real-life scenario is may become a nightmare trying to flatten such documents into rows for a Redshift table.
Data Type Incompatibility between MongoDB and Redshift: Not all data types of MongoDB are compatible with Redshift. ObjectId, Regular Expression, Javascript are not supported by Redshift. While building an ETL solution to migrate data from MongoDB to Redshift from scratch, you will have to write custom code to handle these data types.
Method 2: Using Third Pary ETL Tools to Move Data from MongoDB to Redshift
White using the manual approach works well, but using an automated data pipeline tool like LIKE.TG can save you time, resources and costs. LIKE.TG Data is a No-code Data Pipeline platform that can help load data from any data source, such as databases, SaaS applications, cloud storage, SDKs, and streaming services to a destination of your choice. Here’s how LIKE.TG overcomes the challenges faced in the manual approach for MongoDB to Redshift ETL:
Dynamic expansion for Varchar Columns: LIKE.TG expands the existing varchar columns in Redshift dynamically as and when it encounters longer string values. This ensures that your Redshift space is used wisely without you breaking a sweat.
Splitting Nested Documents with Transformations: LIKE.TG lets you split the nested MongoDB documents into multiple rows in Redshift by writing simple Python transformations. This makes MongoDB file flattening a cakewalk for users.
Automatic Conversion to Redshift Data Types: LIKE.TG converts all MongoDB data types to the closest compatible data type in Redshift. This eliminates the need to write custom scripts to maintain each data type, in turn, making the migration of data from MongoDB to Redshift seamless.
Here are the steps involved in the process for you:
Step 1: Configure Your Source
Load Data from LIKE.TG to MongoDB by entering details like Database Port, Database Host, Database User, Database Password, Pipeline Name, Connection URI, and the connection settings.
Step 2: Intgerate Data
Load data from MongoDB to Redshift by providing your Redshift databases credentials like Database Port, Username, Password, Name, Schema, and Cluster Identifier along with the Destination Name.
LIKE.TG supports 150+ data sources including MongoDB and destinations like Redshift, Snowflake, BigQuery and much more. LIKE.TG ’s fault-tolerant and scalable architecture ensures that the data is handled in a secure, consistent manner with zero data loss.
Give LIKE.TG a try and you can seamlessly export MongoDB to Redshift in minutes.
GET STARTED WITH LIKE.TG FOR FREE
For detailed information on how you can use the LIKE.TG connectors for MongoDB to Redshift ETL, check out:
MongoDB Source Connector
Redshift Destination Connector
Additional Resources for MongoDB Integrations and Migrations
Stream data from mongoDB Atlas to BigQuery
Move Data from MongoDB to MySQL
Connect MongoDB to Snowflake
Connect MongoDB to Tableau
Conclusion
In this blog, I have talked about the 2 different methods you can use to set up a connection from MongoDB to Redshift in a seamless fashion: Using Custom ETL Scripts and with the help of a third-party tool, LIKE.TG .
Outside of the benefits offered by LIKE.TG , you can use LIKE.TG to migrate data from an array of different sources – databases, cloud applications, SDKs, and more. This will provide the flexibility to instantly replicate data from any source like MongoDB to Redshift.
More related reads:
Creating a table in Redshift
Redshift functions
You can additionally model your data, build complex aggregates and joins to create materialized views for faster query executions on Redshift. You can define the interdependencies between various models through a drag and drop interface with LIKE.TG ’s Workflows to convert MongoDB data to Redshift.
Amazon Aurora to BigQuery: 2 Easy Methods
In this day businesses are generating a huge amount of data regularly. To make important decisions this raw data is very essential. However, there are a few major challenges in the process. It is very difficult to analyze such a huge amount of data (Petabyte) using a traditional database like MySQL, Oracle, SQL Server, etc. In order to get any tangible insight from this data, you would need to move data to Data Warehouse like Google BigQuery. This post provides a step-by-step walkthrough on how to migrate data from Amazon Aurora to the BigQuery Data warehouse using 2 steps. Read along and decide which method suits you the best!Performing ETL from Amazon Aurora to BigQuery
Method 1: Using Custom Code to Move Data from Aurora to BigQuery
This method consists of a 5-step process to move data from Amazon Aurora to BigQuery through custom ETL Scripts. There are various advantages of using this method but a few limitations as well.
Method 2: Using LIKE.TG Data to Move Data from Aurora to BigQuery
LIKE.TG Data can load your data fromAurora to BigQueryin minutes without writing a single line of code and forfree. Data loading can be configured on a visual, point, and click interface. Since LIKE.TG is fully managed, you would not have to invest any additional time and resource in maintaining and monitoring the data. LIKE.TG promises 100% data consistency and accuracy.
Sign up here for a 14-day Free Trial!
Methods to Connect Aurora to BigQuery
Here are the methods you can use to connect Aurora to BigQuery in a seamless fashion:
Method 1: Using Custom Code to Move Data from Aurora to BigQuery
Method 2: Using LIKE.TG Data to Move Data from Aurora to BigQuery
In this post, we will cover the second method (Custom Code) in detail. Towards the end of the post, you can also find a quick comparison of both data replication methods so that you can evaluate your requirements and choose wisely.
Method 1: Using Custom Code to Move Data from Aurora to BigQuery
This method requires you to manually set up the data transfer process from Aurora to BigQuery. The steps involved in migrating data from Aurora DB to BigQuery are as follows:
Step 1: Getting Data out of Amazon Aurora
Step 2: Preparing Amazon Aurora Data
Step 3: Upload Data to Google Cloud Storage
Step 4: Upload to BigQuery from GCS
Step 5: Update the Target Table in BigQuery
Step 1: Getting Data out of Amazon Aurora
By writing SQL queries we can export data from Aurora. TheSELECT queries enable us to pull the data we want. You can specify filters and order of the data. You can also limit results.
A command-line tool called mysqldump lets you export entire tables and databases in a format you specify (i.e. delimited text, CSV, or SQL queries).
mysql -u user_name -p --database=db_name --host=rds_hostname --port=rdsport --batch -e "select * from table_name" | sed 's/t/","/g;s/^/"/;s/$/"/;s/n//g' > file_name
Step 2: Preparing Amazon Aurora Data
You need to make sure the target BigQuery table is perfectly aligned with the source Aurora table, specifically column sequence and data type of columns.
Step 3: Upload Data to Google Cloud Storage
You can use the bq command-line tool to upload the files to your datasets, adding schema and data type information. In GCP quickstart guide you can find the syntax of bq command line. Iterate through this process as many times as it takes to load all of your tables into BigQuery.
Once the data has been extracted from the Aurora database the next step is to upload it to the GCS There are multiple ways this can be achieved. The various methods are explained below.
(A) Using Gsutil
The gsutil utility will help us upload a local file to GCS(Google Cloud Storage) bucket.
To copy a file to GCS:
gsutil cp local_copy.csv gs://gcs_bucket_name/path/to/folder/
To copy an entire folder to GCS:
gsutil local_dir_name -r dir gs://gcs_bucket_name/path/to/parent_folder/
(B) Using Web console
An alternative means to upload the data from your local machine to GCS is using the web console. To use the web console alternative, follow the steps laid out below:
1. First of all, you need to Login to your GCP account. You ought to have a working Google account to make use of GCP. In the menu option, click on storage and navigate to the browser on the left tab
2. Create a new bucket to upload your data. Make sure the name you choose is globally unique
3. Click on the bucket name that you have created in step 2, this will ask to you browse the file from your local machine
4. Choose the file and click on the upload button. Once you see a progress bar wait for the action to be completed. You can see the file is loaded in the bucket.
Step 4: Upload to BigQuery from GCS
You can upload data to BigQuery from GCS using two methods: (A) Using console UI (B) Using the command line
(A) Uploading the data using the web console UI:
1. Go to the BigQuery from the menu option
2. On UI click on create a dataset, provide dataset name and location
3. Then click on the name of created dataset name. Click on create table option and provide the dataset name, table name, project name, table type.
(B) Using data using the command line
To open the command-line tool, on the GCS home page click on the cloud shell icon shown below:
The Syntax of the bq command line to load the file in the BigQuery table:
bq --location=[LOCATION] load --source_format=[FORMAT] [DATASET].[TABLE]
[PATH_TO_SOURCE] [SCHEMA]
[LOCATION] is an optional parameter that represents Location name like “us-east”
[FORMAT] to load CSV file set it to CSV
[DATASET] dataset name.
[TABLE] table name to load the data.
[PATH_TO_SOURCE] path to source file present on the GCS bucket.
[SCHEMA] Specify the schema
Note: Autodetect flag recognizes the table schema
You can specify your schema using bq command line:
bq --location=US load --source_format=CSV your_dataset.your_table gs://your_bucket/your_data.csv ./your_schema.json
Your target table schema can also be autodetected:
bq --location=US load --autodetect --source_format=CSV your_dataset.your_table gs://mybucket/data.cs
BigQuery command line interface offers us to 3 options to write to an existing table.
Overwrite the tablebq --location = US load --autodetect --replace --source_file_format = CSV your_target_dataset_name.your_target_table_name gs://source_bucket_name/path/to/file/source_file_name.csv
Append data to the table bq --location = US load --autodetect --noreplace --source_file_format = CSV your_target_dataset_name.your_table_table_name gs://source_bucket_name/path/to/file/source_file_name.csv ./schema_file.json
Adding new fields in the target table bq --location = US load --noreplace --schema_update_option = ALLOW_FIELD_ADDITION --source_file_format = CSV your_target_dataset.your_target_table gs://bucket_name/source_data.csv ./target_schema.json
Step 5: Update the Target Table in BigQuery
The data that was matched in the above-mentioned steps have not done complete data updates on the target table. The data is stored in an intermediate data table, this is because GCS is a staging area for BigQuery upload. Hence, the data is stored in an intermediate table before been uploaded to BigQuery
There two ways of updating the final table as explained below:
Update the rows in the final table, Then insert new rows from the intermediate tableUPDATE target_table t SET t.value = s.value FROM intermediate_table s WHERE t.id = s.id; INSERT target_table (id, value) SELECT id, value FROM intermediate_table WHERE NOT id IN (SELECT id FROM target_table);
Delete all the rows from the final table which are in the intermediate table, Then insert all the rows newly loaded in the intermediate table. Here the intermediate table will be in truncate and load mode DELETE FROM final_table f WHERE f.id IN (SELECT id from intermediate_table); INSERT data_setname.target_table(id, value) SELECT id, value FROM data_set_name.intermediate_table;
That’s it! Your Amazon Aurora to Google BigQuery data transfer process is complete.
Limitations of using Custom Code to Move Data from Aurora to BigQuery
The manual approach will allow you to move your data from Amazon Aurora to BigQuery successfully, however it suffers from the following limitations:
Writing custom code would benefit only if you are looking for one-time data migration from Amazon Aurora to BigQuery.
When you have a use case where data needs to be migrated on an ongoing basis or in real-time, you would have to move it in an incremental manner. The above custom code ETL would fail here. You would need to write additional lines of code to achieve this real-time data migration.
There are chances that the custom code breaks if the source schema gets changed.
If in future you identify the data transformations needs to be applied on data, you would need extra time and resources.
Since you have developed this custom code to migrate data you have to maintain the standard of the code to achieve the business goals.
In the custom code approach, You have to focus on both business and technical details.
ETL code is fragile with a high susceptibility to break the entire process that may cause inaccurate and delay in data availability in BigQuery.
Method 2: Using LIKE.TG Data to Move Data from Aurora to BigQuery
Using a fully managed, easy-to-use Data Pipeline platform likeLIKE.TG , you can load your data from Aurora to BigQuery in a matter of minutes. LIKE.TG is fully managed and completely automates the process of not only loading data from your desired source but also enriching the data and transforming it into an analysis-ready form without having to write a single line of code. Its fault-tolerant architecture ensures that the data is handled in a secure, consistent manner with zero data loss.
Get Started with LIKE.TG for free
This can be achieved in a code-free, point-and-click visual interface. Here are simple steps to replicate Amazon Aurora to BigQuery using LIKE.TG :
Step 1: Connect to your Aurora DB by providing the proper credentials.
Step 2: Select one of the following the replication mode:
Full dump (load all tables)
Load data from Custom SQL Query
Fetch data using BinLog
Step 3: CompleteAurora to BigQueryMigration by providing information about your Google BigQuery destination such as the authorized Email Address, Project ID, etc.
About Amazon Aurora
Amazon Aurora is a popular relational database developed by Amazon. It is one of the most widely used Databases for low latency data storage and data processing. This Database operates on Cloud technology and is easily compatible with MySQL and PostgreSQL. This way it provides performance and accessibility similar to traditional databases at a relatively low price. Moreover, it is simple to use and it has Amazon security and reliability features.
Amazon Aurora is a MySQL-compatible relational database used by businesses. Aurora offers better performance and cost-effective price than traditional MySQL. It is primarily used for a transactional or operational database. It is specifically not recommended for analytics.
About Google BigQuery
BigQuery is a Google-managed cloud-based data warehouse service. This is intended to store, process and analyze large volume (Petabytes) of data to make data analysis more accurate. BigQuery is known to give quick results with very minimal cost and great performance. Since infrastructure is managed by Google, you as a developer, data analyst or data scientist can focus on uncovering meaningful insights using native SQL.
Conclusion
This blog talks about the two methods you can implement to move data from Aurora to BigQuery in a seamless fashion.
Visit our Website to Explore LIKE.TG
With LIKE.TG , you can achieve simple and efficient Data Replication from Aurora to BigQuery. LIKE.TG can help you move data from not just Aurora DB but 100s of additional data sources.
Sign Up for a 14-Day Free Trial with LIKE.TG and experience a seamless, hassle-free data loading experience from Aurora DB to Google BigQuery. You can also have a look at the unbeatable pricing that will help you choose the right plan for your business needs.
Share your understanding of the Amazon Aurora BigQuery Integration in the comments below!
Zendesk to Redshift: 2 Easy Steps to Move Data
Getting data from Zendesk to Redshift is the right step towards centralizing your organization’s customer interactions and tickets. Analyzing this information can help you gain a deeper understanding of the overall health of your Customer Support, Agent Performance, Customer Satisfaction, and more. Eventually, you would be able to unlock deep insights that grow your business. What is Zendesk?
Zendesk is a Cloud-based all-in-one Customer Support Platform widely used by a broad spectrum of enterprises, from large corporations to small startups. Using any data — from anywhere — Zendesk presents businesses with a comprehensive view of the consumer. Hence, its products are built to include and innovate depending on user input collected through beta and Early Access Programs (EAPs).
Companies that have outgrown their current CRM or are investigating other systems, currently utilize Zendesk’s Support Platform, or deal with a high volume of incoming customer inquiries can benefit from Zendesk. The Zendesk Support Platform helps companies thrive in self-service and proactive engagement by delivering consistent support. Organizations can manage all of their one-on-one customer interactions using Zendesk’s one Customer Support Platform.
Zendesk CRM Software allows you to deliver personalized support where consumers expect it, expand your customer experience process, and optimize your operations. Businesses can find a range of Zendesk products with solutions catered to their needs. Out of its suite of CRM products, Zendesk Sunshine is a contemporary CRM Platform built on top of Amazon Web Services (AWS).
Zendesk CRM Software Products are simple and easy to use, thereby allowing business teams to focus on making the most of their time and energy by selling and answering customer questions. This helps in the expansion of businesses without disrupting software services.
For more information on Zendesk Solution, do visit Zendesk’s informative blog here.
Solve your data replication problems with LIKE.TG ’s reliable, no-code, automated pipelines with 150+ connectors.Get your free trial right away!
What is Amazon Redshift?
Amazon Redshift is a petabyte-scale, fully managed data warehouse service that stores data in the form of clusters that you can access with ease. It supports a multi-layered architecture that provides robust integration support for various business intelligence tools and a fast query processing functionality. Apart from business intelligence tools, you can also connect Amazon Redshift to SQL-based clients. It further allows users and applications to access the nodes independently.
Being a fully-managed warehouse, all administrative tasks associated with Amazon Redshift, such as creating backups, security, etc. are taken care of by Amazon.
For further information on Amazon Redshift, you can check our other post here.
For most recent updates on Amazon.com, Inc, visit the Amazon Statistics and Facts page
Methods to Move Data from Zendesk to Redshift
There are two popular methods to perform Zendesk to Redshift data replication.
Method 1: Copying your Data from Zendesk to Redshift Using Custom Scripts
You would have to spend engineering resources to write custom scripts to pull the data using Zendesk API, move data to S3, and then to Redshift destination tables. To achieve data consistency and ensure no discrepancies arise, you will have to constantly monitor and invest in maintaining the infrastructure.
Method 2: Moving your Data from Zendesk to Redshift Using LIKE.TG
LIKE.TG is an easy-to-use Data Integration Platform that can move your data from Zendesk (Data Source Available for Free in LIKE.TG ) to Redshift in minutes. You can achieve this on a visual interface without writing a single line of code. Since LIKE.TG is fully managed, you would not have to worry about any monitoring and maintenance activities. This will ensure that you stop worrying about data and start focussing on insights.
Get Started with LIKE.TG for Free
Methods to Move Data from Zendesk to Redshift
Method 1: Copying your Data from Zendesk to Redshift Using Custom ScriptsMethod 2: Moving your Data from Zendesk to Redshift Using LIKE.TG
Let us, deep-dive, into both these methods.
Method 1: Copying your Data from Zendesk to Redshift Using Custom Scripts
Here is a glimpse of the broad steps involved in this:
Write scripts for some or all of Zendesk’s APIs to extract data. If you are looking to get updated data on a periodic basis, make sure the script can fetch incremental data. For this, you might have to set up cron jobsCreate tables and columns in Redshift and map Zendesk’s JSON files to this schema. While doing this, you would have to take care of the data type compatibility between Zendesk data and Redshift. Redshift has a much larger list of datatypes than JSON, so you need to make sure you map each JSON data type into one supported by RedshiftRedshift is not designed for line-by-line updates or SQL “upsert” operations. It is recommended to use an intermediary such as AWS S3. If you choose to use S3, you will need to Create a bucket for your dataWrite an HTTP PUT for your AWS REST API using Curl or PostmanOnce the bucket is in place, you can then send your data to S3Then you can use a COPY command to get your data from S3 into Redshift In addition to this, you need to make sure that there is proper monitoring to detect any change in the Zendesk Schema. You would need to modify and update the script if there is any change in the incoming data structure
Method 2: Moving your Data from Zendesk to Redshift Using LIKE.TG
LIKE.TG is fully managed and completely automates the process of not only loading data from your desired source but also enriching the data and transforming it into an analysis-ready form without having to write a single line of code. Its fault-tolerant architecture ensures that the data is handled in a secure, consistent manner with zero data loss.
Using the LIKE.TG Data Integration Platform, you can seamlessly replicate data from Zendesk to Redshift with 2 simple steps.
Step 1: Configure the data source using Zendesk API token, Pipeline Name, Email, and Sub Domain.
Step 2: Configure the Redshift warehouse where you want to move your Zendesk data by giving the Database Port, Database User, Database Password, Database Name, Database Schema, Database Cluster Identifier, and Destination Name.
LIKE.TG does all the heavy-weightlifting and will ensure your data is moved reliably to Redshift in real-time.
Sign up here for a 14-Day Free Trial!
Advantages of Using LIKE.TG
The LIKE.TG Data Integration platform lets you move data from Zendesk (Data Source Available for Free in LIKE.TG ) to Redshift. Here are some other advantages:
No Data Loss – LIKE.TG ’s fault-tolerant architecture ensures that data is reliably moved from Freshdesk to Redshift without data loss.100’s of Out of the Box Integrations – In addition to Freshdesk, LIKE.TG can bring data from 100+ Data Sources (Including 30+ Free Data Sources)into Redshift in just a few clicks. This will ensure that you always have a reliable partner to cater to your growing data needs.Minimal Setup – Since LIKE.TG is fully managed, setting up the platform would need minimal effort and bandwidth from your end.Automatic schema detection and mapping – LIKE.TG automatically scans the schema of incoming Freshdesk data. If any changes are detected, it handles this seamlessly by incorporating this change on Redshift.Exceptional Support – LIKE.TG provides 24×7 support to ensure that you always have Technical support for LIKE.TG is provided on a 24/7 basis over both Email and Slack.
Challenges While Transferring Data from Zendesk to Redshift Using Custom Code
Before you write thousands of lines of code to copy your data, you need to familiarize yourself with the downside of this approach.
More often than not, you will need to monitor the Zendesk APIs for changes, check your data tables to make sure all columns are being updated correctly. Additionally, you have to come up with a data validation system to ensure all your data is being transferred accurately.
In an ideal world, all of this is perfectly doable. However, in today’s agile work environment, it usually means expensive engineering resources are scrambling just to stay on top of all the possible things that can go wrong.
Think about the following:
How will you know if an API has been changed by Zendesk?How will you find out when the Redshift is not available for writing?Do you have the resources to rewrite or update the code periodically?How quickly can you update the schema in Redshift in response to a request for more data?
On the other hand, a ready-to-use platform like LIKE.TG rids you of all these complexities. This will not only provide you with analysis-ready data but will also empower you to focus on uncovering meaningful insights instead of wrangling with Zendesk data.
Conclusion
The flexibility you get from building your own custom solution to move data from Zendesk to Redshift comes with a high and ongoing cost in terms of engineering resources.
In this article, you learned about Zendesk to Redshift Data Migration methods. You also learned about the Zendesk Software and Amazon Redshift Data warehouse. However, integrating and analyzing your data from a diverse set of data sources can be challenging and this is where LIKE.TG Data comes into the picture.
Visit our Website to Explore LIKE.TG
LIKE.TG is a No-code Data Pipeline and has awesome 100+ pre-built integrations that you can choose from. LIKE.TG can help you integrate your data from numerous sources such as Zendesk (Data Source Available for Free in LIKE.TG ) and load it into a destination to analyze real-time data with a BI tool and create your Dashboards. It will make your life easier and make data migration hassle-free. It is user-friendly, reliable, and secure.
Want to take LIKE.TG for a spin? Sign Up for a 14-day free trial and experience the feature-rich LIKE.TG suite first hand. You can also have a look at the unbeatablepricingthat will help you choose the right plan for your business needs.
Share your experience of learning about Zendesk to Reshift Data Migration. Let us know in the comments below!
Snowflake Data Warehouse 101: A Comprehensive Guide
Snowflake Data Warehouse delivers essential infrastructure for handling a Data Lake, and Data Warehouse needs. It can store semi-structured and structured data in one place due to its multi-clusters architecture that allows users to independently query data using SQL. Moreover, Snowflake as a Data Lake offers a flexible Query Engine that allows users to seamlessly integrate with other Data Lakes such as Amazon S3, Azure Storage, and Google Cloud Storage and perform all queries from the Snowflake Query Engine.This article will give you a comprehensive guide to Snowflake Data Warehouse. You will get to know about the architecture and performance of Snowflake Data Warehouse. You will also explore the Features, Pricing, Advantages, Limitations, and many more in further sections. Let’s get started.
What is Snowflake Data Warehouse?
Snowflake Data Warehouse is a fully managed, cloud data warehouse available to customers in the form of Software-as-a-Service (SaaS) or Database-as-a-Service (DaaS). The phrase ‘fully managed’ means users shouldn’t be concerned about any of the back-end work like server installation, maintenance, etc. A Snowflake Data Warehouse instance can easily be deployed on any of the three major cloud providers –
Amazon Web Services (AWS)
Google Cloud Storage (GCS)
Microsoft Azure
The customer can select which cloud provider they want for their Snowflake instance. This comes in handy for firms working with multiple cloud providers. Snowflake querying follows the standard ANSI SQL protocol and it supports fully structured as well as semi-structured data like JSON, Parquet, XML, etc.
To know more about Snowflake Data Warehouse, visit this link.
Architecture of Snowflake Data Warehouse
Here’s a diagram depicting the fundamental Snowflake architecture –
At the storage level, there exists cloud storage that includes both shared-disk (for storing persistent data) as well as shared-nothing (for massively parallel processing or MPP of queries with portions of data stored locally) entities. Ingested cloud data is optimized before storing in a columnar format. The data ingestion, compression, and storage are fully managed by Snowflake; as a matter of fact, this stored data is not directly accessible to users and can only be accessed via SQL queries.
Next up is the query processing level, this is where the SQL queries are executed. All the SQL queries are part of a particular cluster that consists of several compute nodes (this is customizable) and are executed in a dedicated, MPP environment. These dedicated MPPs are also known as virtual data warehouses. It is not uncommon for a firm to have separate virtual data warehouses for individual business units like sales, marketing, finance, etc. This setup is more costly but it ensures data integrity and maximum performance.
Finally, we have cloud services. As mentioned in the boxes, these are a bunch of services that help tie together the different units of Snowflake ranging from access control/data security to infrastructure and storage management. Know more about Snowflake Data Warehouse architecture here.
Performance of Snowflake Data Warehouse
The Snowflake Features has been designed for simplicity and maximum efficiency via parallel workload execution through the MPP architecture. The idea of increasing query performance is switched from the traditional manual performance tuning options like indexing, sorting, etc. to following certain generally applicable best practices. These include the following –
Workload Separation
Persisted or Cached Results
1. Workload Separation
Because it is super easy to spin up multiple virtual data warehouses with the desired number of compute nodes, it is a common practice to divide the workloads into separate clusters based on either Business Units (sales, marketing, etc.) or type of operation (data analytics, ETL/BI loads, etc.) It is also interesting to note that virtual data warehouses can be set to auto-suspend (default is 10 minutes) when they go inactive or in other words, no queries are being executed. This feature ensures that customers don’t accrue a lot of costs while having many virtual data warehouses operate in parallel.
2. Persisted or Cached Results
Query results are stored or cached for a certain timeframe (default is 24 hours). This is utilized when a query is essentially re-run to fetch the same result. Caching is done at two levels – local cache and result cache. Local cache provides the stored results for users within the same virtual data warehouse whereas result cache holds results that could be retrieved by users regardless of the virtual data warehouse they belong to.
ETL and Data Transfer in Snowflake Data Warehouse
ETL refers to the process of extracting data from a certain source, transform the source data to a certain format (typically the format that matches up to the target table) and load this data into the desired target table. The source and target are often two different entities or database systems. Some examples include a flat-file load into an Oracle table, a CRM data export into an Amazon Redshift table, data migration from a Postgres database onto a Snowflake Data Warehouse, etc.
Snowflake has been designed to connect to a multitude of data integrators using either a JDBC or an ODBC connection.
In terms of loading data, Snowflake offers two methods –
Bulk Loading This is basically batch loading of data files using the COPY command. COPY command lets users copy data files from the cloud storage into Snowflake tables. This step involves writing code that typically gets scripted to run at scheduled intervals.
Continuous LoadingIn this case, smaller amounts of data are extracted from the staging environment (as soon as they are available) and loaded in quick increments into a target Snowflake table. The feature named Snowpipe makes this possible.
Snowflake offers a bunch of transformation options for the incoming data before the load. This is achieved through the COPY command. Some of these include –
Reordering of columns
Column omissions
Casting columns in the select statement
When it comes to dealing with these intricacies of ETL, it is best to implement a fully managed Data Integration Software solution like LIKE.TG .
Scaling on Snowflake Data Warehouse
Previously, the article briefly touched on virtual data warehouses, clusters, nodes, etc. Now, let’s dive deeper into these areas to better understand how can one tweak these to enable scaling most efficiently.
Snowflake provides for two kinds of scaling –
Scaling up
Scaling out
1. Scaling up
Scaling up means resizing a virtual data warehouse in terms of its nodes. A Snowflake Data Warehouse user can easily modify the number of nodes assigned to a virtual data warehouse. This can be done even while the data warehouse is in operation, although, only the queries that are newly submitted or the ones already queued will be affected by the changes. Apart from the ‘auto suspend’ feature described before, there is a provision to set the minimum and a maximum number of nodes per warehouse.
After setting the maximum and the minimum number of nodes, let Snowflake decide when to scale up or down the number of nodes based on the warehouse activity. This is an efficient way to set up your cluster. Scaling is particularly suitable in the following cases –
To improve query performance in case of larger and more complex queries.
When the queries are submitted using the same local cache.
The option to scale out is not there.
Scaling out is generally preferred, especially with the more recent addition and availability of multi-cluster warehouses, which will be discussed next.
2. Scaling out
Scaling out before referred to adding more virtual data warehouses. However, with the advent of the recent multi-cluster warehouse feature, the old way has become more or less obsolete. So let’s get into the multi-cluster warehouse set up – as the name suggests, in this type of arrangement, a data warehouse can have multiple clusters each having a different set of nodes. Even though Snowflake provides for a ‘maximized’ option, which is an instruction for the data warehouse to have all of its clusters running regardless, almost always, you would want to set this to the ‘Auto-Scale’ mode. Here’s an example of how Auto scaling looks like –
As can be seen, you can set a bunch of parameters in a way that works best for you.
Features like Auto-scale and Auto-suspend provides flexibility for query execution as well as cost management. Let’s see how that works in the next section.
Pricing of Snowflake Data Warehouse
Snowflake has a fairly simple pricing model – charges apply to storage and compute aka virtual data warehouses. The storage is charged for every Terabyte (TB) of usage while compute is charged at a per second per computing unit (or credit) basis. Before getting into an example, it is worthwhile to note that Snowflake offers two broader pricing models –
On-demand – Pay per your usage of storage and compute
Pre-purchased – A set capacity of storage and compute could be pre-purchased at a discount as opposed to accruing the same usage at a higher cost via on-demand.
Now onto the usage pricing examples, the two popular on-demand pricing models available are as follows –
Snowflake Standard Edition
Snowflake Enterprise Sensitive Data Edition
1. Snowflake Standard Edition
Storage costs you around $23 per TB and computes costs would be approximately 4 cents per minute per credit, billed for a minimum time of one minute.
2. Snowflake Enterprise Sensitive Data Edition
Being a premium version with advanced encryption and security features as well as HIPAA compliance, storage costs roughly the same while compute gets bumped to around 6.6 cents per minute per credit.
The above charges for compute apply only to ‘active’ data warehouses and any inactive session time is ignored for billing purposes. This is why it’s important and profitable to set features like auto-suspend and auto-scale in a way as to minimize the charges accrued for idle warehouse periods.
Data Security Maintenance on Snowflake Data Warehouse
Data security is dealt with very seriously at all levels of the Snowflake ecosystem.
Regardless of the version, all data is encrypted using AES 256, and the higher-end enterprise versions have additional security features like period rekeying, etc.
As Snowflake is deployed on a cloud server like AWS or MS Azure, the staging data files (ready for loading/unloading) in these clouds get the same level of security as the staging files for Amazon Redshift or Azure SQL Data Warehouse. While in transit, the data is heavily protected using industrial-strength secure protocols. Know more about Snowflake Data Warehouse security here.
As for maintenance, Snowflake is a fully managed cloud data warehouse, end users have practically nothing to do to ensure a smooth day-to-day operation of the data warehouse. This helps customers tremendously to focus more on the front-end data operations like data analysis and insights generation, and not so much on the back-end stuff like server performance and maintenance activities.
Key Features of Snowflake Data Warehouse
Ever since the Snowflake Data Warehouse got into the growing cloud Data Warehouse market, it has established itself as a solid choice. That being said, here are some things to consider that might make it particularly suitable for your purposes –
It offers five editions going from ‘standard’ to ‘enterprise’. This is a good thing as customers have options to choose from based on their specific needs.
The ability to separate storage and compute is something to consider and how that relates to the kind of data warehousing operations you’d be looking for.
Snowflake is designed in a way to ensure the least user input and interaction required for any performance or maintenance-related activity. This is not a standard among cloud DWHs. For instance, Redshift needs user-driven data vacuuming.
It has some cool querying features like undrop, fast clone, etc. These might be worth checking out as they may account for a good chunk of your day-to-day data operations.
Pros and Cons of Snowflake Data Warehouse
Here are the advantages and disadvantages of using Snowflake Data Warehouse as your data warehousing solution –
Know more about Snowflake Data Warehouse features here.
Why was the Company Called Snowflake?
One of the reasons why the company called Snowflake is that Snowflake has many edges in multiple directions. So as the Snowflake Data Warehouse offers virtual Data Warehousing allowing users to create and organize Data Warehouses just like dimensions tables surround fact tables. The architecture of Snowflake Data Warehouse resembles the Snowflake. Another reason for its name is that the early investors and founders love the winter season, and the name is given as a tribute to it.
Alternatives for Snowflake Data Warehouse
The shift towards cloud data warehousing solutions picked up real pace in the late 2000s, mostly thanks to Google and Amazon. Since then, so many traditional database vendors like Microsoft, Oracle, etc. as well as newer players like Vertica, Panoply, etc. have entered this space. Having said that, let’s take a look at some of the popular alternatives to Snowflake.
Amazon Redshift vs Snowflake
Google BigQuery vs Snowflake
Azure SQL Data Warehouse vs Snowflake
1. Amazon Redshift vs Snowflake
The cloud data warehousing solution of one of the largest cloud providers (Amazon Web Services or AWS) in this domain that can work with Petabyte scale data. Supports fully structured as well as some semi-structured data like JSON, stored in columnar format. However, compute and storage are not separate like Snowflake. Generally, a costlier alternative to Snowflake but more robust and faster with optimizable tuning techniques like materialized views, sorting/distribution keys, etc.
2. Google BigQuery vs Snowflake
Also, a columnar, structured data warehouse that is part of the Google Cloud Services suite. It has other features comparable to Amazon Redshift like MPP architecture. It can be easily integrated with other data vendors, etc. BigQuery is similar to Snowflake in the sense that storage and compute are treated separately, however, instead of a discounted, pre-purchase pricing model (as in Snowflake), BigQuery services are charged monthly/yearly at a flat rate.
3. Azure SQL Data Warehouse vs Snowflake
Azure is gaining in popularity by the day and is especially known for performing analytics tasks. It is part of the Microsoft suite of products so there is a natural advantage for users and firms dealing with MS products and technologies like SQL Server, SSRS, SSIS, T-SQL, etc. Also, a columnar database, with storage and compute separated. Azure SQL engine is also known for its high level of concurrency.
How to Get Started with Snowflake?
Here are some resources for you to get started with Snowflake.
Snowflake Documentation: This is the official documentation from Snowflake about their services, features, and provides clarity on all aspects of this data warehouse.
Snowflake ecosystem of partner integrations. This takes you to their integration options to third-party partners and technologies having native connectivity to Snowflake. This includes various data integration solutions to BI tools to ML and data science platforms.
Pricing page: You can check out this link to know about their pricing plans which also contains guides and relevant contacts for Snowflake consultants.
Community forums: There are different Community Groups under major topics on Snowflake website. You can check out Snowflake Lab on GitHub or visit StackOverflow or Reddit forums as well.
Snowflake University and Hands-on Lab: This contains many courses for people with varying expertise levels.
YouTube channel: You can check out their YouTube for various videos that include tutorials, customer success videos etc.
Conclusion
As can be gathered from the article so far, the Snowflake Data Warehouse is a secure, scalable, and popular cloud data warehousing solution. It has achieved this status by constantly re-engineering and catering to a wide variety of industrial use cases that helped win over so many clients.You can have a good working knowledge of Snowflake by understandingSnowflake Create Table. You can have a look at 8 Best Data Warehousing Tools.
Visit our Website to Explore LIKE.TG
Frequently Asked Questions
Why Snowflake is better than SQL?
Snowflake’s approach to data modeling is a schema-less approach. This will help you to efficiently store and query data without a predefined schema. On the other hand, SQL Server has a traditional relational data modeling approach which needs creating schemas before you can store your data.
2. Snowflake warehouse vs. database
Snowflake and a database are different in the sense that Snowflake is built of database architectures and utilizes database tables to store data. It also uses massively parallel processing capability to compute clusters to process queries for the data stored in it. A database is an electronically stored and structured data collection.
3. What is the difference between Snowflake and ETL?
Snowflake is a good SaaS data cloud platform and data warehouse that can store and help you query your data efficiently. ETL (extract, transform and load) is the process of moving data from various data sources to a single destination such as a data warehouse.
Businesses can use automated platforms like LIKE.TG Data to set the integration and handle the ETL process. It helps you directly transfer data from a source of your choice to a Data Warehouse, Business Intelligence tools, or any other desired destination in a fully automated and secure manner without having to write any code and will provide you with a hassle-free experience.
Want to take LIKE.TG for a spin? Sign Up for a 14-day free trial and experience the feature-rich LIKE.TG suite first hand. You can also have a look at the unbeatable pricing that will help you choose the right plan for your business needs.
Share your experience of using Snowflake Data Warehouse
Google Ads to BigQuery: 2 Easy Methods
Google Ads is one of the modern marketer’s favorite channels to grow the business. If you are someone who has even glanced at the Google Ads interface would know that Google provides a gazillion data points to optimize and run personalized ads. The huge amount of diverse data points available makes performance tracking a complex and time-consuming task.Well, the complexity increases further when Businesses want to build a 360-degree understanding of how Google Ads fare in comparison to other marketing initiatives (Facebook Ads, LinkedIn Ads, etc.). To enable a detailed, convoluted analysis like this, it becomes important to extract and load the data from all the different marketing platforms used by a company to a robust cloud-based Data Warehouse like Google BigQuery. This blog talks about the different approaches to use when loading data from Google Ads to BigQuery.
What are the Methods to Connect Google Ads to BigQuery?
Here are the methods you can use to establish a connection from Google Ads to BigQuery in a seamless fashion:
Method 1: Using LIKE.TG to Connect Google Ads to BigQuery
Method 2: Using BigQuery Data Transfer Service to Connect Google Ads to BigQuery
Method 1: Using LIKE.TG to Connect Google Ads to BigQuery
LIKE.TG works out of the box with both Google Ads and BigQuery. This makes the data export from Google Ads to BigQuery a cakewalk for businesses. LIKE.TG is fully managed and completely automates the process of not only loading data from your desired source but also enriching the data and transforming it into an analysis-ready form without having to write a single line of code. Its fault-tolerant architecture ensures that the data is handled in a secure, consistent manner with zero data loss.
With LIKE.TG ’s point-and-click interface, you can load data in just two steps:
Step 1: Configure the Google Ads data source by providing required inputs like the Pipeline Name, Select Reports, and Select Accounts.
Step 2: Configure the BigQuery destination where the data needs to be loaded by providing details like Destination Name, Dataset ID, Project ID, GCS Bucket, and Sanitize Table/Column Names.
Once this is done, your data will immediately start moving from Google Ads to BigQuery.
Method 2: Using BigQuery Data Transfer Service to Connect Google Ads to BigQuery
Before you begin this process, you would need to create a Google Cloud project in the console and enable BigQuery’s API. Also, you need to enable billing on your Google Cloud project. This is a mandatory step that needs to be executed once per project. In case you already have set up a project, you would only need to enable the BigQuery API.
On the BigQuery platform, hit the “Create a Dataset” button and fill out the Dataset ID and Location fields. This will create a dedicated space for storing your Google Ads data.
Next, enable BigQuery Data Transfer Service from the web UI. Note – you would need to have admin access to transfer and update the data.
Click on the “Add Transfer” button. Select “Google Ads” in the source and destination dataset.
BigQuery’s data connector allows you to set up refresh windows (the max offered is 30 days) and a schedule to export the Google Ads data.
Now, enter your Google Ads Customer ID or Manager Account (MCC).
Next, allow the ‘Read’ access to the Google Ads Customer ID. This is needed for the transfer configuration.
It is generally a good practice to opt for email notification in case a loading failure occurs.
Despite this being a native integration with two products available from Google, there are a few limitations that make companies look out for other options.
Limitations of using BigQuery Data Transfer Service to Connect Google Ads to BigQuery
BigQuery Data Transfer Service supports a maximum of 180 days per data backfill request. This means you would have to manually transfer any historical data.
Since the business teams that need this data are not very tech-savvy, using this approach would necessarily mean that a company would need to invest tech bandwidth to move data. This is an expensive affair.
While transferring data, you need to remember that BigQuery doesn’t allow joining datasets saved in different location servers later. So, always create datasets in the same locations across your project. Hence, you need to be careful initially while setting up as there’s no option to change the location later.
Say you want to convert the timestamp in the data from UTC to PST, such modifications are not supported on the BigQuery Transfer service.
BigQuery transfer service can only bring data from Google products into BigQuery. In the future, in case you want to bring data from other sources such as Salesforce, Mailchimp, Intercom, and more, you would need to use another service.
What can you achieve by replicating data from Google Ads to BigQuery?
Here’s a little something for the data analyst on your team. We’ve mentioned a few core insights you could get by replicating data from Google Ads to BigQuery, does your use case make the list?
Know your customer: Get a unified view of your customer journey by combing data from all your channels and user touchpoints. Easily visualize each stage of your sales funnel and quickly derive actionable insights.
Supercharge your conversion rates: Leverage analysis-ready impressions, website visits, clicks data from multiple sources in a single place. Understand what content works best for you and double down on it to increase conversions.
Boost Marketing ROI: With detailed campaign reports at your grasp in near-real time, reallocate your budget to the most effective Ad strategy.
Conclusion
This blog talks about the different methods you can use to establish a connection in a seamless fashion: using BigQuery Data Transfer Service and a third-party tool, LIKE.TG .
Apart from providing data integration in Google Ads for free, LIKE.TG enables you to move data from a variety of data sources (Databases, Cloud Applications, SDKs, and more). These include products from both within and outside of the Google Suite.
Share your experience of replicating data! Let us know in the comments section below!
Salesforce to PostgreSQL: 2 Easy Methods
Even though Salesforce provides an analytics suite along with its offerings, most organizations will need to combine their customer data from Salesforce to data elements from various internal and external sources for decision making. This can only be done by importing Salesforce data into a data warehouse or database. The Salesforce Postgres integration is a powerful way to store and manage your data in an effective manner. Other than this, Salesforce Postgres sync is another way to store and manage data by extracting and transforming it. In this post, we will look at the steps involved in loading data from Salesforce to PostgreSQL.
Methods to Connect Salesforce to PostgreSQL
Here are the methods you can use to set up a connection from Salesforce to PostgreSQL in a seamless fashion as you will see in the sections below.
Reliably integrate data with LIKE.TG ’s Fully Automated No Code Data Pipeline
Given how fast API endpoints etc can change, creating and managing these pipelines can be a soul-sucking exercise. LIKE.TG ’s no-code data pipeline platform lets you connect over 150+ sources in a matter of minutes to deliver data in near real-time to your warehouse. It also has in-built transformation capabilities and an intuitive UI.
All of this combined with transparent pricing and 24×7 support makes us the most loved data pipeline software in terms of user reviews. Take our 14-day free trial to experience a better way to manage data pipelines.
Get started for Free with LIKE.TG !
Method 1: Using LIKE.TG Data to Connect Salesforce to PostgreSQL
An easier way to accomplish the same result is to use a code-free data pipeline platform likeLIKE.TG Datathat can implement sync in a couple of clicks.
LIKE.TG does all heavy lifting and masks all the data migration complexities to securely and reliably deliver the data from Salesforce into your PostgreSQL database in real-time and for free. By providing analysis-ready data in PostgreSQL, LIKE.TG helps you stop worrying about your data and start uncovering insights in real time.
Sign up here for a 14-day Free Trial!
With LIKE.TG , you could move data from Salesforce to PostgreSQL in just 2 steps:
Step 1: Connect LIKE.TG to Salesforce by entering the Pipeline Name.
Step 2: Load data from Salesforce to PostgreSQL by providing your Postgresql databases credentials like Database Host, Port, Username, Password, Schema, and Name along with the destination name.
Check out what makes LIKE.TG amazing:
Data Transformation: It provides a simple interface to perfect, modify, and enrich the data you want to transfer.
Schema Management: LIKE.TG can automatically detect the schema of the incoming data and maps it to the destination schema.
Incremental Data Load: LIKE.TG allows the transfer of data that has been modified in real-time. This ensures efficient utilization of bandwidth on both ends.
Method 2: Using Custom ETL Scripts to Connect Salesforce to PostgreSQL
The best way to interact with Salesforce is to use the different APIs provided by Salesforce itself. It also provides some utilities to deal with the data. You can use these APIs for Salesforce PostgreSQL integration. The following section attempts to provide an overview of these APIs and utilities.
Salesforce REST APIs: Salesforce REST APIs are a set of web services that help to insert/delete, update and query Salesforce objects. To implement a custom application using Salesforce in mobile or web ecosystem, these REST APIs are the preferred method.
Salesforce SOAP APIs: SOAP APIs can establish formal contracts of API behaviour through the use of WSDL. Typically Salesforce SOAP APIs are when there is a requirement for stateful APS or in case of strict transactional reliability requirement. SOAP APIs are also sometimes used when the organization’s legacy applications mandate the protocol to be SOAP.
Salesforce BULK APIs: Salesforce BULK APIs are optimized for dealing with a large amount of data ranging up to GBs. These APIs can run in a batch mode and can work asynchronously. They provide facilities for checking the status of batch runs and retrieving the results as large text files. BULK APIs can insert, update, delete or query records just like the other two types of APIs.
Salesforce Bulk APIs have two versions – Bulk API and Bulk API 2.0. Bulk API 2.0 is a new and improved version of Bulk API, which includes its own interface. Both are still available to use having their own set of limits and features.
Both Salesforce Bulk APIs are based on REST principles. They are optimized for working with large sets of data. Any data operation that includes more than 2,000 records is suitable for Bulk API 2.0 to successfully prepare, execute, and manage an asynchronous workflow that uses the Bulk framework. Jobs with less than 2,000 records should involve “bulkified” synchronous calls in REST (for example, Composite) or SOAP.
Using Bulk API 2.0 or Bulk API requires basic knowledge of software development, web services, and the Salesforce user interface. Because both Bulk APIs are asynchronous, Salesforce doesn’t guarantee a service level agreement.
Salesforce Data Loader: Data Loader is a Salesforce utility that can be installed on the desktop computer. It has functionalities to query and export the data to CSV files. Internally this is accomplished using the bulk APIs.
Salesforce Sandbox: A Salesforce Sandbox is a test environment that provides a way to copy and create metadata from your production instance. It is a separate environment where you can test with data (Salesforce records), including Accounts, Contacts, and Leads.It is one of the best practices to configure and test in a sandbox prior to making any live changes. This ensures that any development does not create disruptions in your live environment and is rolled out after it has been thoroughly tested. The data that is available to you is dependent on the sandbox type. There are multiple types, and each has different considerations. Some sandbox types support or require a sandbox template.
Salesforce Production: The production Environment in Salesforce is another type of environment available for storing the most recent data used actively for running your business. Many of the production environments in use today are Salesforce CRM customers that purchased group, professional, enterprise, or unlimited editions. Using the production environment in Salesforce offers several significant benefits, as it serves as the primary workspace for live business operations.
Here are the steps involved in using Custom ETL Scripts to connect Salesforce to PostgreSQL:
Step 1: Log In to Salesforce
Step 2: Create a Bulk API Job
Step 3: Create SQL Query to Pull Data
Step 4: Close the Bulk API Job
Step 5: Access the Resulting API
Step 6: Retrieve Results
Step 7: Load Data to PostgreSQL
Step 1: Log In to Salesforce
Login to Salesforce using the SOAP API and get the session id. For logging in first create an XML file named login.txt in the below format.
<?xml version="1.0" encoding="utf-8" ?>
<env:Envelope xmlns:xsd="http://www.w3.org/2001/XMLSchema"
xmlns:xsi="http://www.w3.org/2001/XMLSchema-instance"
xmlns:env="http://schemas.xmlsoap.org/soap/envelope/">
<env:Body>
<n1:login xmlns:n1="urn:partner.soap.sforce.com">
<n1:username>username</n1:username>
<n1:password>password</n1:password>
</n1:login>
</env:Body>
</env:Envelope>
Execute the below command to login
curl https://login.Salesforce.com/services/Soap/u/47.0 -H "Content-Type: text/xml; charset=UTF-8" -H
"SOAPAction: login" -d @login.txt
From the result XML, note the session id. We will need the session id for the later requests.
Step 2: Create a Bulk API Job
Create a BULK API job. For creating a job, a text file with details of the objects that are to be accessed is needed. Create the text file using the below template.
<?xml version="1.0" encoding="UTF-8"?>
<jobInfo xmlns="http://www.force.com/2009/06/asyncapi/dataload">
<operation>insert</operation>
<object>Contact</object>
<contentType>CSV</contentType>
</jobInfo>
We are attempting to pull data from the object Contact in this exercise.
Execute the below command after creating the job.txt
curl https://instance.Salesforce.com/services/async/47.0/job -H "X-SFDC-Session: sessionId" -H
"Content-Type: application/xml; charset=UTF-8" -d @job.txt
From the result, note the job id. This job-id will be used to form the URL for subsequent requests. Please note the URL will change according to the URL of the user’s Salesforce organization.
Step 3: Create SQL Query to Pull Data
Create the SQL query to pull the data and use it with CURL as given below.
curl https://instance_name—api.Salesforce.com/services/async/APIversion/job/jobid/batch
-H "X-SFDC-Session: sessionId" -H "Content-Type: text/csv;
SELECT name,desc from Contact
Step 4: Close the Bulk API Job
The next step is to close the job. This requires a text file with details of the job status change. Create it as below with the name close_job.txt.
<?xml version="1.0" encoding="UTF-8"?>
<jobInfo xmlns="http://www.force.com/2009/06/asyncapi/dataload">
<state>Closed</state>
</jobInfo>
Use the file with the below command.
curl https://instance.Salesforce.com/services/async/47.0/job/jobId -H "X-SFDC-Session: sessionId" -H
"Content-Type: application/xml; charset=UTF-8" -d @close_job.txt
Step 5: Access the Resulting API
Access the resulting API and fetch the result is of the batch.
curl -H "X-SFDC-Session: sessionId" https://instance.Salesforce.com/services/async/47.0/job/jobId/batch/batchId/result
Step 6: Retrieve Results
Retrieve the actual results using the result id that was fetched from the above step.
curl -H "X-SFDC-Session: sessionId"
https://instance.Salesforce.com/services/async/47.0/job/jobId/batch/batchId/result/resultId
The output will be a CSV file with the required rows of data. Save it as Contacts.csv in your local filesystem.
Step 7: Load Data to PostgreSQL
Load data to Postgres using the COPY command. Assuming the table is already created this can be done by executing the below command.
COPY Contacts(name,desc,)
FROM 'contacts.csv' DELIMITER ',' CSV HEADER;
An alternative to using the above sequence of API calls is to use the Data Loader utility to query the data and export it to CSV. But in case you need to do this programmatically, Data Loader utility will be of little help.
Limitations of using Custom ETL Scripts to Connect Salesforce to PostgreSQL
As evident from the above steps, loading data through the manual method contains a significant number of steps that could be overwhelming if you are looking to do this on a regular basis. You would need to configure additional scripts in case you need to bring data into real-time.
It is time-consuming and requires prior knowledge of coding, understanding APIs and configuring data mapping.
This method is not suitable for bulk data movement, leading to slow performance, especially for large datasets.
Conclusion
This blog talks about the different methods you can use to set up a connection from Salesforce to PostgreSQL in a seamless fashion. If you wants to know about PostgreSQL, then read this article: Postgres to Snowflake.
LIKE.TG is the only real-time ELT No-code Data Pipeline platform that cost-effectively automates data pipelines that are flexible to your needs. LIKE.TG handles everything from schema management to data flow monitoring data rids you of any maintenance overhead. In addition to Salesforce, you can bring data from 150s of different sources into PostgreSQL in real-time, ensuring that all your data is available for analysis with you.
Visit our Website to Explore LIKE.TG
Want to take LIKE.TG for a spin? Sign Up for a 14-day free trial and experience the feature-rich LIKE.TG suite first hand. You can also have a look at the unbeatable pricing that will help you choose the right plan for your business needs.
What are your thoughts on the two approaches to move data from Salesforce to PostgreSQL? Let us know in the comments.
How to Integrate Salesforce to Snowflake: 3 Easy Methods
Salesforce is an important CRM system and it acts as one of the basic source systems to integrate while building a Data Warehouse or a system for Analytics. Snowflake is a Software as a Service (SaaS) that provides Data Warehouse on Cloud-ready to use and has enough connectivity options to connect any reporting suite using JDBC or provided libraries.This article uses APIs, UNIX commands or tools, and Snowflake’s web client that will be used to set up this data ingestion from Salesforce to Snowflake. It also focuses on high volume data and performance and these steps can be used to load millions of records from Salesforce to Snowflake.
What is Salesforce
Image Source
Salesforce is a leading Cloud-based CRM platform. As a Platform as a Service (Paas), Salesforce is known for its CRM applications for Sales, Marketing, Service, Community, Analytics etc. It also is highly Scalable and Flexible. As Salesforce contains CRM data including Sales, it is one of the important sources for Data Ingestion into Analytical tools or Databases like Snowflake.
What is Snowflake
Image Source
Snowflake is a fully relational ANSI SQL Data Warehouse provided as a Software-as-a-Service (SaaS). It provides a Cloud Data Warehouse ready to use, with Zero Management or Administration. It uses Cloud-based persistent Storage and Virtual Compute instances for computation purposes.
Key features of Snowflake include Time Travel, Fail-Safe, Web-based GUI client for administration and querying, SnowSQL, and an extensive set of connectors or drivers for major programming languages.
Methods to move data from Salesforce to Snowflake
Method 1: Easily Move Data from Salesforce to Snowflake using LIKE.TG
Method 2: Move Data From Salesforce to Snowflake using Bulk API
Method 3: Load Data from Salesforce to Snowflake using Snowflake Output Connection (Beta)
Method 1: Easily Move Data from Salesforce to Snowflake using LIKE.TG
LIKE.TG is fully managed and completely automates the process of not only loading data from your desired source but also enriching the data and transforming it into an analysis-ready form without having to write a single line of code. Its fault-tolerant architecture ensures that the data is handled in a secure, consistent manner with zero data loss.
It is that simple. While you relax, LIKE.TG will take care of fetching the data from data sources like Salesforce, etc., and sending it to your destination warehouse for free.
Get started for Free with LIKE.TG !
Here are the steps involved in moving the data from Salesforce to Snowflake:
Step 1: Configure your Salesforce Source
Authenticate and configure your Salesforce data sourceas shown in the below image. To learn more about this step, visithere.
In the Configure Salesforce as Source Page, you can enter details such as your pipeline name, authorized user account, etc.
In the Historical Sync Duration, enter the duration for which you want to ingest the existing data from the Source. By default, it ingests the data for 3 months. You can select All Available Data, enabling you to ingest data since January 01, 1970, in your Salesforce account.
Step 2: Configure Snowflake Destination
Configure the Snowflake destination by providing the details like Destination Name, Account Name, Account Region, Database User, Database Password, Database Schema, and Database Name to move data from Salesforce to Snowflake.
In addition to this, LIKE.TG lets you bring data from 150+ Data Sources (40+ free sources) such as Cloud Apps, Databases, SDKs, and more. You can explore the complete list here.
LIKE.TG will now take care of all the heavy-weight lifting to move data from Salesforce to Snowflake. Here are some of the benefits of LIKE.TG :
In-built Transformations – Format your data on the fly with LIKE.TG ’s preload transformations using either the drag-and-drop interface, or our nifty python interface. Generate analysis-ready data in your warehouse using LIKE.TG ’s Postload Transformation
Near Real-Time Replication – Get access to near real-time replication for all database sources with log based replication. For SaaS applications, near real time replication is subject to API limits.
Auto-Schema Management – Correcting improper schema after the data is loaded into your warehouse is challenging. LIKE.TG automatically maps source schema with destination warehouse so that you don’t face the pain of schema errors.
Transparent Pricing – Say goodbye to complex and hidden pricing models. LIKE.TG ’s Transparent Pricing brings complete visibility to your ELT spend. Choose a plan based on your business needs. Stay in control with spend alerts and configurable credit limits for unforeseen spikes in data flow.
Security – Discover peace with end-to-end encryption and compliance with all major security certifications including HIPAA, GDPR, SOC-2.
Get started for Free with LIKE.TG !
Method 2: Move Data From Salesforce to Snowflake using Bulk API
What is Salesforce DATA APIs
As, we will be loading data from Salesforce to Snowflake, extracting data out from Salesforce is the initial step. Salesforce provides various general-purpose APIs that can be used to access Salesforce data, general-purpose APIs provided by Salesforce:
REST API
SOAP API
Bulk API
Streaming API
Along with these Salesforce provides various other specific purpose APIs such as Apex API, Chatter API, Metadata API, etc. which are beyond the scope of this post.
The following section gives a high-level overview of general-purpose APIs:
Synchronous API: Synchronous request blocks the application/client until the operation is completed and a response is received.
Asynchronous API: An Asynchronous API request doesn’t block the application/client making the request. In Salesforce this API type can be used to process/query a large amount of data, as Salesforce processes the batches/jobs at the background in Asynchronous calls.
Understanding the difference between Salesforce APIs is important, as depending on the use case we can choose the best of the available options for loading data from Salesforce to Snowflake.
APIs will be enabled by default for the Salesforce Enterprise edition, if not we can create a developer account and get the token required to access API.In this post, we will be using Bulk API to access and load the data from Salesforce to Snowflake.
The process flow for querying salesforce data using Bulk API:
The steps are given below, each one of them explained in detail to get data from Salesforce to Snowflake using Bulk API on a Unix-based machine.
Step 1: Log in to Salesforce API
Bulk API uses SOAP API for login as Bulk API doesn’t provide login operation.
Save the below XML as login.xml, and replace username and password with your respective salesforce account username and password, which will be a concatenation of the account password and access token.
<?xml version="1.0" encoding="utf-8" ?>
<env:Envelope xmlns:xsd="http://www.w3.org/2001/XMLSchema"
xmlns:xsi="http://www.w3.org/2001/XMLSchema-instance"
xmlns:env="http://schemas.xmlsoap.org/soap/envelope/">
<env:Body>
<n1:login xmlns:n1="urn:partner.soap.sforce.com">
<n1:username>username</n1:username>
<n1:password>password</n1:password>
</n1:login>
</env:Body>
</env:Envelope>
Using a Terminal, execute the following command:
curl <URL> -H "Content-Type: text/xml;
charset=UTF-8" -H "SOAPAction: login" -d @login.xml > login_response.xml
Above command if executed successfully will return an XML loginResponse with <sessionId> and <serverUrl> which will be used in subsequent API calls to download data.
login_response.xml will look as shown below:
<?xml version="1.0" encoding="UTF-8"?>
<soapenv:Envelope xmlns:soapenv="http://schemas.xmlsoap.org/soap/envelope/"
xmlns="urn:partner.soap.sforce.com"
xmlns:xsi="http://www.w3.org/2001/XMLSchema-instance">
<soapenv:Body>
<loginResponse>
<result>
<metadataServerUrl><URL>
<passwordExpired>false</passwordExpired>
<sandbox>false</sandbox>
<serverUrl><URL>
<sessionId>00Dj00001234ABCD5!AQcAQBgaabcded12XS7C6i3FNE0TMf6EBwOasndsT4O</sessionId>
<userId>0010a00000ABCDefgh</userId>
<userInfo>
<currencySymbol>$</currencySymbol>
<organizationId>00XYZABCDEF123</organizationId>
<organizationName>ABCDEFGH</organizationName>
<sessionSecondsValid>43200</sessionSecondsValid>
<userDefaultCurrencyIsoCode xsi:nil="true"/>
<userEmail>user@organization</userEmail>
<userFullName>USERNAME</userFullName>
<userLanguage>en_US</userLanguage>
<userName>user@organization</userName>
<userTimeZone>America/Los_Angeles</userTimeZone>
</userInfo>
</result>
</loginResponse>
</soapenv:Body>
</soapenv:Envelope>
Using the above XML, we need to initialize three variables: serverUrl, sessionId, and instance.The first two variables are available in the response XML, the instance is the first part of the hostname in serverUrl.
The shell script snippet given below can extract these three variables from the login_response.xml file:
sessionId=$(xmllint --xpath
"/*[name()='soapenv:Envelope']/*[name()='soapenv:Body']/*[name()='loginResponse']/*
[name()='result']/*[name()='sessionId']/text()" login_response.xml)
serverUrl=$(xmllint --xpath
"/*[name()='soapenv:Envelope']/*[name()='soapenv:Body']/*[name()='loginResponse']/*
[name()='result']/*[name()='serverUrl']/text()" login_response.xml)
instance=$(echo ${serverUrl/.salesforce.com*/} | sed 's|https(colon)//||')
sessionId = 00Dj00001234ABCD5!AQcAQBgaabcded12XS7C6i3FNE0TMf6EBwOasndsT4O
serverUrl = <URL>
instance = organization
Step 2: Create a Job
Save the given below XML as job_account.xml. The XML given below is used to download Account object data from Salesforce in JSON format. Edit the bold text to download different objects or to change content type as per the requirement i.e. to CSV or XML. We are using JSON here.
job_account.xml:
<?xml version="1.0" encoding="UTF-8"?>
<jobInfo
xmlns="http://www.force.com/2009/06/asyncapi/dataload">
<operation>query</operation>
<object>Account</object>
<concurrencyMode>Parallel</concurrencyMode>
<contentType>JSON</contentType>
</jobInfo>
Execute the command given below to create the job and get the response, from the XML response received (account_jobresponse.xml), we will extract the jobId variable.
curl -s -H "X-SFDC-Session: ${sessionId}" -H "Content-Type: application/xml; charset=UTF-8" -d
@job_account.xml https://${instance}.salesforce.com/services/async/41.0/job >
account_job_response.xml
jobId = $(xmllint --xpath "/*[name()='jobInfo']/*[name()='id']/text()" account_job_response.xml)
account_job_response.xml:
<?xml version="1.0" encoding="UTF-8"?>
<jobInfo xmlns="http://www.force.com/2009/06/asyncapi/dataload">
<id>1200a000001aABCD1</id>
<operation>query</operation>
<object>Account</object>
<createdById>00580000003KrL0AAK</createdById>
<createdDate>2018-05-22T06:09:45.000Z</createdDate>
<systemModstamp>2018-05-22T06:09:45.000Z</systemModstamp>
<state>Open</state>
<concurrencyMode>Parallel</concurrencyMode>
<contentType>JSON</contentType>
<numberBatchesQueued>0</numberBatchesQueued>
<numberBatchesInProgress>0</numberBatchesInProgress>
<numberBatchesCompleted>0</numberBatchesCompleted>
<numberBatchesFailed>0</numberBatchesFailed>
<numberBatchesTotal>0</numberBatchesTotal>
<numberRecordsProcessed>0</numberRecordsProcessed>
<numberRetries>0</numberRetries>
<apiVersion>41.0</apiVersion>
<numberRecordsFailed>0</numberRecordsFailed>
<totalProcessingTime>0</totalProcessingTime>
<apiActiveProcessingTime>0</apiActiveProcessingTime>
<apexProcessingTime>0</apexProcessingTime>
</jobInfo>
jobId = 1200a000001aABCD1
Step 3: Add a Batch to the Job
The next step is to add a batch to the Job created in the previous step. A batch contains a SQL query used to get the data from SFDC.After submitting the batch, we will extract the batchId from the JSON response received.
uery = ‘select ID,NAME,PARENTID,PHONE,ACCOUNT_STATUS from ACCOUNT’
curl -d "${query}" -H "X-SFDC-Session: ${sessionId}" -H "Content-Type: application/json;
charset=UTF-8" https://${instance}.salesforce.com/services/async/41.0/job/${jobId}/batch |
python -m json.tool > account_batch_response.json
batchId = $(grep "id": $work_dir/job_responses/account_batch_response.json | awk -F':' '{print $2}' | tr -d ' ,"')
account_batch_response.json:
{
"apexProcessingTime": 0,
"apiActiveProcessingTime": 0,
"createdDate": "2018-11-30T06:52:22.000+0000",
"id": "1230a00000A1zABCDE",
"jobId": "1200a000001aABCD1",
"numberRecordsFailed": 0,
"numberRecordsProcessed": 0,
"state": "Queued",
"stateMessage": null,
"systemModstamp": "2018-11-30T06:52:22.000+0000",
"totalProcessingTime": 0
}
batchId = 1230a00000A1zABCDE
Step 4: Check The Batch Status
As Bulk API is an Asynchronous API, the batch will be run at the Salesforce end and the state will be changed to Completed or Failed once the results are ready to download. We need to repeatedly check for the batch status until the status changes either to Completed or Failed.
status=""
while [ ! "$status" == "Completed" || ! "$status" == "Failed" ]
do
sleep 10; #check status every 10 seconds
curl -H "X-SFDC-Session: ${sessionId}"
https://${instance}.salesforce.com/services/async/41.0/job/${jobId}/batch/${batchId} |
python -m json.tool > account_batchstatus_response.json
status=$(grep -i '"state":' account_batchstatus_response.json | awk -F':' '{print $2}' |
tr -d ' ,"')
done;
account_batchstatus_response.json:
{
"apexProcessingTime": 0,
"apiActiveProcessingTime": 0,
"createdDate": "2018-11-30T06:52:22.000+0000",
"id": "7510a00000J6zNEAAZ",
"jobId": "7500a00000Igq5YAAR",
"numberRecordsFailed": 0,
"numberRecordsProcessed": 33917,
"state": "Completed",
"stateMessage": null,
"systemModstamp": "2018-11-30T06:52:53.000+0000",
"totalProcessingTime": 0
}
Step 5: Retrieve the Results
Once the state is updated to Completed, we can download the result dataset which will be in JSON format. The code snippet given below will extract the resultId from the JSON response and then will download the data using the resultId.
if [ "$status" == "Completed" ]; then
curl -H "X-SFDC-Session: ${sessionId}"
https(colon)//${instance}.salesforce(dot)com/services/async/41.0/job/${jobId}/batch/${batchId}/result |
python -m json.tool > account_result_response.json
resultId = $(grep '"' account_result_response.json | tr -d ' ,"')
curl -H "X-SFDC-Session: ${sessionId}"
https(colon)//${instance}.salesforce(dot)com/services/async/41.0/job/${jobId}/batch/${batchId}/result/
${resultId} > account.json
fi
account_result_response.json:
[
"7110x000008jb3a"
]
resultId = 7110x000008jb3a
Step 6: Close the Job
Once the results have been retrieved, we can close the Job. Save below XML as close-job.xml.
<?xml version="1.0" encoding="UTF-8"?>
<jobInfo xmlns="http://www.force.com/2009/06/asyncapi/dataload">
<state>Closed</state>
</jobInfo>
Use the code given below to close the job, by suffixing the jobId to the close-job request URL.
curl -s -H "X-SFDC-Session: ${sessionId}" -H "Content-Type: text/csv; charset=UTF-8" -d
@close-job.xml https(colon)//${instance}.salesforce(dot)com/services/async/41.0/job/${jobId}
After running all the above steps, we will have the account.json generated in the current working directory, which contains the account data downloaded from Salesforce in JSON format, which we will use to load data into Snowflake in next steps.
Downloaded data file:
$ cat ./account.json
[ {
"attributes" : {
"type" : "Account",
"url" : "/services/data/v41.0/sobjects/Account/2x234abcdedg5j"
},
"Id": "2x234abcdedg5j",
"Name": "Some User",
"ParentId": "2x234abcdedgha",
"Phone": 124567890,
"Account_Status": "Active"
}, {
"attributes" : {
"type" : "Account",
"url" : "/services/data/v41.0/sobjects/Account/1x234abcdedg5j"
},
"Id": "1x234abcdedg5j",
"Name": "Some OtherUser",
"ParentId": "1x234abcdedgha",
"Phone": null,
"Account_Status": "Active"
} ]
Step 7: Loading Data from Salesforce to Snowflake
Now that we have the JSON file downloaded from Salesforce, we can use it to load the data into a Snowflake table. File extracted from Salesforce has to be uploaded to Snowflake’s internal stage or to an external stage such as Microsoft Azure or AWS S3 location.Then we can load the Snowflake table using the created Snowflake Stage.
Step 8: Creating a Snowflake Stage
Stage in the Snowflake is a location where data files are stored, and that location is accessible by Snowflake; then, we can use the Stage name to access the file in Snowflake or to load the table.
We can create a new stage, by following below steps:
Login to the Snowflake Web Client UI.
Select the desired Database from the Databases tab.
Click on Stages tab
Click Create, Select desired location (Internal, Azure or S3)
Click Next
Fill the form that appears in the next window (given below).
Fill the details i.e. Stage name, Stage schema of Snowflake, Bucket URL and the required access keys to access the Stage location such as AWS keys to access AWS S3 bucket.
Click Finish.
Step 9: Creating Snowflake File Format
Once the stage is created, we are all set with the file location. The next step is to create the file format in Snowflake.File Format menu can be used to create the named file format, which can be used for bulk loading data into Snowflake using that file format.
As we have JSON format for the extracted Salesforce file, we will create the file format to read a JSON file.
Steps to create File Format:
Login to Snowflake Web Client UI.
Select the Databases tab.
Click the File Formats tab.
Click Create.
This will open a new window where we can mention the file format properties.
We have selected type as JSON, Schema as Format which stores all our File Formats. Also, we have selected Strip Outer Array option, this is required to strip the outer array (square brace that encloses entire JSON) that Salesforce adds to the JSON file.
File Format can also be created using SQL in Snowflake. Also, grants have to be given to allow other roles to access this format or stage we have created.
create or replace file format format.JSON_STRIP_OUTER
type = 'json'
field_delimiter = none
record_delimiter = '
'
STRIP_OUTER_ARRAY = TRUE;
grant USAGE on FILE FORMAT FORMAT.JSON_STRIP_OUTER to role developer_role;
Step 10: Loading Salesforce JSON Data to Snowflake Table
Now that we have created the required Stage and File Format of Snowflake, we can use them to bulk load the generated Salesforce JSON file and load data into Snowflake.
The advantage of JSON type in Snowflake:Snowflake can access the semi-structured type like JSON or XML as a schemaless object and can directly query/parse the required fields without loading them to a staging table. To know more about accessing semi-structured data in Snowflake, click here.
Step 11: Parsing JSON File in Snowflake
Using the PARSE_JSON function we can interpret the JSON in Snowflake, we can write a query as given below to parse the JSON file into a tabular format.Explicit type casting is required when using parse_json as it’ll always default to string.
SELECT
parse_json($1):Id::string,
parse_json($1):Name::string,
parse_json($1):ParentId::string,
parse_json($1):Phone::int,
parse_json($1):Account_Status::string
from @STAGE.salesforce_stage/account.json
( file_format=>('format.JSON_STRIP_OUTER')) t;
We will create a table in snowflake and use the above query to insert data into it. We are using Snowflake’s web client UI for running these queries.
Upload file to S3:
Table creation and insert query:
Data inserted into the Snowflake target table:
Hurray!! You have successfully loaded data from Salesforce to Snowflake.
Limitations of Loading Data from Salesforce to Snowflake using Bulk API
The maximum single file size is 1GB (Data that is more than 1GB, will be broken into multiple parts while retrieving results).
Bulk API query doesn’t support the following in SOQL query:COUNT, ROLLUP, SUM, GROUP BY CUBE, OFFSET, and Nested SOQL queries.
Bulk API doesn’t support base64 data type fields.
Method 3: Load Data from Salesforce to Snowflake using Snowflake Output Connection (Beta)
In June 2020, Snowflake and Salesforce launched native integration so that customers can move data from Salesforce to Snowflake. This can be analyzed using Salesforce’s Einstein Analytics or Tableau. This integration is available in open beta for Einstein Analytics customers.
Steps for Salesforce to Snowflake Integration
Enable the Snowflake Output Connector
Create the Output Connection
Configure the Connection Settings
Limitations of Loading Data from Salesforce to Snowflake using Snowflake Output Connection (Beta):
Snowflake Output Connection (Beta) is not a full ETL solution. It extracts and loads data but lacks the capacity for complex transformations.
It has limited scalability as there are limitations on the amount of data that can be transferred per object per hour. So, using Snowflake Output Connection as Salesforce to Snowflake connector is not very efficient.
Use Cases of Salesforce to Snowflake Integration
Real-Time Forecasting: When you connect Salesforce to Snowflake, it can be used in business for predicting end-of-the-month/ quarter/year forecasts that help in better decision-making. For example, you can use opportunity data from Salesforce with ERP and finance data from Snowflake to do so.
Performance Analytics: After you import data from Salesforce to Snowflake, you can analyze your marketing campaign’s performance. You can analyze conversion rates by merging click data from Salesforce with the finance data in Snowflake.
AI and Machine Learning: It can be used in business organizations to determine customer purchases of specific products. This can be done by combining Salesforce’s objects, such as website visits, with Snowflake’s POS and product category data.
Conclusion
This blog has covered all the steps required to extract data using Bulk API to move data from Salesforce to Snowflake. Additionally, an easier alternative using LIKE.TG has also been discussed to load data from Salesforce to Snowflake.
Visit our Website to Explore LIKE.TG
Want to take LIKE.TG for a spin? Sign Up for a 14-day free trial and experience the feature-rich LIKE.TG suite first hand. You can also have a look at the unbeatable pricing that will help you choose the right plan for your business needs.
Do leave a comment on your experience of replicating data from Salesforce to Snowflake and let us know what worked for you.
Google Analytics to Redshift: 2 Easy Methods
Many businesses worldwide use Google Analytics to collect valuable data on website traffic, signups, purchases, customer behavior, and more.Given the humongous amount of data that is present on Google Analytics, the need todeeplyanalyze it has also become acute.Naturally, organizations are turning towardsAmazon Redshift,one of thewidelyadopted Data Warehouses of today, to host this data and power the analysis. In this post, you will learn how to move data from Google Analytics to Redshift.Solve your data replication problems with LIKE.TG ’s reliable, no-code, automated pipelines with 150+ connectors.Get your free trial right away!
Methods to move data from Google Analytics to Redshift
There are two ways of loading your data from Google Analytics to Redshift:
Method 1: Using Hand Coding to Connect Google Analytics to Redshift
The activities of extracting data from Google Analytics, transforming that data to a usable form, and loading said data onto the target Redshift database would have to be carried out by custom scripts. The scripts would have to be written by members of your data management or business intelligence team. This data pipeline would then have to be managed and maintained over time.
Method 2: Using LIKE.TG Data to Connect Google Analytics to Redshift
Get Started with LIKE.TG for Free
Google Analytics comes free pre-built “out of the box” integration in LIKE.TG . You can easily move data with minimal setup, configuration from your end. Given LIKE.TG is a fully managed platform, no coding help or engineering bandwidth would be needed. LIKE.TG will ensure that your data is in the warehouse, ready for analysis in a matter of just a few minutes.
Sign up here for a 14-Day Free Trial
Methods to Connect Google Analytics to Redshift
Here are the methods you can use to connect Google Analytics to Redshift in a seamless fashion:
Method 1: Using Hand Coding to Connect Google Analytics to Redshift
Method 2: Using LIKE.TG Data to Connect Google Analytics to Redshift
Method 1: Using Hand Coding to Connect Google Analytics to Redshift
Pre-Migration Steps
Audit of Source Data: Before data migration begins, Google Analytics event samples shouldbe reviewedto ensure that the engineering team is completely aware of the schema.Business teams should coordinate with engineering toclearlydefine the data that needs tobe madeavailable.This will reduce the possibility of errors due to expectation mismatch between business and engineering teams
Backup of all Data: In the case of a failed replication, it is necessary to ensure that all your GA data maybe retrievedwith zero (or minimal) data loss. Also, plans shouldbe madeto ensure that sensitive datais protectedat all stages of the migration.
Manual Migration Steps
Step 1: Google Analytics provides an API, the Google Core Reporting API, that allows engineers to pull data.As such, most of the data thatis returnedis combinedinto a consolidated JSON format, which is incompatible with Redshift.
Step 2: The scripts would need to pull data from GA to a separate object, such as a CSV file.Meanwhile, to prepare the Redshift data warehouse, SQL commands mustbe runto create the necessary tables that define the database structure.TheaforementionedCSV file must thenbe loadedto a resource that Redshift can access.
Step 3: Amazon S3 cloud storage service is a good option. There is some amount of preparation involved in configuring S3 for this purpose. The CSV file must thenbe loadedinto the S3 that you configured. The COPY command mustbe invokedto load the data from the CSV file and into the Redshift database.
Step 4: Once the transfer is complete queries shouldbe runon thenewlypopulated database to test if the data is accurate and complete. This would re-ensure that the data load was successful.Havingbeen verified, a cron job should be set up to run with reasonable frequency, ensuring that the Redshift database stays up to date.Say you have different Google Analytics views set up for Website, App, etc. You would have to end up repeating the above process for each of these.
This concludes this method of manually coding the migration from Google Analytics to Redshift.
Limitations of using Hand Coding to Connect Google Analytics to Redshift
Manual coding for data replication between diverse technologies, while not impossible, does come with its fair share of challenges. Immediate consideration is one of time and cost.While the value of the information tobe gleanedfrom the data is definitely worth the cost of implementation, it is still a considerable cost.
The second concern of using Hand Coding to connect Google Analytics to Redshift is of accuracy and effectiveness. How good is the code? How many iterations will it take to get it right? Have effective testsbeen developedto ensure the accuracy of the migrated data?Have effective process management policiesbeen putin place to ensure correctness and consistency?
For instance, how would you identify if GA Reporting API JSON format hasbeen altered? The questions never end.
Should the data load processbe mismanaged, serious knock-on effects may result.These may include issues such as inaccurate databeing loadedin the form of redundancies and unknowns, missed deadlines, and exceeded budgets as a result ofmultipletests and script rewrites and more.
However, loading data from Google Analytics to Redshift may alsobe handled bymucheasilyin a hassle-free manner with platforms such as LIKE.TG .
Method 2: Using LIKE.TG Data to Connect Google Analytics to Redshift
LIKE.TG is fully managed and completely automates the process of not only loading data from your desired source but also enriching the data and transforming it into an analysis-ready form without having to write a single line of code. Its fault-tolerant architecture ensures that the data is handled in a secure, consistent manner with zero data loss.
LIKE.TG takes care of all your data preprocessing to set up migration from Google Analytics to Redshift and lets you focus on key business activities and draw a much powerful insight on how to generate more leads, retain customers, and take your business to new heights of profitability. It provides a consistent reliable solution to manage data in real-time and always have analysis-ready data in your desired destination.
Using LIKE.TG Data Integration Platform, you canseamlesslyreplicate data from Google Analytics to Redshift with 2 simple steps:
Step 1: Connect LIKE.TG to Google Analytics to set it up as your source by filling in the Pipeline Name, Account Name, Property Name, View Name, Metrics, Dimensions, and the Historical Import Duration.
Step 2: Load data from Google Analytics to Redshift by providing your Redshift databases credentials like Database Port, Username, Password, Name, Schema, and Cluster Identifier along with the Destination Name.
LIKE.TG takes up all the grind work ensuring that consistent and reliable data is available for Google Analytics to Redshift setup.
What Can You Achieve By Replicating Data from Google Analytics to Redshift?
Which Demographic contributes to the highest fraction of users of a particular Product Feature?
How are Paid Sessions and Goal Conversion Rates varying with Marketing Spend and Cash in-flow?
How to identify your most valuable customer segments?
Conclusion
This blog talks about the two methods you can use to connect Google Analytics to Redshift in a seamless fashion. Data and insights are the keys to success in business, and good insights can only come from correct, accurate, and relevant data.LIKE.TG , a 100% fault-tolerant, easy-to-use Data Pipeline Platform ensures that your valuable datais movedfrom Google Analytics to Redshift with care and precision.
VISIT OUR WEBSITE TO EXPLORE LIKE.TG
LIKE.TG Data provides its users with a simpler platform for integrating data from 150+ sources like Google Analytics. It is a No-code Data Pipeline that can help you combine data from multiple sources. You can use it to transfer data from multiple data sources into your Data Warehouses, Databases, Data Lakes, or a destination of your choice. It provides you with a consistent and reliable solution to managing data in real-time, ensuring that you always have Analysis-ready data in your desired destination.
SIGN UP for a 14-day free trial and experience a seamless data replication experience from Google Analytics to Redshift.
You can also have a look at the unbeatable pricing that will help you choose the right plan for your business needs.
How to Replicate Postgres to Snowflake: 4 Easy Steps
Snowflake’s architecture is defined newly from scratch, not an extension of the existing Big Data framework like Hadoop. It has a hybrid of the traditional shared-disk database and modern shared-nothing database architectures. Snowflake uses a central repository for persisted data that is accessible from all compute nodes in the data warehouse and processes queries using MPP (Massively Parallel Processing) compute clusters where each node in the cluster stores a portion of the data set. Snowflake processes using “Virtual Warehouses” which is an MPP compute cluster composed of multiple compute nodes. All components of Snowflake’s service run in a public Cloud-like AWS Redshift. This Data Warehouse is considered a cost-effective high performing analytical solution and is used by many organizations for critical workloads. In this post, we will discuss how to move real-time data from Postgres to Snowflake. So, read along and understand the steps to migrate data from Postgres to Snowflake.
Method 1: Use LIKE.TG ETL to Move Data From Postgres to Snowflake With Ease
UsingLIKE.TG , official Snowflake ETL partneryou can easily load data from Postgres to Snowflake with just 3 simple steps: Select your Source, Provide Credentials, and Load to Destination. LIKE.TG is the only real-time ELT No-code Data Pipeline platform that cost-effectively automates data pipelines that are flexible to your needs.
SIGN UP HERE FOR A 14-DAY FREE TRIAL
Step 1: Connect your PostgreSQL account to LIKE.TG ’s platform. LIKE.TG has an in-built PostgreSQL Integration that connects to your account within minutes.
Read the documents to know the detailed configuration steps for each PostgreSQL variant.
Step 2: Configure Snowflake as a Destination
Perform the following steps to configure Snowflake as a Destination in LIKE.TG :
By completing the above steps, you have successfully completed Postgres Snowflake integration.
To know more, check out:
PostgreSQL Source Connector
Snowflake Destination Connector
Check out some of the cool features of LIKE.TG :
Incremental Data Load: LIKE.TG allows the transfer of data that has been modified in real-time. This ensures efficient utilization of bandwidth on both ends.
Schema Management:LIKE.TG takes away the tedious task of schema management automatically detects the schema of incoming data and maps it to the destination schema.
Scalable Infrastructure:LIKE.TG has in-built integrations for150+ sourcesthat can help you scale your data infrastructure as required.
Method 2: Write a Custom Code to Move Data from Postgres to Snowflake
As in the above-shown figure, the four steps to replicate Postgres to Snowflake using custom code (Method 2) are as follows:
1. Extract Data from Postgres
COPY TO command is the most popular and efficient method to extract data from the Postgres table to a file. We can also use the pg_dump utility for the first time for full data extraction. We will have a look at both methods.
a. Extract Data Using the COPY Command
As mentioned above, COPY TO is the command used to move data between Postgres tables and standard file-system files. It copies an entire table or the results of a SELECT query to a file:
COPY table or sql_query TO out_file_name WITH options.
Example:
COPY employees TO 'C:tmpemployees_db.csv' WITH DELIMITER ',' CSV HEADER;
COPY (select * from contacts where age < 45) TO 'C:tmpyoung_contacts_db.csv' WITH DELIMITER ',' CSV HEADER;
Some frequently used options are:
FORMAT: The format of the data to be written are text, CSV, or binary (default is text).
ESCAPE: The character that should appear before a data character that matches the QUOTE value.
NULL: Represents the string that is a null value. The default is N (backslash-N) in text and an unquoted empty string in CSV.
ENCODING: Encoding of the output file. The default value is the current client encoding.
HEADER: If it is set, on the output file, the first line contains the column names from the table.
QUOTE: The quoting character to be used when data is quoted. The default is double-quote(“).
DELIMITER: The character that separates columns within each line of the file.
Next, we can have a look at how the COPY command can be used to extract data from multiple tables using a PL/PgSQL procedure. Here, the table named tables_to_extract contains details of tables to be exported.
CREATE OR REPLACE FUNCTION table_to_csv(path TEXT) RETURNS void AS $
declare
tables RECORD;
statement TEXT;
begin
FOR tables IN
SELECT (schema || '.' || table_name) AS table_with_schema
FROM tables_to_extract
LOOP
statement := 'COPY ' || tables.table_with_schema || ' TO ''' || path || '/' || tables.table_with_schema || '.csv' ||''' DELIMITER '';'' CSV HEADER';
EXECUTE statement;
END LOOP;
return;
end;
$ LANGUAGE plpgsql;
SELECT db_to_csv('/home/user/dir'/dump); -- This will create one csv file per table, in /home/user/dir/dump/
Sometimes you want to extract data incrementally. To do that, add more metadata like the timestamp of the last data extraction to the table tables_to_extract and use that information while creating the COPY command to extract data changed after that timestamp.
Consider you are using a column name last_pull_time corresponding to each table in the table tables_to_extract which stores the last successful data pull time. Each time data in the table which are modified after that timestamp has to be pulled. The body of the loop in procedure will change like this:
Here a dynamic SQL is created with a predicate comparing last_modified_time_stampfrom the table to be extracted and last_pull_time from table list_of_tables.
begin
FOR tables IN
SELECT (schema || '.' || table_name) AS table_with_schema, last_pull_time AS lt
FROM tables_to_extract
LOOP
statement := 'COPY (SELECT * FROM ' || tables.table_with_schema || ' WHERE last_modified_time_stamp > ' || last_pull_time ') TO ' '' || path || '/' || tables.table_with_schema || '.csv' ||''' DELIMITER '';'' CSV HEADER';
EXECUTE statement;
END LOOP;
return;
End;
b. Extract Data Using the pg_dump
As mentioned above, pg_dump is the utility for backing up a Postgres database or tables. It can be used to extract data from the tables also.
Example syntax:
pg_dump --column-inserts --data-only --table=<table> <database> > table_name.sql
Here output file table_name.sql will be in the form of INSERT statements like
INSERT INTO my_table (column1, column2, column3, ...)
VALUES (value1, value2, value3, ...);
This output has to be converted into a CSV file with the help of a small script in your favorites like Bash or Python.
2. Data Type Conversion from Postgres to Snowflake
There will be domain-specific logic to be applied while transferring data. Apart from that following things are to be noted while migrating data to avoid surprises.
Snowflake out-of-the-box supports a number of character sets including UTF-8. Check out the full list of encodings.
Unlike many other cloud analytical solutions, Snowflake supports SQL constraints like UNIQUE, PRIMARY KEY, FOREIGN KEY, NOT NULL constraints.
Snowflake by default has a rich set of data types. Below is the list of Snowflake data types and corresponding PostgreSQL types.
Snowflake allows almost all of the date/time formats. The format can be explicitly specified while loading data to the table using the File Format Option which we will discuss in detail later. The complete list of supported date/time formats can be found.
3. Stage Data Files
Before inserting data from Postgres to Snowflake table it needs to be uploaded to a temporary location which is called staging. There are two types of stages – internal and external.
a. Internal Stage
Each user and table is automatically allocated an internal stage for data files. It is also possible to create named internal stages.
The user named and accessed as ‘@~’.
The name of the table stage will be the same as that of the table.
The user or table stages can’t be altered or dropped.
The user or table stages do not support setting file format options.
As mentioned above, Internal Named Stages can be created by the user using the respective SQL statements. It provides a lot of flexibility while loading data by giving options to you to assign file format and other options to named stages.
While running DDL and commands like load data, SnowSQL is quite a handy CLI client which can be used to run those commands and is available in Linux/Mac/Windows. Read more about the tool and options.
Below are some example commands to create a stage:
Create a names stage:
create or replace stage my_postgres_stage
copy_options = (on_error='skip_file')
file_format = (type = 'CSV' field_delimiter = '|' skip_header = 1);
PUT command is used to stage data files to an internal stage. The syntax of the command is as given below :
PUT file://path_to_file/filename internal_stage_name
Example:
Upload a file named cnt_data.csv in the /tmp/postgres_data/data/ directory to an internal stage named postgres_stage.
put file:////tmp/postgres_data/data/cnt_data.csv @postgres_stage;
There are many useful options that can be helpful to improve performance like set parallelism while uploading the file, automatic compression of data files, etc. More information about those options is listed here.
b. External Stage
Amazon S3 and Microsoft Azure are external staging locations currently supported by Snowflake. We can create an external stage with any of those locations and load data to a Snowflake table.
To create an external stage on S3, IAM credentials have to be given. If the data is encrypted, then encryption keys should also be given.
create or replace stage postgre_ext_stage url='s3://snowflake/data/load/files/'
credentials=(aws_key_id='111a233b3c' aws_secret_key='abcd4kx5y6z');
encryption=(master_key = 'eSxX0jzYfIjkahsdkjamtnBKONDwOaO8=');
Data to the external stage can be uploaded using AWS or Azure web interfaces. For S3 you can upload using the AWS web console or any AWS SDK or third-party tools.
4. Copy Staged Files from Postgres to Snowflake Table
COPY INTO is the command used to load the contents of the staged file(s) from Postgres to the Snowflake table. To execute the command compute resources in the form of virtual warehouses are needed. You know more about it this command in the Snowflake ETL best practices.
Example:To load from a named internal stage
COPY INTO postgres_table
FROM @postgres_stage;
Loading from the external stage. Only one file is specified.
COPY INTO my_external_stage_table
FROM @postgres_ext_stage/tutorials/dataloading/contacts_ext.csv;
You can even copy directly from an external location:
COPY INTO postgres_table
FROM s3://mybucket/snow/data/files
credentials = (aws_key_id='$AWS_ACCESS_KEY_ID' aws_secret_key='$AWS_SECRET_ACCESS_KEY')
encryption = (master_key = 'eSxX0jzYfIdsdsdsamtnBKOSgPH5r4BDDwOaO8=')
file_format = (format_name = csv_format);
Files can be specified using patterns.
COPY INTO pattern_table
FROM @postgre_stage
file_format = (type = 'CSV')
pattern='.*/.*/.*[.]csv[.]gz';
Some common format options for CSV format supported in the COPY command:
COMPRESSION: Compression algorithm used for the input data files.
RECORD_DELIMITER: Records or lines separator characters in an input CSV file.
FIELD_DELIMITER: Character separating fields in the input file.
SKIP_HEADER: How many header lines are to be skipped.
DATE_FORMAT: To specify the date format.
TIME_FORMAT: To specify the time format.
Check out the full list of options. So, now you have finally loaded data from Postgres to Snowflake.
Update Snowflake Table
We have discussed how to extract data incrementally from PostgreSQL. Now we will look at how to migrate data from Postgres to Snowflake effectively.
As we discussed in the introduction, Snowflake is not based on any big data framework and does not have any limitations for row-level updates like in systems like Hive. It supports row-level updates making delta data migration much easier. Basic idea is to load incrementally extracted data into an intermediate table and modify records in the final table as per data in the intermediate table.
There are three popular methods to modify the final table once data is loaded into the intermediate table.
Update the rows in the final table and insert new rows from the intermediate table which are not in the final table.
UPDATE final_target_table t
SET t.value = s.value
FROM intermed_delta_table in
WHERE t.id = in.id;
INSERT INTO final_target_table (id, value)
SELECT id, value
FROM intermed_delta_table
WHERE NOT id IN (SELECT id FROM final_target_table);
Delete all records from the final table which are in the intermediate table. Then insert all rows from the intermediate table to the final table.
DELETE .final_target_table f
WHERE f.id IN (SELECT id from intermed_delta_table);
INSERT final_target_table (id, value)
SELECT id, value
FROM intermed_table;
MERGE statement: Inserts and updates can be done with a single MERGE statement and it can be used to apply changes in the intermediate table to the final table with one SQL statement.
MERGE into final_target_table t1 using intermed_delta_table t2 on t1.id = t2.id
WHEN matched then update set value = t2.value
WHEN not matched then INSERT (id, value) values (t2.id, t2.value);
Limitations of Using Custom Scripts for Postgres to Snowflake Connection
Here are some of the limitations associated with the use of custom scripts to connect Postgres to Snowflake.
Complexity
This method necessitates a solid grasp of PostgreSQL and Snowflake, including their respective data types, SQL syntax, and file-handling features. Some may find this to be a challenging learning curve because not all may have substantial familiarity with SQL or database management.
Time-consuming
It can take a while to write scripts and troubleshoot any problems that may occur, particularly with larger databases or more intricate data structures.
Error-prone
In human scripting, mistakes can happen. A small error in the script might result in inaccurate or corrupted data.
No Direct Support
You cannot contact a specialized support team in the event that you run into issues. For help with any problems, you’ll have to rely on the manuals, community forums, or internal knowledge.
Scalability Issues
The scripts may need to be modified or optimized to handle larger datasets as the volume of data increases. Without substantial efforts, this strategy might not scale effectively.
Inefficiency with Large Datasets
It might not be the most effective method to move big datasets by exporting them to a file and then importing them again, especially if network bandwidth is limited. Methods of direct data transmission could be quicker.
Postgres to Snowflake Data Replication Use Cases
Let’s look into some use cases of Postgres-Snowflake replication.
Transferring Postgres data to Snowflake
Are you feeling constrained by your Postgres configuration on-premises? Transfer your data to Snowflake’s endlessly scalable cloud platform with ease. Take advantage of easy performance enhancements, cost-effectiveness, and the capacity to manage large datasets.
Data Warehousing
Integrate data into Snowflake’s robust data warehouse from a variety of sources, including Postgres. This can help uncover hidden patterns, get a better understanding of your company, and strengthen strategic decision-making.
Advanced Analytics
Utilize Snowflake’s quick processing to run complex queries and find minute patterns in your Postgres data. This can help you stay ahead of the curve, produce smart reports, and gain deeper insights.
Artificial Intelligence and Machine Learning
Integrate your Postgres data seamlessly with Snowflake’s machine-learning environment. As a result, you can develop robust models, provide forecasts, and streamline processes to lead your company toward data-driven innovation.
Collaboration and Data Sharing
Colleagues and partners can securely access your Postgres data within the collaborative Snowflake environment. Hence, this integration helps promote smooth communication and expedite decision-making and group achievement.
Backup and Disaster Recovery
Transfer your Postgres data to the dependable and safe cloud environment offered by Snowflake. You can be assured that your data is constantly accessible and backed up, guaranteeing company continuity even in the event of unanticipated events.
Before wrapping up, let’s cover some basics.
What is Postgres?
Postgres is an open-source Relational Database Management System (RDBMS) developed at the University of California, Berkeley. It is widely known for reliability, feature robustness, and performance, and has been in use for over 20 years.
Postgres supports not only object-relational data but also supports complex structures and a wide variety of user-defined data types. This gives Postgres a definitive edge over other open-source SQL databases like MySQL, MariaDB, and Firebird.
Businesses rely on Postgres as their primary data storage/data warehouse for online, mobile, geospatial, and analytics applications. Postgres runs on all major operating systems, including Linux, UNIX (AIX, BSD, HP-UX, SGI IRIX, Mac OS X, Solaris, Tru64), and Windows.
What is Snowflake?
Snowflake is a fully-managed Cloud-based Data Warehouse that helps businesses modernize their analytics strategy. Snowflake can query both structured and unstructured data using standard SQL. It delivers results of user queries spanning Gigabytes and Petabytes of data in seconds.
Snowflake automatically harnesses thousands of CPU cores to quickly execute queries for you. You can even query streaming data from your web, mobile apps, or IoT devices in real-time.
Snowflake comes with a web-based UI, a command-line tool, and APIs with client libraries that makes interacting with Snowflake pretty simple. Snowflake is secure and meets the most secure regulatory standards such as HIPAA, FedRAMP, and PCI DSS. When you store your data in Snowflake, your data is encrypted in transit and at rest by default and it’s automatically replicated, restored, and backed up to ensure business continuity.
Additional Resources for PostgreSQL Integrations and Migrations
PostgreSQL to Oracle Migration
Connect PostgreSQL to MongoDB
Connect PostgreSQL to Redshift
Integrate Postgresql to Databricks
Export a PostgreSQL Table to a CSV File
Conclusion
High-performing Data Warehouse solutions like Snowflake are getting more adoption and are becoming an integral part of a modern analytics pipeline. Migrating data from various data sources to this kind of cloud-native solution i.e from Postgres to Snowflake, requires expertise in the cloud, data security, and many other things like metadata management.
If you are looking for an ETL tool that facilitates the automatic migration and transformation of data from Postgres to Snowflake, then LIKE.TG is the right choice for you.LIKE.TG is a No-code Data Pipeline. It supports pre-built integration from150+ data sourcesat a reasonableprice. With LIKE.TG , you can perfect, modify and enrich your data conveniently.
visit our website to explore LIKE.TG [/LIKE.TG Button]
SIGN UP for a 14-day free trial and see the difference!
Have any further queries about PostgreSQL to Snowflake? Get in touch with us in the comments section below.
Decoding Google BigQuery Pricing
Google BigQuery is a fully managed data warehousing tool that abstracts you from any form of physical infrastructure so you can focus on tasks that matter to you. Hence, understanding Google BigQuery Pricing is pertinent if your business is to take full advantage of the Data Warehousing tool’s offering. However, the process of understanding Google BigQuery Pricing is not as simple as it may seem.The focus of this blog post will be to help you understand the Google BigQuery Pricing setup in great detail. This would, in turn, help you tailor your data budget to fit your business needs.
What is to Google BigQuery?
It is Google Cloud Platform’s enterprise data warehouse for analytics. Google BigQuery performs exceptionally even while analyzing huge amounts of data quickly meets your Big Data processing requirements with offerings such as exabyte-scale storage and petabyte-scale SQL queries. It is a serverless Software as a Service (SaaS) application that supports querying using ANSI SQL houses machine learning capabilities.
Some key features of Google BigQuery:
Scalability: Google BigQuery offers true scalability and consistent performance using its massively parallel computing and secure storage engine.
Data Ingestions Formats:Google BigQuery allows users to load data in various formats such as AVRO, CSV, JSON etc.
Built-in AI ML: It supports predictive analysis using its auto ML tables feature, a codeless interface that helps develop models having best in class accuracy. Google BigQuery ML is another feature that supports algorithms such as K means, Logistic Regression etc.
Parallel Processing: It uses a cloud-based parallel query processing engine that reads data from thousands of disks at the same time.
For further information on Google BigQuery, you can check theofficial site here.
What are the Factors that Affect Google BigQuery Pricing?
Google BigQuery uses a pay-as-you-go pricing model, and thereby charges only for the resources they use. There are mainly two factors that affect the cost incurred on the user, the data that they store and the amount of queries, users execute.
You can learn about the factors affecting Google BigQuery Pricing in the following sections:
Effect of Storage Cost on Google BigQuery Pricing
Effect of Query Cost on Google BigQuery Pricing
Effect of Storage Cost on Google BigQuery Pricing
Storage costs are based on the amount of data you store in BigQuery. Storage costs are usually incurred based on:
Active Storage Usage: Charges that are incurred monthly for data stored in BigQuery tables or partitions that have some changes effected in the last 90 days.
Long Time Storage Usage: A considerably lower charge incurred if you have not effected any changes on your BigQuery tables or partitions in the last 90 days.
BigQuery Storage API: Charges incur while suing the BigQuery storage APIs based on the size of the incoming data. Costs are calculated during the ReadRows streaming operations.
Streaming Usage: Google BigQuery charges users for every 200MB of streaming data they have ingested.
Data Size Calculation
Once your data is loaded into BigQuery you start incurring charges, the charge you incur is usually based on the amount of uncompressed data you stored in your BigQuery tables. The data size is calculated based on the data type of each individual columns of your tables. Data size is calculated in Gigabytes(GB) where 1GB is 230 bytes or Terabytes(TB) where 1TB is 240 bytes(1024 GBs). The table shows the various data sizes for each data type supported by BigQuery.
For example, let’s say you have a table called New_table saved on BigQuery. The table contains 2 columns with 100 rows, Column A and B. Say column A contains integers and column B contains DateTime data type. The total size of our table will be (100 rows x 8 bytes) for column A + (100 rows x 8 bytes) for column B which will give us 1600 bytes.
BigQuery Storage Pricing
Google BigQuery pricing for both storage use cases is explained below.
Active Storage Pricing:Google BigQuery pricing for active storage usage is as follows: Region (U.S Multi-region) Storage Type Pricing Details Active Storage $0.020 per GB BigQuery offers free tier storage for the first 10 GB of data stored each month So if we store a table of 100GB for 1 month the cost will be (100 x 0.020) = $2 and the cost for half a month will $1. Be sure to pay close attention to your regions. Storage costs vary from region to region. For example, the storage cost for using Mumbai (South East Asia) is $0.023 per GB, while the cost of using the EU(multi-region) is $0.020 per GB.
Long-term Storage Pricing: Google BigQuery pricing for long-term storage usage is as follows: Region (U.S Multi-Region) Storage Type Pricing Details Long-term storage $0.010 per GB BigQuery offers free tier storage for the first 10 GB of data stored each month The price for long term storage is considerably lower than that of the active storage and also varies from location to location. If you modify the data in your table, it 90 days timer reverts back to zero and starts all over again. Be sure to always keep that in mind.
BigQuery Storage API: Storage API charge is incurred during ReadRows streaming operations where the cost accrued is based on incoming data sizes, not on the bytes of the transmitted data. BigQuery Storage API has two tiers for pricing they are:
On-demand pricing: These charges are incurred per usage. The charges are: Pricing Details $1.10 per TB data read BigQuery Storage API is not included in the free tier
Flat rate pricing: This Google BigQuery pricing is available only to customers on flat-rate pricing. Customers on flat-rate pricing can read up to 300TB of data monthly at no cost. After exhausting 300TB free storage, the pricing reverts to on-demand.
Streaming Usage:Pricing for streaming data into BigQuery is as follows: Operation Pricing Details Ingesting streamed data $0.010 per 200MB Rows that are successfully ingested are what you are charged for
Effect of Query Cost on Google BigQuery Pricing
This involves costs incurred for running SQL commands, user-defined functions, Data Manipulation Language (DML) and Data Definition Language (DDL) statements. DML are SQL statements that allow you to update, insert, delete data from your BigQuery tables. DDL statements, on the other hand, allows you to create, modify BigQuery resources using standard SQL syntax.
BigQuery offers it’s customers two tiers of pricing from which they can choose from when running queries. The pricing tiers are:
On-demand Pricing: In this Google BigQuery pricing model you are charged for the number of bytes processed by your query, the charges are not affected by your data source be it on BigQuery or an external data source. You are not charged for queries that return an error and queries loaded from cache. On-demand pricing information is given below: Operation Pricing Details Queries (on demand) $5 per TB 1st 1TB per month is not billed Prices also vary from location to location.
Flat-rate Pricing: This Google BigQuery pricing model is for customers who prefer a stable monthly cost to fit their budget. Flat-rate pricing requires its users to purchase BigQuery Slots. All queries executed are charged to your monthly flat rate price. Flat rate pricing is only available for query costs and not storage costs. Flat rate pricing has two tiers available for selection
Monthly Flat-rate Pricing: The monthly flat-rate pricing is given below: Monthly Costs Number of Slots $ 10,000 500
Annual Flat-rate Pricing: In this Google BigQuery pricing model you buy slots for the whole year but you are billed monthly. Annual Flat-rate costs are quite lower than the monthly flat-rate pricing system. An illustration is given below: Monthly Costs Number of Slots $8,500 500
How to Check Google BigQuery Cost?
Now that you have a good idea of what different activities will cost you on BigQuery, the next step would be to estimate your Google BigQuery Pricing. For that operation, Google Cloud Platform(GCP) has a tool called the GCP Price Calculator.
In the next sections, let us look at how to estimate both Query and Storage Costs using the GCP Price Calculator:
Using the GCP Price Calculator to Estimate Query Cost
Using the GCP Price Calculator to Estimate Storage Cost
Using the GCP Price Calculator to Estimate Query Cost
On-demand Pricing:
For customers on the on-demand pricing model, the steps to estimate your query costs using the GCP Price calculator are given below:
Login to your BigQuery console home page.
Enter the query you want to run, the query validator(the green tick) will verify your query and give an estimate of the number of bytes processed. This estimate is what you will use to calculate your query cost in the GCP Price Calculator.
From the image above, we can see that our Query validator will process 3.1 GB of data when the query is run. This value would be used to calculate the query cost on GCP Price calculator.
The next action is to open the GCP Price calculator to calculate Google BigQuery pricing.
Select BigQuery as your product and choose on-demand as your mode of pricing.
Populate the on-screen form with all the required information, the image below gives an illustration.
From the image above the costs for running our query of 3.1GB is $0, this is because we have not exhausted our 1TB free tier for the month, once it is exhausted we will be charged accordingly.
Flat-rate Pricing:
The process for on-demand and flat-rate pricing is very similar to the above steps. The only difference is – when you are on the GCP Price Calculator page, you have to select the Flat-rate option and populate the form to view your charges.
How much does it Cost to Run a 12 GiB Query in BigQuery?
In this pricing model, you are charged for the number of bytes processed by your query. Also, you are not charged for queries that return an error and queries loaded from the cache.
BigQuery charges you $5 per TB of a query processed. However, 1st 1TB per month is not billed. So, to run a 12 GiB Query in BigQuery, you don’t need to pay anything if you have not exhausted the 1st TB of your month.
So, let’s assume you have exhausted the 1st TB of the month. Now, let’s use the GCP Price Calculator to estimate the cost of running a 12 GiB Query. Populate the on-screen form with all the required information and calculate the cost.
According to the GCP Calculator, it will cost you around $0.06 to process 12 GiB Query.
How much does it Cost to Run a 1TiB Query in BigQuery?
Assuming you have exhausted the 1st TB of the month. Now, let’s use the GCP Price Calculator to estimate the cost of running a 1 TiB Query. Populate the on-screen form with all the required information and calculate the cost.
According to the GCP Calculator, it will cost you $5 to process 1 TiB Query.
How much does it Cost to Run a 100 GiB Query in BigQuery?
Assuming you have exhausted the 1st TB of the month. Now, let’s use the GCP Price Calculator to estimate the cost of running a 100 GiB Query. Populate the on-screen form with all the required information and calculate the cost.
According to the GCP Calculator, it will cost you $0.49 to process 100 GiB Query.
Using the GCP Price Calculator to Estimate Storage Cost
The steps to estimating your storage cost with the GCP price calculator are as follows:
Access the GCP Price Calculator home page.
Select BigQuery as your product.
Click on the on-demand tab (BigQuery does not have storage option for Flat rate pricing).
Populate the on-screen form with your table details and size of the data you want to store either in MB, GB or TB. (Remember the first 10GB of storage on BigQuery is free)
Click add to estimate to view your final cost estimate.
BigQuery API Cost
The pricing model for the Storage Read API can be found in on-demand pricing. On-demand pricing is completely usage-based. Apart from this, BigQuery’s on-demand pricing plan also provides its customers with a supplementary tier of 300TB/month.
Although, you would be charged on a per-data-read basis on bytes from temporary tables. This is because they aren’t considered a component of the 300TB free tier. Even if a ReadRows function breaks down, you would have to pay for all the data read during a read session. If you cancel a ReadRows request before the completion of the stream, you will be billed for any data read prior to the cancellation.
BigQuery Custom Cost Control
If you dabble in various BigQuery users and projects, you can take care of expenses by setting a custom quote limit. This is defined as the quantity of query data that can be processed by users in a single day.
Personalized quotas set at the project level can constrict the amount of data that might be used within that project. Personalized User Quotas are assigned to service accounts or individual users within a project.
BigQuery Flex Slots
Google BigQuery Flex Slots were introduced by Google back in 2020. This pricing option lets users buy BigQuery slots for short amounts of time, beginning with 60-second intervals. Flex Slots are a splendid addition for users who want to quickly scale down or up while maintaining predictability of costs and control.
Flex Slots are perfect for organizations with business models that are subject to huge shifts in data capacity demands. Events like a Black Friday Shopping surge or a major app launch make perfect use cases. Right now, Flex Slots cost $0.04/slot, per hour. It also provides you with the option to cancel at any time after 60 seconds. This means you will only be billed for the duration of the Flex Slots Deployment.
How to Stream Data into BigQuery without Incurring a Cost?
Loading data into BigQuery is entirely free, but streaming data into BigQuery adds a cost. Hence, it is better to load data than to stream it, unless quick access to your data is needed.
Tips for Optimizing your BigQuery Cost
The following are some best practices that will prevent you from incurring unnecessary costs when using BigQuery:
Avoid using SELECT *when running your queries, only query data that you need.
Sample your data using the preview function on BigQuery, running a query just to sample your data is an unnecessary cost.
Always check the prices of your query and storage activities on GCP Price Calculator before executing them.
Only use Streaming when you require your data readily available. Loading data in BigQuery is free.
If you are querying a large multi-stage data set, break your query into smaller bits this helps in reducing the amount of data that is read which in turn lowers cost.
Partition your data by date, this allows you to carry out queries on relevant sub-set of your data and in turn reduce your query cost.
With this, we can conclude the topic of BigQuery Pricing.
Conclusion
This write-up has exposed you to the various aspects of Google BigQueryPricing to help you optimize your experience when trying to make the most out of your data. You can now easily estimate the cost of your BigQuery operations with the methods mentioned in this write-up. In case you want to export data from a source of your choice into your desired Database/destination likeGoogle BigQuery, thenLIKE.TG Datais the right choice for you!
We are all ears to hear about any other questions you may have on Google BigQuery Pricing. Let us know your thoughts in the comments section below.